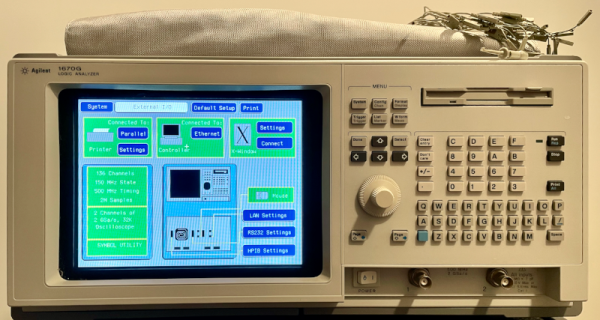
When you think of a logic analyzer today, you might think of a little USB probe that can measure a few signals and decoding for various serial buses. But actual logic analyzers were high-speed multichannel hardware with sophisticated ways to clock and trigger. [Tom] picked up an HP1670G on the surplus market and was impressed that it could sample 136 channels at 500 MHz. The circa-2000 machine has a front panel, but if you really wanted to use it, you wanted to use an X terminal. [Tom] shows us how that works with modern Linux software.
Linux Hacks589 Articles
Linux Fu: Easy Kernel Debugging
It used to be that building the Linux kernel was not easy. Testing and debugging were even worse. Nowadays, it is reasonably easy to build a custom kernel and test or debug it using virtualization. But if you still find it daunting, try [deepseagirl’s] script to download, configure, build, and debug the kernel.
The Python program takes command line arguments so you can select a kernel version and different operations. The script can download the source, patch the configuration, build the kernel, and then package it into a Debian package you can boot under qemu. From there, you can test and even debug with gdb. No risk of hosing your everyday system and no need to understand how to configure everything to run.
The Linux Scheduler And How It Handles More Cores
Sometimes you read an article headline and you find yourself re-reading it a few times before diving into the article. This was definitely the case for a recent blog post by [The HFT Guy], where the claim was made that the Linux kernel has for fifteen years now been hardlocked into not scheduling for more than 8 cores. Obviously this caused a lot of double-checking and context discovery on both Hacker News and the Level 1 Techs forum. So what is going on exactly? Did the Linux developers make an egregious error more than a decade ago that has crippled Linux performance to this day? Continue reading “The Linux Scheduler And How It Handles More Cores”
Reliving The Authentic 90s Linux Experience
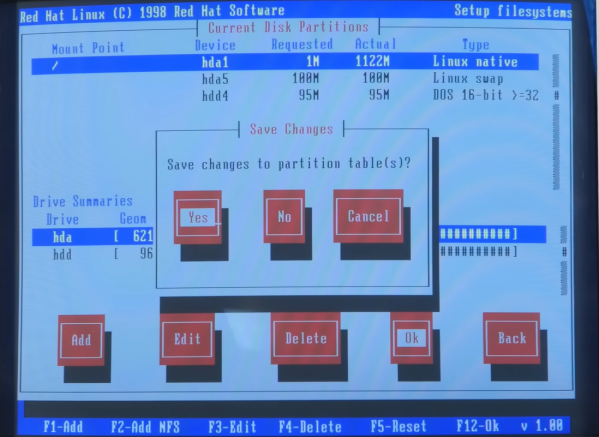
Installing Linux on a modern PC has never been easier. There are tons of tools available that will nearly-automatically download your Linux distribution of choice, image a USB drive, and make it bootable so you can finally ditch your bloated, privacy-violating operating system and get the free performance boost that comes along with it. This wasn’t always the case, though. In the 90s you had to take a trip to a store (or library) and buy (or borrow) a boxed copy of some variety of Linux on floppy disk or CDs, and then install it on your own, often without the help of the Internet. [Action Retro] demonstrates this process for us so we don’t have to relive the pain ourselves.
Complete with a 90s-era Pentium machine enclosed in a beige case, this is really the full 90s experience. He’s found a boxed version of Red Hat version 5.2 with everything needed to get it up and running and, after a brief issue with the installer crashing because it couldn’t figure out the ZIP disk drive, had another era-appropriate experience by erasing the existing Windows 98 installation. This was before automatic partitioning tools were widely available, so it was a real risk for beginner Linux enthusiasts if they were trying to dual boot.
With the installation complete, the X window system still needed to be set up, as well as making sure the settings for the old CRT monitor were correct. With everything finalized, the system can really be explored. It includes out-of-the-box some software plenty of us would recognize today such as GIMP and some other software we might not, like Netscape Communicator. It’s a real time machine experience to get this operating system running on period-appropriate hardware, and a lot of features of modern Linux systems can still be seen especially if your modern distribution of choice still requires a lot of manual configuration during installation. Old operating systems aside, this machine might be capable of running a modern Linux distribution as well, provided it has something slightly newer than a 486.
Continue reading “Reliving The Authentic 90s Linux Experience”
Linux Fu: Customizing Printf
When it comes to programming in C and, sometimes, C++, the printf function is a jack-of-all-trades. It does a nice job of quickly writing output, but it can also do surprisingly intricate formatting. For debugging, it is a quick way to dump some data. But what if you have data that printf can’t format? Sure, you can just write a function to pick things apart into things printf knows about. But if you are using the GNU C library, you can also extend printf to use custom specifications. It isn’t that hard, and it makes using custom data types easier.
An Example
Suppose you are writing a program that studies coin flips. Even numbers are considered tails, and odd numbers are heads. Of course, you could just print out the number or even mask off the least significant bit and print that. But what fun is that?
Here’s a very simple example of using our new printf specifier “%H”:
printf("%H %H %H %H\n",1,2,3,4);
printf("%1H %1H\n",0,1);
When you have a width specification of 1 (like you do in the second line) the output will be H or T. If you have anything else, the output will be HEADS or TAILS.
Linux Fu: Deep Git Rebasing
If you spend much time helping people with word processor programs, you’ll find that many people don’t really use much of the product. They type, change fonts, save, and print. But cross-references? Indexing? Largely, those parts of the program go unused. I’ve noticed the same thing with Git. We all use it constantly. But do we? You clone a repo. Work on it. Maybe switch branches and create a pull request. That’s about 80% of what you want to do under normal circumstances. But what if you want to do something out of the ordinary? Git is very flexible, but you do have to know the magic incantations.
For example, suppose you mess up a commit message — we never do that, of course, but just pretend. Or you accidentally added a file you didn’t want in the commit. Git has some very useful ways to deal with situations like this, especially the interactive rebase.
Because You Can: Linux On An Arduino Uno
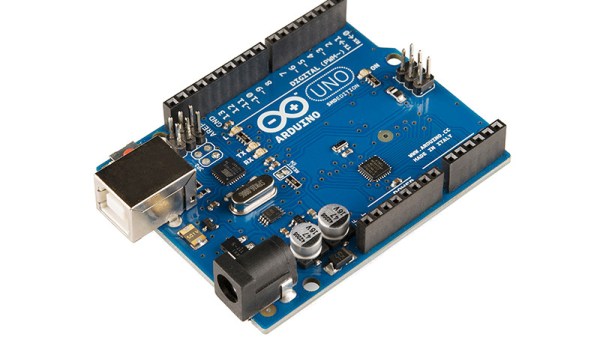
There are a few “Will it run” tropes when it comes to microcontrollers, one for example is “Will it run Doom?“, while another is “Will it run Linux?”. In one of the lowest spec examples of the last one, [gvl610] has got an up-to-date Linux kernel to boot on a vanilla Arduino Uno. And your eyes didn’t deceive you, that’s a full-fat kernel rather than the cut-down μClinux for microcontrollers.
Those of you who’ve been around a while will probably have guessed how this was done, as the ATmega328 in the Uno has no MMU and is in to way powerful enough for the job. It’s running an emulator, in this case just enough RISC-V to be capable, and as you’d imagine it’s extremely slow. You’ll be waiting many hours for a shell with this machine.
The code is written in pure AVR C, and full instructions for compilation are provided. Storage comes from an SD card, as the ATmega’s meagre 32k is nowhere near enough. If you’re having a bit of deja vu here we wouldn’t blame you, but this one is reputed to be worse than the famous 2012 “Worst PC Ever“, which emulated ARM instead of RISC-V.
Thanks [Electronics Boy] for the tip!


