Adding Bluetooth And A Lightning Connector To Beats Pro Headphones

Beats

Not wanting to wait for Apple to step up their game and complete their purchase of Beats headphones, [Carnivore] decided he wanted his own pair of Apple-compatible Beats cans with Bluetooth. He created something that will probably be for sale in the Apple store come Christmas: a pair of Beats Pro headphones with Bluetooth and a Lightning connector for charging.

[Carnivore] liked the sound of his Beats Pro headphones but hated the wires. After disassembling the headphones, he carefully rewired the speakers with smaller gauge wire, added a small Bluetooth module and battery, and sealed everything back up.

There are a few interesting bits to this build – by getting rid of all external wires, [Carnivore] was left with a few holes in the headphones. These were a perfect place to add a 3D printed mount for the power button and the Lightning adapter taken from an Apple Lightning extension connector.

Thanks [Tony] for the tip!

Apple ][ Graphics As Your Screensaver Or Second Screen

apple2-xscreensaver-weather-demo

Hipsters rejoice, you can actually make those high-tech IPS panels look like crap. Really nostalgic crap. [Kaveen Rodrigo] wrote in to show how he displays weather data as his Apple ][ emulated screensaver.

2014-07-08-234300_1366x768_scrotHe’s building on the Apple2 package that is part of the xscreensaver available on Linux systems. The program has an option flag that allows you to run another program inside of it. This can be just about anything including using it as your terminal emulator. [Adrian] recently sent us the screenshot shown here for our retro edition. He is running bash and loaded up freenet just to enjoy what it used to be like in the good old days.

In this case, [Kaveen] is using Python to pull in, parse, and print out a Yahoo weather json packet. Since it’s just a program that is called when the screensaver is launched, you can use it as such or just launch it manually and fill your second monitor whenever not in use.

We gave it a whirl, altering his code to take a tuple of zip codes. Every hour it will pull down the data and redraw the screen. But we’ve put enough in there that you’ll be able to replace it with your own data in a matter of minutes. If you do, post a screenshot and what you’re using it for in the comments.

Continue reading “Apple ][ Graphics As Your Screensaver Or Second Screen”

Fixing Apple TV’s Terrible UI

IR

Despite Apple’s unfailing dedication to UI, they still sometimes manage to put out some stinkers. The latest of these is the ‘keyboard’ for the search interface in the Apple TV. It’s an alphabetical keyboard, laid out in a square with the obvious frustration that goes along with that terrible idea. [Lasse] was frustrated with this design and realized searching anything with the Apple TV IR remote is a pain. His solution was to build his own version of the Apple TV remote with a web interface, powered by an Arduino.

Inspired by the Apple Remote Arduino Shield we featured a few years ago, [Lasse] stuck an IR LED int the pins of Arduino with an Ethernet shield, current limiting resistors be damned. The web UI is the innovative part of this build. He’s hosting a simple website on the Arduino that allows him to type – with a real keyboard – a search query into the website, and have the Arduino take care of moving the Apple TV cursor around to select each letter.

The web UI has all the features found on the Apple TV remote, including the swipe gestures, and has a really slick brushed metal texture to boot. You can check out the video of [Lasse]’s project typing text into an Apple TV hilariously fast below.

Continue reading “Fixing Apple TV’s Terrible UI”

The INFRA-NINJA — A PC Remote Receiver

F3GULGEHTOUJI73.MEDIUM

Laziness sometimes spawns the greatest inventions. Making things to reduce effort on your part is quite possibly one of the greatest motivators out there. So when [Kyle] had to get out of bed in order to turn off Netflix on his computer… He decided to do something about it.

He already had an Apple remote, which we have to admit, is a nice, simple and elegant control stick — so he decided  to interface with it in order to control his non-Apple computer. He quickly made up a simple PCB up using the good ‘ol toner transfer method, and then populated it with a Bareduino, a CP2102 USB 2.0 to TTL UART 6PIN Serial Converter, an IR receiver, a USB jack, header pins, and a few LED and tactile switches.

It’s a bit tricky to upload the code (you have to remove the jumper block) but then it’s just a matter of connecting to it and transferring it over with the Arduino IDE. The Instructable is a bit short, but [Kyle] promises if you’re really interested he’ll help out with any questions you might have!

The Mac9000 — A Photo Frame With Style (Maybe?)

Digital photo frames — as tacky as they may be — are a handy way to show off photos, especially considering how few photos get printed these days! [Rene] decided he could really use one at work, but he wanted it to look cool as well. Feeling a bit nostalgic with the 30th anniversary of the Macintosh Classic II, he decided to gut one and turn it into this awesome linux based “Mac9000”!

He started by picking up the Mac off eBay and cleaning it up a bit. It had definitely belonged to a school considering how worn it was. A bunch of sandpaper, bleach wipes, and elbow grease later, and it almost looks like new again! The next step was gutting the insides to make room for the new hardware. This is a bit tricky because you are dealing with high-voltage equipment! Make sure to discharge it safely before sticking your hands in!

Once the unit was empty, he began upgrading it with some more recent technology. A 7″ LCD, a Raspberry Pi (with PIR sensor), and a WiFi adapter to name a few. In addition to his blog, he also has a great photo gallery of the entire process over at LYTRO. He’s set up Raspbian “Wheezy” to automatically snag photos off of a DropBox directory, making this one of the easiest to use photo frames we’ve ever seen. He also plans to show videos on it, but alas, that is a project for another day.

The 30th Anniversary Macintosh

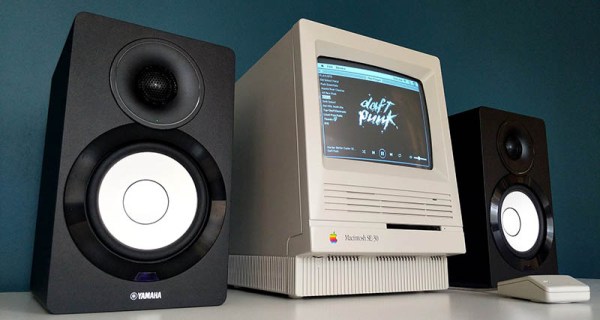
It’s been just over thirty years since the original Macintosh was released, and [hudson] over at NYC Resistor thought it would be a good time to put some old hardware to use. He had found an all-in-one Mac SE “on the side of a road” a while ago (where exactly are these roads, we wonder), and the recent diamond anniversary for the original mac platform convinced him to do some major hardware hacking.

Inspired by a six-year-old project from a NYC Resistor founder aptly named the 24th anniversary Mac, [hudson] decided to replace the old hardware with more powerful components – in this case, a BeagleBone Black. Unlike the earlier build, though, the original CRT would be salvaged; the analog board on the Mac SE has pins for video, hsync, vsync, and power.

To get a picture on the old CRT, [hudson] needed to write a software video card that used the BeagleBone’s PRU. The CRT isn’t exactly “modern” tech, and everything must be clocked at exactly 60.1 Hz lest the CRT emit a terrible buzzing sound.

With a software video card written for the old CRT, the BeagleBone becomes the new brains of this beige box. It runs all the classic Linux GUI apps including XEyes and XScreenSaver, although flying toasters might be out of the question. He also managed to load up the Hackaday retro site with xterm, making this one of the best ways to make an old Mac SE useful.

Finding The Fix For A Dimmed 27″ IMac Screen

machack27

Like many with a 27″ iMac, [Gerry’s] been experiencing some screen brightness issues. According to him, Apple’s been largely ignoring the problem and the community’s outcry, which led to [Kaos2k] poking around inside to hack together a fix. It’s a solution clearly born from trial and error; [Kaos2k’s] initial post on the issue simply recommending “applying pressure” to the panel itself, which would sometimes cause the dim screen to spring back to life.

It turns out that heat (or stress, or something) from the screen causes the solder joints to weaken on the board where a 6-pin connector hooks up, dimming the screen to eye-strain levels. Some Mac users are suing over it, because the problem tends to show up just outside of the warranty window and affects a large number of people. [Kaos2k], however, provided the much needed solution for those looking to get the fix over with: just solder the cable directly to the board. Our tipster, [Gerry], has documented his experiences over at his blog, and was kind enough to make a step-by-step video of the repair, which you can see after the break.

Continue reading “Finding The Fix For A Dimmed 27″ IMac Screen”