Portable Gaming Console Uses SSD1289 And Propeller

building-a-portable-video-game

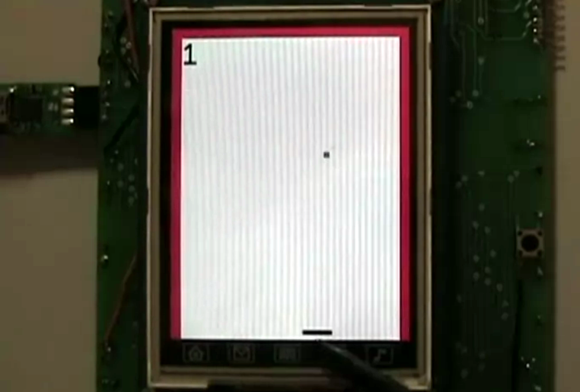
[Samir] dabbles in hobby electronics and decided to put his skills to the test by building this portable gaming console (Note: this site uses an HTTPS address which cannot be used through Google Tranlator. It does work for the Chrome browser translator). The image above is a screenshot from his Breakout-style game. The paddle at the bottom is controlled with the touchscreen. You move it back and forth to keep the ball from traveling past the bottom edge (it bounces off of the red borders on the sides and top).

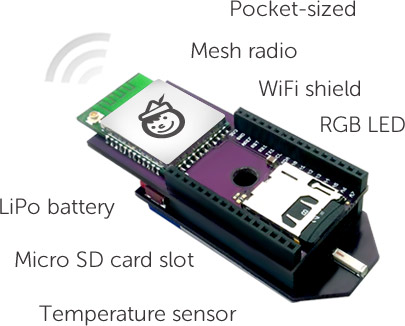
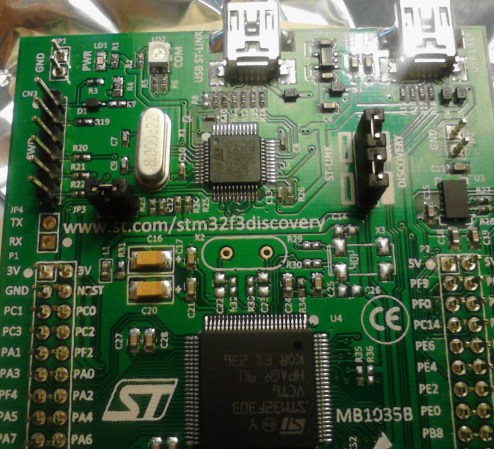
The main PCB is larger than the 3.2″ LCD footprint, but [Samir] made sure to include a lot of peripherals to make up for it. The board sports a Parallax Propeller chip to run the games. It interfaces with the SSD1289 screen (this is a cheap and popular choice) but that really eats up a lot of the IO pins. To control the game the touchscreen can be used as we’ve already mentioned. But there are two other options as well. There is an expansion port which uses a shift register (74HC165) to serialize the input. For prototyping this allowed [Samir] to use an Atari joystick. He also rolled a Bluetooth adapter into the project which we would love to see working with a Wii remote. Rounding out the peripherals are an SD card slot, audio jack for sound, and an RTC chip for keeping time.

There are several videos included in the post linked above. After the break we’ve embedded the game-play demo from which this screenshot was taken.

Continue reading “Portable Gaming Console Uses SSD1289 And Propeller”

Pinoccio – An Ecosystem For The Internet Of Things

pinoccio-lead-scout-labelled

[Pinoccio] is currently an Indeigogo crowd-sourced project that aims use the real-world programmability of the Arduino through the internet using a wifi connection. One could rightly point out that this can already be done through the use of a wifi shield. Before ruling this device out, just “shush your shussins” and consider that it’s designed specifically for interfacing with “things” over the internet. This can replace several components (see 1:10 in the video after the break) and should be less of a hassle.

Additionally, with a shield on one of these devices, several other [Pinoccio] boards can communicate with the Internet using this as a hub in a mesh network. This is similar to how the many “smart” electrical meters work, with a grid router being a central hub for communications. Additionally, this board has a built in temperature sensor and a RGB (instead of a single-color) LED, so you can do some interesting stuff with it right out of the box. Assuming this project gets funded, which seems likely at this point, we’re excited to see the projects that get built using it! Continue reading “Pinoccio – An Ecosystem For The Internet Of Things”

Making Better Noises With Dual PWM

pwm_16b_sm

Although it’s technically possible to get 16 bits of resolution on a ATMega328, most implementations of PWM on everyone’s favorite ‘mega – including just about every Arduino sketch – are limited to 8 bit PWM. This means the pins can only output 256 different values, so if you’re playing around with music made on an Arduino don’t expect very high fidelity.

There is a clever way around this: use two PWMs, and use one pin for high bytes and another for low bytes. That’s what Open Music Labs did when working on a synthesizer project that needed very high quality audio.

The basic idea behind the build is that PWM pins can be used to create audio frequencies. Using two PWM pins and adding them together means it’s possible to add extra bits of resolution. This requires using different values of resistors on each pin. For example, using the same value of resistors on two PWM pins increases the resolution by one bit. Two pins with a resistor value ratio of 1:4 increases the resolution by four bits, and so on.

There’s a great tutorial for setting up these higher resolution, dual PWM outputs on an ATMega or Arduino, as well as a distortion analysis for this dual PWM setup.

Converting A Weather Station Kit For Wireless Data Harvesting

converting-weather-station-for-wireless-data-collection

Everyone loves getting something you can play with as a Christmas gift. [Thomas] was the lucky recipient of an Elektor USB weather station kit. But the fun didn’t end once he had assembled everything. He went on to hack the device for wireless data collection.

Shown above is the weather station board connected to the transmitter. The red board with a tiny antenna to the right is a Rovio RN-VX module. It is capable of transmitting serial data to its twin on the receiving end of the setup. The weather station is pretty easy to connect to the transmitter since it feeds serial data to an FTDI USB chip. [Thomas] simply connected power and ground, then added a jumper from the board’s TX pin to the Rovio’s RX pin. The receiving end uses a serial-to-USB converter — getting a signal for its RX pin from the TX pin on the Rovio receiver board.

We know from other projects that these radio modules can connect to a WiFi AP. Perhaps a future revision of [Thomas’] hack will allow the weather station to communicate with his server over the network, doing away with the need for a standalone receiver.

Microcontroller Statistics With A Small SRAM Footprint

statistics-library-for-microcontrollers

You may know your way around the registers of that favorite microcontroller, but at some point you’ll also need to wield some ninja-level math skills to manage arrays of data on a small device. [Scott Daniels] has some help for you in this arena. He explains how to manage statistical calculations on your collected data without eating up all the RAM. The library which he made available is targeted for the Arduino. But the concepts, which he explains quite well, should be easy to port to your preferred hardware.

The situation he outlines in the beginning his post is data collected from a sensor, but acted upon by the collection device (as opposed to a data logger where you dump the saved numbers and use a computer for the heavy lifting). This can take the form of a touch sensor, which are known for having a lot of noise when looking at individual readings. But since [Scott] is using the Mean and Standard Deviation to keep running totals of collected data over time it is also very useful for applications like building your own home heating thermostat.

Finally, TI Is Producing Simple, Cheap WiFi Modules

Ever responsive to the hobbyist market, Texas Instruments is releasing a very inexpensive, very simple WiFi module specifically designed for that Internet of Things.

The TI SimpleLink TI CC3000 WiFi module is a single-chip solution to putting 802.11b/g WiFi in just about every project you can dream up. Just about everything needed to put the Internet in a microcontroller is included in this chip – there’s a TCP/IP stack included on the chip, along with all the security stuff needed to actually connect to a network.

The inexpensive micocontroller WiFi solutions we’ve seen – including the very cool Electric Imp – had difficult, or at least odd, means of putting WiFi credentials such as the SSID and password onto the device. TI is simplifying this with SmartConfig, an app running on a phone, tablet, or PC that automagically takes care of setting up a link in a wireless network.

Best of all, the CC3000 only costs $10 in quantities of 1000. Compare that to other Internet of Things WiFi solutions, and it looks like we might be seeing and easy and cheap way to connect a project to the internet this year.

Reverse Engineering ST-Link/V2 Firmware

reverse-engineering-stlink-v2

The chip seen just above the center of this image is an ARM Cortex-M3. It provides the ability to interface and program the main chip on the STM32F3 Discovery board. The protocol used is the ST-Link/V2 which has become the standard for ST Microelectronics development boards. The thing is, that big ARM chip near the bottom of the image has multiple UARTs and bridging a couple of solder points will connect it to the ST-Link hardware. [Taylor Killian] wanted to figure out if there is built-in firmware support to make this a USB-to-serial converter and his path to the solution involved reverse engineering the ST-Link/V2 firmware.

The first part of the challenge was to get his hands on a firmware image. When you download the firmware update package the image is not included as a discrete file. Instead he had to sniff the USB traffic during a firmware update. He managed to isolate the file and chase down the encryption technique which is being used. It’s a fun read to see how he did this, and we’re looking forward to learning what he can accomplish now that’s got the goods he was after.