Raspberry Pi As An AVR Programmer

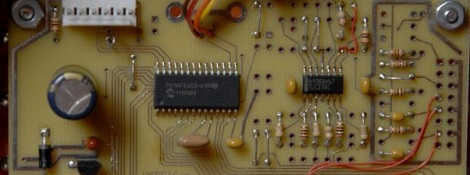
AVR programmers can be bought for just a few dollars on the Internet, but if you’re building an expansion board with an AVR for your Raspi, this is the build for you. It’s a safe way of programming an AVR via the Raspi’s GPIO pins that uses an extremely minimal circuit.

The AVR ISP interface looks a lot like an SPI interface, and the easiest way to program an AVR with a Raspi would be to bitbang all the commands from the GPIO pins. Sometimes, though, the logic of the AVR and Raspi would be at different levels, so while bitbanging may work in a pinch it’s not something anyone should use regularly.

To get the Raspi and AVR talking to each other safely, [Steve] built a small circuit from a 74244 buffer and a FET. With the added support for Linux GPIO avrdude programming, it’s a snap to program an AVR with a Raspi.

A few days ago we ran across a hugely overwrought PIC programmer for the Raspi, so we’re glad to see another round in the PIC/AVR holy war go to the AVR camp.

Thanks [Mateusz] for sending this one in.

Programming The XMEGA With An ISP

Atmel’s XMEGA series of microcontrollers are neat little pieces of hardware; with a very fast clock, a ton of IO, USB, and up to 8 UART ports, these neat little chips serve as a nice bridge between AVRs and PICs and the very powerful ARM chips coming out on the market. Unfortunately, the XMEGAs don’t use the extremely common ISP programming header found on just about every AVR dev board making them a bear to program. [Szu] over in Poland came up with a very easy way to program these chips, all while using the programming hardware you already have on hand.

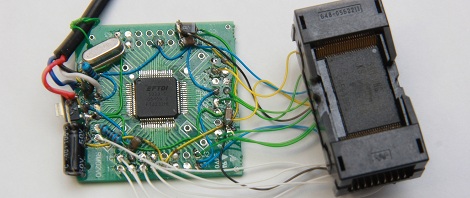
[Szu]’s build uses a few resistors and diodes to break out a USBASP connection to the XMEGA’s PDI interface. On the software side of things, [Szu] wrote an update to the USBASP firmware to allow it to program PDI devices, and also has a patch for AVRdude to allow uploading firmware from the command line.

A very cool build, and one that allows for very, very powerful devices that build on the AVR code you’ve already written.

PIC 18F4550 Dev Board

[Natsfr] was looking for a single-sided PCB to host a PIC 18F4550. Not finding one he designed his own in Kicad and is sharing (translated) the spoils of his labor.

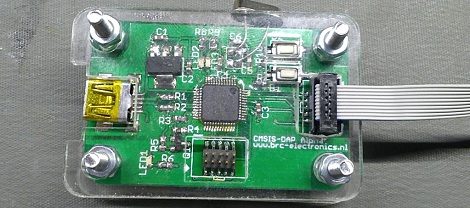
This chip has USB capabilities which is why we see it used in a ton of projects. Almost all of them (including this USB input device post) use a very large DIP package. [Natsfr] went a different route, designing for the TQFP package to keep the drilling ot a minimum. The layout includes a crystal and USB-mini port, but it also breaks out the I/O pins on the chip. The red box above shows the quick fix he used on the VCC line as the board trace was shorting on the USB jack housing.

He didn’t drill out the holes for most of the breakout pins on this prototype. There’s just one header populated for programming the PIC chip. But he does have some plans for the first board. He’s going to use [Texan’s] AVR programming firmware for PIC to turn it into a USB AVR ISP programmer.

Raspberry Pi As A PIC Programmer

[Giorgio Vazzana] turned his Raspberry Pi into a PIC programmer using a rather small collection of common parts. It supports about a dozen different chips from the 16F family. But we’d guess that software is the limiting factor when it comes to supporting more chips.

Generally the problem with PIC programming is the need for a 12V supply. He chose to use an external 12V supply and a 78L05 linear regulator to derive the 5V rails from it. With the power worked out there are some level conversion issues to account for. The RPi provides 3.3V on the GPIO header pins, but 5V logic levels are needed for programming. He built transistor and voltage divider circuits to act as level converters. The programming software bit bangs the pins with a write time of less than eight seconds per 1k words of program data. So far this does not work with ICSP, but he plans to add that feature in a future version.

The Coming Age Of ARM Chips For The Hobbyist

The days of the 8 bit Arduino may be quickly coming to a close. Sure, there will always be a place for AVRs in blinking LEDs and turning on relays, but for doing anything cool – playing MP3s, driving LCD displays, or running a CNC machine – you need the power of a 32 bit chip. [Brian Carrigan] put up a great tutorial on getting started with these bigger, more powerful micros and moving beyond what is possible with an 8 bit PIC or AVR.

These new 32 bit chips are much more powerful, but aren’t exactly hobbyist friendly. Most of the ARM chips we’ve found are stuffed into very fine pitch QFN or QFP packages that require a reflow oven to solder to a board. In fact, we can only find one through-hole Cortex M0 chip that is suited for breadboard development. This doesn’t make it easy to whip up a circuit in a few hours, so builders needing a very powerful microcontroller will be more dependent on dev boards.

Already there are a good number of ARM-based 32 bit dev boards available including the offerings from Leaf Labs, the extremely inexpensive STM Discovery boardKinetis KL25Z Freedom Board, the outrageously powerful BeagleBone, and the perpetually delayed Arduino (over) Due.

None of these boards are particularly new developments; they’ve all been around the block once or twice. However, there are many more options for 32 bit development than the current 8 bit PIC and AVR holy war. We’re going to turn the comments over to Hackaday readers with the following questions: what supersized dev board are you rolling with? What’s good for a beginner, and what should they watch out for?

CPLD Motor Control

[Chris] continues cranking out the tutorials, this time around he’s showing how to use a CPLD for simple motor control. The demo hardware is pretty basic, he built his own FPGA/CPLD demo board a few years back which used a PLCC socket for easy interfacing. You should be able to use just about any gear you have on hand.

Of course the thing about these chips is that you’re working with hardware that can be run in parallel. [Chris] mentions that this is what makes it perfect for timing-critical applications. Here he’s using a motor driver that monitors a PWM signal, using the duty cycle to actuate the direction and speed at which the motor turns. After the break you can see a demonstration of the CPLD reading from an ADC chip and converting the value to a PWM signal. [Chris] has also used the same hardware for VGA signals; something that is usually a timing nightmare if done with a microcontroller.

If this leaves you thirsting for more CPLD goodness check out our own guide on the subject.

Continue reading “CPLD Motor Control”

TI Launches C2000 Launchpad (featuring Billy Mays)

The Texas Instruments MSP430 Launchpad is pretty popular in hacks, likely due to its low price. TI has recently released a new C2000 Launchpad device that offers more power and peripherals for $17. This board uses the C2000 Piccolo processor, which is meant for DSP applications.

Also included is an unrestricted version of the Code Composer Studio IDE and the controlSUITE software package. You can also run the free SYS/BIOS RTOS on this board. It’s nice to see TI providing a lot of free, non-crippled tools that could be used to power some pretty advanced hacks.

Most MSP430 Launchpad Booster Packs should be compatible with this board, and TI has a new layout for Booster Packs that use the additional pins. There is a C2000 specific LED Booster Pack available now for $30. There are also specifications for building your own Booster Packs for the C2000.

TI has released a slightly cheesy promotional video that features a [Billy Mays] like performance. Check it out after the break.

Continue reading “TI Launches C2000 Launchpad (featuring Billy Mays)”