Building An EEPROM Programmer

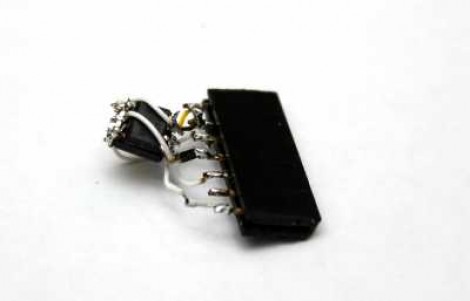
Behold this ATtiny85 based EEPROM programmer. It seems like a roundabout way of doing things, but [Quinn Dunki] wanted to build to her specifications using tools she had on hand. What she came up with is an ATtinyISP USB programmer, pushing data to an ATtiny85, which then programs an EEPROM chip with said data.

The hardware is the next module for her Veronica 6502 computer build. When we last saw that project [Quinn] was planning to add persistent storage for the operating firmware. This will be in the form of an EEPROM programmed with this device. Using ISP and an ATtiny as a go-between means that she should have no problems reflashing the OS without removing the chip. But it all depends on how she designs the interface.

For example, she blew a whole bunch of time troubleshooting the device because garbage data was being written to the chip. In the end, having her manual bus programmer hooked up during the flashing operation was the culprit. Lesson learned, it’s onward and upward with the build.

We’ve been featuring [Quinn’s] projects a lot lately. That’s in part because they’re really interesting, but also because she does such a great job of documenting her experience.

Microcontroller Based Audio Volume Level Compressor

In an effort listen to his music on shuffle without the need to touch the volume knob [Mike] build his own automatic volume leveling hardware. He knows what you’re thinking right now: there’s software to do that for you. But building the feature in hardware is a great stepping off point for a project.

He started the prototype using LabVIEW along with a Mobile Studio development board and a Bus Pirate. This project will be a mix of digital and analog components and it’s a bit easier starting off the exploration with these tools rather than jumping right into the AVR code.

The circuit will sample the incoming audio, modify it accordingly, and output the result. The output side is where the Bus Pirate really shines. He’s using some MCP42010 digital potentiometer chips to make the necessary changes to the levels. They communicate via SPI and it’s nice to have the Bus Pirate’s terminal to issue commands without the need to reflash a microcontroller.

[Mike] made a video showing an audio waveform with and without the hardware leveling. Sound quality is still great, and each clip is played at a reasonably comfortable listening level. We’ve embedded that demonstration after the break.

Continue reading “Microcontroller Based Audio Volume Level Compressor”

Using A Touch Screen With An STM32 Microcontroller

[Andy Brown] has been working on a series of tutorials revolving around the STM32 processor family. He’s using the STM32plus development board, with an STM32F1 ARM Cortex M3 processor to drive a couple of different full color graphic LCD screens. His latest installment shows how to read from the touch screen included with both displays.

After the break we’ve embedded the video from which this screenshot was taken. As an example, [Andy] has programmed a painting program to show off what the touchscreen overlay is capable of. It starts off with the calibration routine we’re all familiar with, then drops to this screen with a virtual control panel and blank canvas.

This hardware uses the Texas Instruments ADS7843 controller, which [Andy] says is extremely common and that several other manufacturers use the same communications protocols. He discusses how to communicate with the controller, and how to incorporate the data into your program. Included is an open source library which you can use in your own projects.

Continue reading “Using A Touch Screen With An STM32 Microcontroller”

Giving The Hexbug Spider Freedom To Explore On Its Own

hexbug-hack

[Eric Gregori] recently spent some time messing around with a Hexbug Spider, and wrote in to share some modifications he made to the toy. In its unaltered form the robot can be controlled remotely, and while it’s fun to play with, the excitement is short lived. Using a TI MSP430 along with a small motor controller kit he put together, he gave the Hexbug a bit more personality.

The kit is really just a simple board used for mounting the MSP430 and FAN8200 motor driver, along with an IR emitter/sensor pair. It would be easy enough to put something similar together yourself, though if you are looking for a protoboard/deadbug/PCB etching-free solution, his Spider Hack kit is a quick and easy solution.

[Eric’s] walkthrough shows how to disassemble the Hexbug, and details which components need alterations before the controller board can be properly mounted. A few soldered wires later, the toy is ready to be reprogrammed, a process [Eric] carries out using the Launchpad board from which he lifted the MSP430.

As you can see in the videos below, calling the robot autonomous might be a bit of a stretch (I don’t see it walking to the kitchen to make me a sandwich), but it can navigate and avoid objects with ease.

Continue reading “Giving The Hexbug Spider Freedom To Explore On Its Own”

Over-engineering A Two-zone Thermometer

We love the extra touches that [Andrianakis Haris] added to his two-zone electronic thermometer. It includes features that you just wouldn’t find on a mass-market commercial product because of issues like added cost. For example, you can see that the PCB juts up above the LCD display, allowing the module to be mounted on a pair of screws thanks to the keyhole shape that was drilled in the substrate. I increases the board size greatly, but on a small hobby run this won’t usually affect the price of the board depending on the fab house pricing model.

The design uses an ATmega8 microcontroller to monitor sensors in two different places. There is an onboard LM35 temperature sensor for monitoring the space where the unit resides. A remote sensor module uses a DHT-11 chip to gather data about temperature and humidity. That sensor is wired, but there is one wireless option for the device. Data can be pulled down from it via an optional Bluetooth module which can be soldered to a footprint on the back of the board.

Check out the video after the break to see temperature readings pulled down wirelessly. Continue reading “Over-engineering A Two-zone Thermometer”

Programming An Arduino Using An Audio File

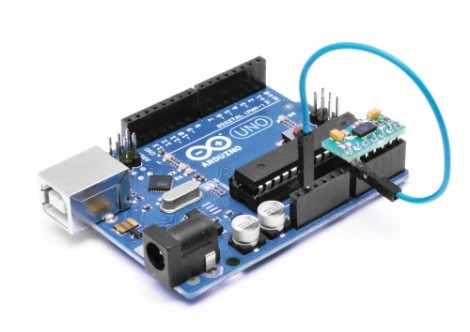
This proof-of-concept is just waiting for you to put it to good use. [Mike Tsao] wrote an Arduino sketch that lets him decode incoming audio data which could be used to program the device. He’s calling the project TribeDuino because it decodes an audio file which is actually the firmware update for a Korg Monotribe.

Earlier in the month [Mike] read our feature on a project that reverse engineered the audio-based firmware update for the Korg hardware. He wanted to see if he could write some code to read that file on his own hardware. All it took was an audio jack and two jumper wires to get the Arduino ready to receive the audio file. His firmware reads the Binary Frequency-Shift Keying encoded data as the audio is played, then echos a checksum to prove that it works.

This would be a fantastic addition to your own projects. Since the audio connection only needs to be mono, it only takes just one Arduino pin to add this jack (the other is a ground connection). Having just played around with alternative ways to push data to a microcontroller ourselves, we might give this a try when we have some free time.

Using An ATmega8 To Program PIC24FJ Chips

[Fezoj] likes to play around with microcontrollers and decided that he wanted to try a Bus Pirate as a new tool in his adventures. Since it’s open hardware he had his own board made and populated it himself. The trouble is, he works only with AVR chips and doesn’t have a PIC programmer. No problem, he figured out how to flash the PIC24FJ using an ATmega8.

To get started, he grabbed a copy of the flash programming specifications from Microchip. Once he had implemented the protocol in the AVR code, it was just a matter of getting the downloaded PIC firmware to the AVR. An RS232 chip gives him the serial connection he needs, with the help of his own programming software written with Visual Studio.

It’s not a robust solution for prototyping on the PIC platform, but maybe it could be developed for that purpose. For now, all he needed was a bootloader so that he could flash the Bus Pirate via a USB connection.

[via Dangerous Prototypes]