[Scot] Whips Up Breakout Board For His ARM Breakout Board

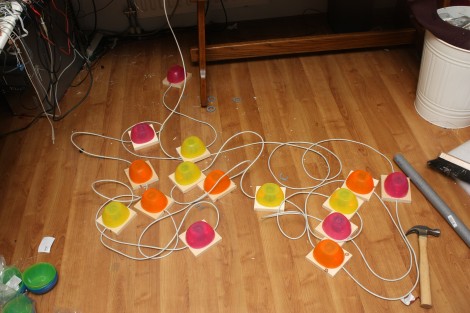
[Scot Kornak] got his hands on the new STM32 Discovery Board. He got his as a free giveaway, but at only $18 he probably would have picked one up anyway. His one complaint about the device is that he dual pin-headers which break out the ARM processor’s pins are not the most convenient for hooking up external components. He decided to make his own breakout board which would give him a more robust solution for the components he uses all the time.

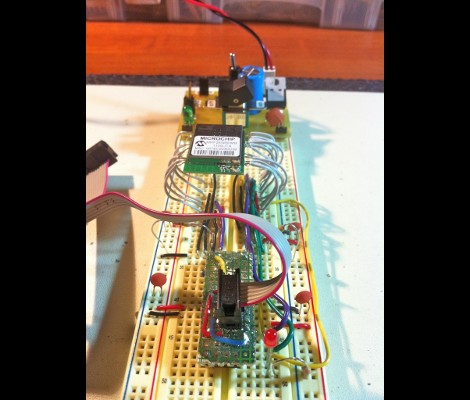
The protoboard that he chose as a base is quite interesting. It’s made for interfacing DIL pin headers just like the ones on the STM32F4 Discovery board. Each row of the dual header is carried down the board perpendicular to those headers. [Scot] cut the traces underneath the STM32 board to isolate the right and left sides. He then added RS232 hardware to one side, while including another pair of DIL headers to break out the rest of the unused pins.

This is all he’s got so far, but there’s plenty of room on the base board to add more as the need arises.

Microcontroller Comm With A Computer Monitor

Prolific Hack a Day author [Mike S] has been playing in his lab again and he’s come up with a neat way to talk to microcontrollers with an LCD monitor. The basic idea behind [Mike]’s work isn’t much different from the weird and/or cool Timex Datalink watch from the 1990s.

Despite the fancy dev board, the hardware is very simple – a photoresistor is pointed at a computer monitor and reads bits using Manchester encoding. The computer flashes a series of black and white screens thanks to a simple Javascript/HTML page, and data is (mostly) transmitted to the micro. [Mike] says he has about a failed message about 60% of the time, and he’s not quite sure where the problem is. He’s looking into another kind of Manchester encoding that uses samples instead of edges, so we hope everything works out for him.

This build is very similar – and was inspired by – an earlier post about microcontroller communication with flashing lights. Still, [Mike]’s build reminds us of the strangely futuristic Ironman watch we had in ’97. Check out [Mike]’s demo of his computer/micro comm link after the break and his code on github.

Continue reading “Microcontroller Comm With A Computer Monitor”

Build Your Own Miniature Self Parking Car

self-park

[Achu Wilson] was watching TV when he saw an ad for Volkswagen’s latest Passat, which happens to come equipped with a park assist mode. This essentially allows the car to park itself with little to no user interaction. While these systems come as a pricey add-on option, he figured he could build something similar in his own home, albeit on a much smaller scale.

Digging through his parts bin he only came across a single infrared proximity sensor, so instead of building vehicle that could parallel park, he settled on constructing one that can situate itself in a traditional parking spot instead. The car is built from wood and a pair of DC motors [Achu] had on hand, both of which are controlled using an ATmega16.

As a proof of concept, it looks to work pretty well despite the fact that it only has a single fixed sensor navigate its surroundings. We imagine it would be a relatively easy task to adapt the system for parallel parking, among other things.

Continue reading to see [Achu’s] self-parking car in action.

Continue reading “Build Your Own Miniature Self Parking Car”

High Speed Stepper Driving: 25k Steps Per Second

Stepper motors are pretty easy to control with a microcontroller. But if you’re looking to run then at a high number of revolutions per second things get tricky pretty quickly. [Uwe’s] been learning about and building stepper drivers for years, and recently he decided to build a high-performance driver based on a MicroChip reference design.

As with the reference design, his board uses a dsPIC33. But instead of using a series of discrete MOSFETS to switch the signals to the motor, he sourced an L298N motor driver. That’s it sticking up next to the large capacitor. When driven hard it needs its own heat sink, which [Uwe] cut from a larger CPU heat sink. During development, he decided to use interrupt-based PWM rather than the hardware PWM offered by the dsPIC. It works, but he would go the other route if doing it again.

For the pedestrian, the video after the break has all the details you need. For those that really want to dive in, [Uwe’s] multi-paged write-up is worth bookmarking.

Continue reading “High Speed Stepper Driving: 25k Steps Per Second”

Chrono-tomic Shield Helps Your Arduino Keep Perfect Time

chronotomic-arduino-shield

[Josh] and his lab partner [Eric] needed a final project for their Embedded Systems Design class, and thought that designing an Arduino shield would be a cool idea. They noticed that there are plenty of ways to get an Arduino to keep time, though none that they knew of utilized WWVB (Atomic Time) signals directly.

The Chrono-tomic Arduino shield uses a C-MAX radio to demodulate the WWVB signal, demodulating it and passing it along to a PIC16F1824 microcontroller. The PIC decodes the data frame and verifies it is valid, sending the time to an MCP79410N real-time clock module.

We can hear the “Yo dawg I herd you like microcontrollers so I put a microcontroller on your microcontroller shield” jokes already, but the pair says that they offloaded the time processing to the PIC in order to let the Arduino focus on whatever tasks it has been delegated. The Arduino code merely needs to request the time from the RTC whenever it is required, rather than deal with the decoding itself.

Is it overkill? Perhaps – though we think it heavily depends on your application and configuration. We can certainly conjure up situations where it would be useful.

Pyxis 3 Hits Beta; Rebranded As Gadgetos

The beta version of Pyxis 3 is now available. Skewworks continues to develop the ARM operating system, and with the transition to version 3 they’ve given it a new name: Gadgetos. One big difference from Pyxis 2 is that the new kernal is closed source. But they’ve taken steps to ensure that the OS is still hardware independent. This is done by reworking the kernel to allow driver loading at run time from an SD card.

The user interface has also changed a bit. Gadgetos relies entirely on a context-based menu system. The minimum input hardware requires a touchscreen LCD and one tactile button. By holding that button, a menu pops up in the center of the screen. This menu is different based on where it is called (this is where context comes in). If you’re at the desktop screen, you get options to load programs, etc. If you pull up the menu while running an application you’ll see the options available for that app. To see more about the new navigation system check out the video after the break.

Continue reading “Pyxis 3 Hits Beta; Rebranded As Gadgetos”

Tiny Audio Switcher Eliminates Repetitive Plug Swapping

usb-audio-switcher

[Phil] uses both his computer’s speakers and a set of headphones while working at his desk, but he was growing tired of constantly having to remove the headset from his sound card in order to insert the speaker plug. He’s been meaning to rig something up to make it easier to switch outputs, but never seemed to get around to it until he recently saw this LAN-enabled audio switcher we featured.

His USB-controlled switch features a single audio input and two audio outputs, which he mounted on a nicely done homemade double-sided PCB. The switch can be toggled using any terminal program, sending commands to the on-board ATtiny13A via an FT232R USB to serial UART chip.

The switch’s operation is really quite simple, merely requiring [Phil] to type in the desired audio channel into the terminal. The ATiny and a small relay do the rest, directing the audio to the proper output.