The good news is that more and more people are working from home these days. The bad news is that some of the more draconian employers out there aren’t too happy about it, to the point of using spyware software to keep tabs on their workers. Better make that bathroom break quick — Big Brother is watching!
One simple way to combat such efforts is a mouse jiggler, which does…well it does exactly what it sounds like. If you find yourself in need of such a device, the WorkerMouse from [Zane Bauman] is a simple open source design that can be put together with just a handful of components.
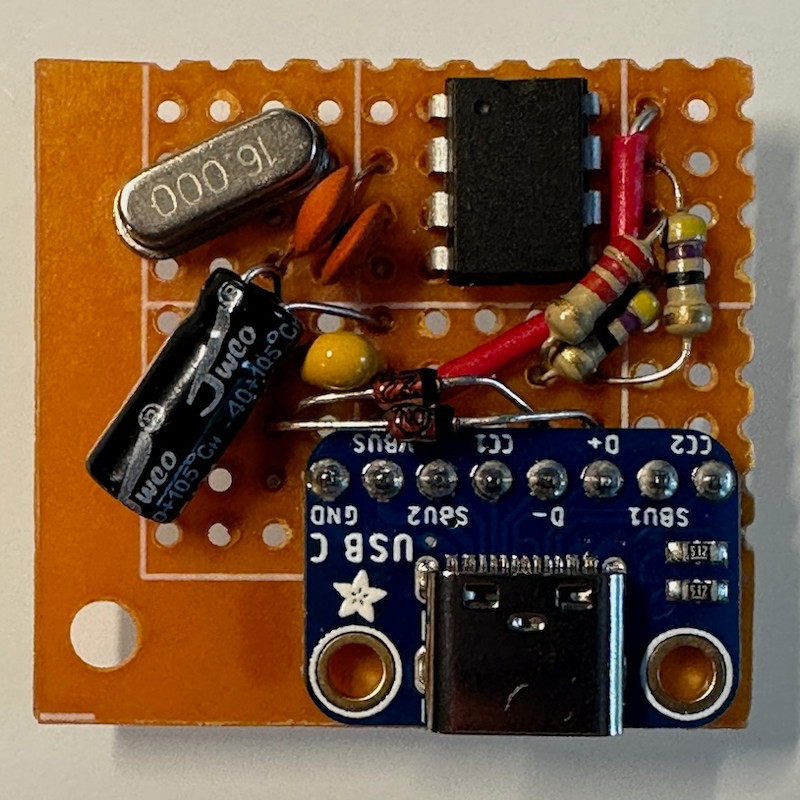 The WorkerMouse is designed to be assembled using through-hole parts on a scrap of perfboard, but you could certainly swap them out for their SMD variants if that’s what you have on hand. The circuit is largely made up out of passive components anyway, except for the ATtiny85 that’s running the show.
[Zane] decided to embrace modernity and couple the circuit with a USB-C breakout board, but naturally you could outfit it with whatever USB flavor you want so long as you’ve got a cable that will let you plug it into your computer.
The project’s C source code uses V-USB to connect to the computer and act as a USB Human Interface Device (HID). From there, it generates random speed and position data for a virtual mouse, and dumps it out every few seconds. The end result is a cursor that leaps around the screen whenever the WorkerMouse is plugged in, which should be enough to show you online while you step away from the computer. As an added bonus, [Zane] has put together a nice looking 3D printable enclosure for the board. After all, the thing is likely going to be sitting on your desk, might as well have it look professional.
If you’ve got the time to get a PCB made, you might also be interested in the MAUS we covered last year, which also keeps the ATtiny85 working so you don’t have to.