.Net OS For Your ARM

Pyxis 2 is a recently released new embedded operating system. The first Pyxis OS would run on an arduino with a touch screen, and provided a nice GUI. Pyxis 2 on the other hand has departed from most of its predicator, and is now made on top of the .NET micro framework, and natively supports FEZ Cobra and ChipworkX systems. It supports 320×240, 480×272, even 800×480 (if you have the ram), LCDs.

Some of the features of the OS include alpha blended desktop icons, file dialogs, prompts, input, color selection, file box, buttons, all the standard stuff to construct your applications, support for network, USB, SD and Mp3. Since it is .NET you can also use C# visual studio to construct everything without dedicating yourself to hardware until you are ready.

Join us after the break for a short video.

Continue reading “.Net OS For Your ARM”

Keypad Input Scanning By A 555 Timer

[R-B] designed a 555 timer circuit to scan a keypad. Keypads are common interfaces for small projects and require row and column scanning by a microcontroller. [R-B’s] setup allows you to reduce the number of pins used on the microcontroller to just two. One is an interrupt that is triggered when any of the buttons are pushed, the other reads the frequency from the 555 chip. Each button has its own resistance which alters the frequency of the 555. The microcontroller reads the frequency for 100ms using a timer. The number of timer overflows that occur during that period directly correspond to the button press (five overflows for the numeral 5, zero overflows for the numeral zero).

We usually debounce our button presses for 40 ms, this is more than twice that amount of time but still not a staggering difference. It does make us wonder if you will miss quick button presses? The only really way to know is to try this out yourself. Check out the video after the break and don’t forget to leave a comment with your own experiences in working with the circuit.

Continue reading “Keypad Input Scanning By A 555 Timer”

Earthquake Alert System


[Roteno’s] submission for the 555 timer design contest is an Internet connected earthquake alert system. It monitors the USGS website for earthquake data and plays a tune when an earthquake occurs. The data is available as a feed in the form of a TXT file which is pretty easy to parse using cURL. He chose an LPCXpresso board (which is an ARM development platform that can run a Linux kernel) along with an XPORT module to handle the Ethernet traffic.

So where does the 555 timer see some action? It is responsible for playing the tone when an earthquake is detected. But playing just one pitch isn’t much fun. Instead, [Roteno] built the circuit above which creates a resistor network switched by a series of transistors. This way he can use GPIO from the microcontroller to choose different pitches. Check out the video after the break to hear the results. At power-up all eight pitches are played as a test, and the alert sound varies in pitch and tempo based on the magnitude of the earthquake.

Continue reading “Earthquake Alert System”

Gameduino

Gameduino is an FPGA based sound and graphics adapter for microcontrollers. Laid out as an Arduino shield, all it really takes is a microcontroller with SPI and some code to send commands to the board which lets you toggle registers, handle memory, and drawing functions.

Once the data gets there, it is greeted by a Xilinx FPGA which puts out a 800×600 72Hz SVGA sync signal, large 512×512 pixel character scrolling backgrounds, piles of 16×16 (up to 256 color) sprites, each with per pixel transparency, rotation, flip, and if that was not enough a 12 bit frequency synth that can do 16 independent voices.

All the resources to make one of these is listed on the site under the Making a Gameduino link, but if youre interested in getting a made board there is also a kickstarter page available. There are other ways to squeeze video out of micro controllers from the basic like hackvision to AVGA or even Lucidscience AVR VGA v2, and tons of propeller projects, but this one being stand alone and portable, has a certain appeal.

Join us after the break for a quick video.

Continue reading “Gameduino”

Racking Up Miles On A Bicycle Odometer

[jonh] religiously tracks the miles he rides on his bicycle. When his odometer’s battery started getting low, he wanted a way to run the miles up to where they were before, since replacing the battery resets everything to zero. [jonh] used an Atmel microcontroller to run up the miles on his bike computer so he could pick right back up where he left off. There is definitely a Ferris Bueller’s Day Off joke in here somewhere.

The bike computer itself is designed to plug into a base that connects to a magnet-triggered reed relay. It uses a wheel-mounted magnet to count the number of revolutions made and thus the distance traveled. [jonh] hooked up a simple microcontroller-driven circuit to these connectors to trick the bike computer into thinking it was moving, and moving fast! Since he knew the number of miles he wanted to sandbag onto the odometer, he was able to program it to run up the proper amount of miles and then stop. There’s no source code listing for the project, but this shouldn’t be too hard to reproduce. He provides a pencil-drawn schematic for the connection to the cyclometer from the microcontroller. At the end, there’s also some sage advice for those of you who are interested in building a decent hardware hacking lab on the cheap.

Debugging MSP430 Using Eclipse

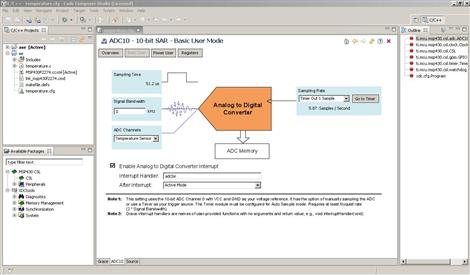
[Springuin] just posted a tutorial about debugging MSP430 projects using Eclipse. He read our feature about debugging under IAR, a proprietary IDE which TI offers as a code-limited freebie with the TI Launchpad. In that writeup we wondered if anyone would put together a tutorial using open source tools like DDD and GDB to make debugging easier for those that choose to use operating systems other than Windows. Even though he didn’t directly use those particular packages, this should work just as well.

Eclipse is a popular IDE for many different languages like C, C++, Java, and others. We’ve already seen it used to develop for the TI Evalbot on Linux systems. [Springuin] is using the Java-based IDE on a Windows system, and this is the first time we recall seeing directions on using an open-source alternative for programming with the TI Launchpad under Windows. That being said, the only real Windows specific parts are the steps necessary for communicating with the programmer. Since this method uses MSP-GCC and msp430-gdbproxy, it should be easy to do this under Linux as well. Use our tutorial to set up those tools if you haven’t already, then follow this one for a setting up and debugging in the Eclipse environment.

Reverse Engineering A Mobile Phone E-paper Display

msp430_epaper_display

While e-paper is common among e-readers, there are very few, if any phones other than the MOTOFONE that exclusively use an e-paper display. [Steve] had one of these phones sitting around and thought it could be used to build a low-power clock. Since the bistable e-paper display can retain the currently active content even when power is removed, he would only need to update the clock once a minute, when the time changed.

Unfortunately for him, very little publicly-available documentation exists for the display controller Motorola used. To get an idea of how the display was driven, he had to sniff the SPI communications between the processor and the display. Once he had the basic commands down, he spent quite a bit of time figuring out how to activate the different segments of the display, due to what seems to be a rushed design process on Motorola’s part.

Now that [Steve] had reverse-engineered just about everything, he connected the phone to a TI MSP430 to drive the display. He programmed the LaunchPad to serve as a basic clock with great results, as you can see in the video below.

If your interest in e-paper hacking has been piqued, be sure to check out our previous e-paper coverage here.

Continue reading “Reverse Engineering A Mobile Phone E-paper Display”