The vast majority of model rockets go vaguely up and float vaguely downwards without a lot of control. However, [newaysfactory] built a few rockets that were altogether more precise in their flight, thanks to his efforts to master active roll control.
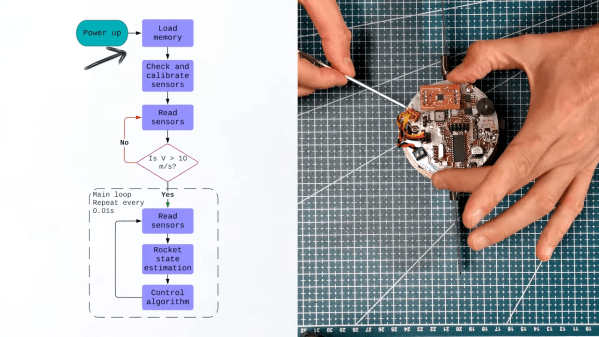
[newaysfactory] started this work a long time ago, well before Arduinos, ESP32s, and other highly capable microcontroller platforms were on the market. In an era when you had to very much roll your own gear from the ground up, he whipped up a rocket control system based around a Microchip PIC18F2553. He paired it with a L3G4200D gyro, an MPXH6115A barometer, and an MMA2202KEG accelerometer, chosen for its ability to provide useful readings under high G acceleration. He then explains how these sensor outputs were knitted together to keep a rocket flying straight and true under active control.
[newaysfactory] didn’t just master roll control for small rockets; he ended up leveraging this work into a real career working on fully-fledged autopilot systems. Sometimes your personal projects can take your career in interesting directions.
Continue reading “Rocket Roll Control, The Old Fashioned Way”