Espressif’s New ESP32-S31: Dual-Core RISC-V With WiFi 6 And GBit Ethernet

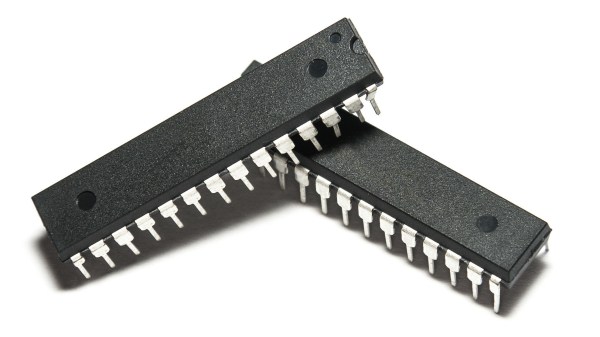
In a move that’s no doubt going to upset and confuse many, Espressif has released its newest microcontroller — the ESP32-S31. The confusing part here is that the ESP32-S series was always the one based on Tensilica Xtensa LX7 cores, while the ESP32-C series was the one using RISC-V cores.

That said, if one looks at it as a beefier -S3 MCU it does have some appealing upgrades. The most obvious improvements are with the use of WiFi 6, as well as Bluetooth Classic and LE 5.4, including LE Audio. There is also Thread and Zigbee support for those who are into such things.

The Ethernet MAC got a bump from the 100 Mbit RMII MAC in previous MCUs and is now gigabit-rated, while the number of GPIO is significantly higher at 60 instead of 45 on the -S3. On the RAM side, things are mostly the same, except for DDR PSRAM support, with octal SPI offering up to 250 MHz compared to 80 MHz on the -S3.

On the CPU side the up-to-320 MHz RISC-V cores are likely to be about as powerful as the 240 MHz LX7 cores in the -S3, based on the ESP32-C series performance in terms of IPC. Overall it does seem like a pretty nice MCU, it’s just confusing that it doesn’t use LX7 cores with the series it was put into. When this MCU will be available for sale doesn’t seem to be known yet, with only samples available to select customers.

TinyGo Boldly Goes Where No Go Ever Did Go Before

When you’re programming microcontrollers, you’re likely to think in C if you’re old-school, Rust if you’re trendy, or Python if you want it done quick and have resources to spare. What about Go? The programming language, not the game. That’s an option, too, with TinyGo now supporting over 100 different dev boards, along with webASM.

We covered TinyGo back in 2019, but they were just getting started at that point, targeting the Arduino and BBC:micro boards. They’ve grown that list to include everything from most of Adafruit’s fruitful suite of offerings, ESP32s, and even the Nintendo Game Boy Advance. So now you can go program go in Go so you can play go on the go.

The biggest drawback–which is going to be an absolute dealkiller for a lot of applications–is a lack of wireless connectivity support. Claiming to support the ESP8266 while not allowing one to use wifi is a bit of a stretch, considering that’s the whole raison d’être of that particular chip, but it’s usable as a regular microcontroller at least.

They’ve now implemented garbage collection, a selling point for those who like Go, but admit it’s slower in TinyGo compared to its larger cousin and won’t work on AVR chips or in WebAssembly. It’s still not complete Go, however, so just as we reported in 2019, you won’t be able to compile all the standard library packages you might be used to. There are more of them than there were, so progress has been made!

Still, knowing how people get about programming languages, this will please the Go fanatics out there. Others might prefer to go FORTH and program their Arduinos, or to wear out their parentheses keys with LISP. The more the merrier, we say!

Build This Open-Source Graphics Calculator

Graphics calculators are one of those strange technological cul-de-sacs. They rely on outdated technology and should not be nearly as expensive as they are, but market effects somehow keep prices well over $100 to this day. Given that fact, you might like to check out an open-source solution instead.

NumOS comes to us from [El-EnderJ]. It’s a scientific and graphic calculator system built to run on the ESP32-S3 with an ILI9341 screen. It’s intended to rival calculators like the Casio fx-991EX ClassWiz and the TI-84 Plus CE in terms of functionality. To that end, it has a full computer algebra system and a custom math engine to do all the heavy lifting a graphic calculator is expected to do, like symbolic differentiation and integration. It also has a Natural V.P.A.M-like display—if you’re unfamiliar with Casio’s terminology, it basically means things like fractions and integrals are rendered as you’d write them on paper rather than in uglier simplified symbology.

If you’ve ever wanted a graphics calculator that you could really tinker with down to the nuts and bolts, this is probably a great place to start. With that said, don’t expect your local school or university to let you take this thing into an exam hall. They’re pretty strict on that kind of thing these days.

We’ve seen some neat hacks on graphics calculators before, like this TI-83 running CircuitPython. If you’re doing your own magic with these mathematical machines, don’t hesitate to notify the tips line.

Better Faux-Analog VU Meters

One of the coolest things about old hi-fi hardware is that it often came with flickety needles that danced with the audio level. You can still buy these if you want, or you can simulate the same look on a screen, as [mircemk] demonstrates.

It isn’t [mircemk]’s first rodeo in this regard. An earlier project involved creating simulated VU meters on round displays, but they were somewhat limited. Using the Adafruit GFX library on an ESP32 netted a working setup, but it was jerky and very jagged and digital-looking. It was more akin to a fake needle display running on an 8-bit computer than something that looked like a real vintage VU meter.

Continue reading “Better Faux-Analog VU Meters”

An Electric Jellyfish For Androids

We have to admit, we didn’t know that we wanted a desktop electric jellyfish until seeing [likeablob]’s Denki-Kurage, but it’s one of those projects that just fills a need so perfectly. The need being, of course, to have a Bladerunner-inspired electric animal on your desk, as well as having a great simple application for that Cheap Yellow Display (CYD) that you impulse purchased two years ago.

Maybe we’re projecting a little bit, but you should absolutely check this project out if you’re interested in doing anything with one of the CYDs. They are a perfect little experimentation platform, with a touchscreen, an ESP32, USB, and an SD card socket: everything you need to build a fun desktop control panel project that speaks either Bluetooth or WiFi.

We love [likeablob]’s aesthetic here. The wireframe graphics, the retro-cyber fonts in the configuration mode, and even the ability to change the strength of the current that the electric jellyfish is swimming against make this look so cool. And the build couldn’t be much simpler either. Flash the code using an online web flasher, 3D print out the understated frame, screw the CYD in, et voila! Here’s a direct GitHub link if you’re interested in the wireframe graphics routines.

We’ve seen a bunch of other projects with the CYD, mostly of the obvious control-panel variety. But while we’re all for functionality, it’s nice to see some frivolity as well. Have you made a CYD project lately? Let us know!

ESP32: When Is A P4 A P4, But Not The P4 You Thought It Was

We’re used to electronic parts of the same type staying predictably the same, sometimes over many years. An early Z80 from the mid 1970s can be exchanged with one from the end of production a few years ago, for example. This week, we’ve had DMs from several readers who’ve found that this is not always the case, and the culprit is surprising. Espressif has released a new revision of their P4 application processor, and though it’s ostensibly the same, there are a couple of changes that have been catching people out.

The changes lie in both hardware and software, in that there’s a pin that’s changed from NC to a power rail, a few extra passives are needed, and firmware must be compiled separately for either revision. The problem is that they are being sold as the same device and appear in some places under the same SKU! This is leading to uncertainty as to which P4 revision is in stock at wholesalers. We’ve been told about boards designed for the old revision being assembled with the new one, a situation difficult to rework your way out of. Designers are also left uncertain as to which firmware build is needed for boards assembled in remote factories.

The ESP32-P4 is an impressive part for its price, and we’re sure that we’ll be seeing plenty of projects using this new revision over the coming years. We’re surprised that it doesn’t have a different enough part number and that the wholesalers have seemingly been caught napping by the change. We’re told that some of the well-known Chinese assembly houses are now carrying the two chips as separate SKUs, but that’s scant consolation for a designer with a pile of boards carrying the wrong part. If you’re working with the P4, watch out, make sure your board is designed for the latest revision, and ask your supplier to check which chips you’ll get.

If the P4 is new to you, we’ve already seen a few projects using it.

Real-Time ISS Tracker Shows Off The Goods

What hardware hacker doesn’t have a soft spot for transparent cases? While they may have fallen out of mainstream favor, they have an undeniable appeal to anyone with an interest in electronic or mechanical devices. Which is why the Orbigator built by [wyojustin] stands out among similar desktop orbital trackers we’ve seen.

Conceptually, it’s very similar to the International Space Station tracking lamp that [Will Dana] built in 2025. In fact, [wyojustin] cites it specifically as one of the inspirations for this project. But unlike that build, which saw a small model of the ISS moving across the surface of the globe, a transparent globe is rotated around the internal mechanism. This not only looks gorgeous, but solves a key problem in [Will]’s design — that is, there’s no trailing servo wiring that needs to be kept track of.

For anyone who wants an Orbigator of their own, [wyojustin] has done a fantastic job of documenting the hardware and software aspects of the build, and all the relevant files are available in the project’s GitHub repository.

The 3D printable components have been created with OpenSCAD, the firmware responsible for calculating the current position of the ISS on the Raspberry Pi Pico 2 is written in MicroPython, and the PCB was designed in KiCad. Incidentally, we noticed that Hackaday alum [Anool Mahidharia] appears to have been lending a hand with the board design.

As much as we love these polished orbital trackers, we’ve seen far more approachable builds if you don’t need something so elaborate. If you’re more interested in keeping an eye out for planes and can get your hands on a pan-and-tilt security camera, it’s even easier.