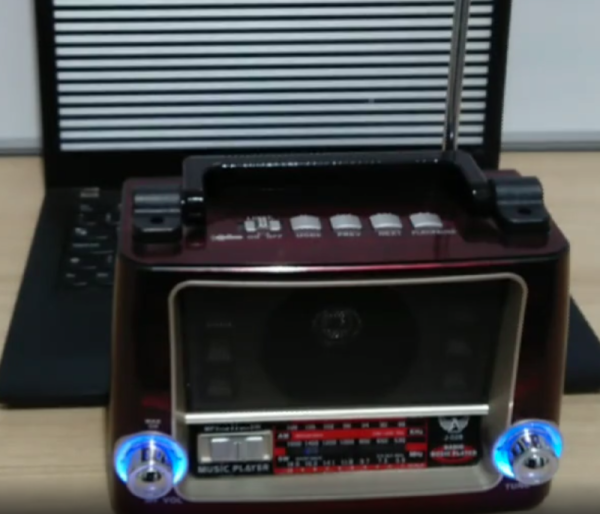
In the old days, it wasn’t uncommon to put an AM radio near a computer or a monitor and deliberately cause interference to have a crude form of sound generation. Did you miss out on that? No! Thanks to [luambfb] you can now do the same trick with a common LCD monitor. You’ll need the horizontal refresh rate of the monitor in question.
Of course, doing it is somewhat less interesting than learning how it works. The effect relies on the fact that the LCDs emit signals as it refreshes a row. A black row emits relatively low energy while a white row emits more. Grayscale… well, you get the idea. Continue reading “LCD Monitor Plays The Hits”→
[Daniel Valuch] shared a fun and record-setting conference badge story (Slovak, translated) with us. He was one of the organizers for the “ZENIT in electronics” event, which is an annual Slovak national competition for students. During the competition, students are assigned a letter+number code for the purpose of result submission anonymity, and organizers are always on the lookout for a fun way to assign these codes – this time, they did it with custom silicon!
It just so happened that [Peter], one of [Daniel]’s colleagues, was at the time working for onsemi who were doing a tapeout and had some free space on their test chips. Of course, they didn’t have to think twice. When it was a student’s turn to draw their identification number, instead of a slip of paper, they received a SOIC-16 package with custom silicon bonded to it. Then, they had to solder it to their competition badge – which was, of course, a PCB. Each chip was individually laser-trimmed to contain the student’s number, and that number could then be decoded using a multimeter – or a reasonably sharp eye.
There’s way more to this competition story than just the badge, but the custom silicon part of it sure caught our eyes. Who knows, maybe next year stars will align again and we’ll see custom silicon on one of the hacker conference badges. After all, things have been advancing rapidly on that front – for instance, since Skywater PDK project’s inception in 2020, there’s been several successful runs already, and if you’d like to learn more, you could check the HackChat we’ve had this year, and this Remoticon 2020 workshop!
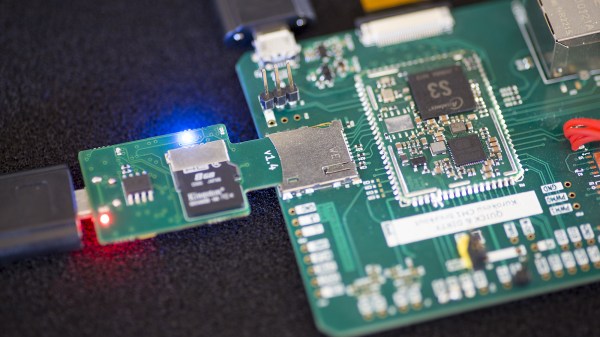
[Saulius Lukse] has been working on some single board computer, seemingly, running Linux. Naturally, that boots from a microSD card – and as development goes on, that card has to be reimaged all the time. Sick of constantly plugging and unplugging the microSD card between the SBC and an SD card reader, [Saulius] started looking for a more automated solution – and it wasn’t long before he found out about the SDWire project, a hardware tool that lets you swap a card between a DUT (Device Under Test) and your personal computer with no moving parts involved.
SDWire is an offshoot from the Tizen project, evidently, designed to be of help in device development, be it single-board computers or smartphones. The idea is simple – you plug your MicroSD card into the SDWire board, plug the SDWire into a MicroSD slot of your embedded device, and then connect a USB cable from the SDWire to your development computer. This way, if you need to reflash the firmware on the SBC you’re tinkering with, you only need to issue a command to the SDWire board over the USB cable, and the MicroSD card appears as a storage drive on your computer. SDWire is a fully open source project, both in hardware and in software, and you can also buy preassembled boards online.
Such shortening of development time helps in things like automated testing, but it also speeds your development up quite a bit, saving you time between iterations, freeing you from all the tiny SD card fiddling, and letting you have more fun as you hack. There’s a clear need for a project like SDWire, as we’ve already seen a hacker assemble such a device using breakouts.
[Pyrotechnical] thought about buying a CAT scanner and found out they cost millions of dollars. So he decided to build one for about $200 using a salvage X-ray tube and some other miscellaneous parts. A scintillating detector provides the image for pick up with a camera phone. The control? An Arduino, what else? You can watch the video below, but due to plenty of NSFW language, you might want to put your headphones on if you don’t want to shock anyone.
Of course, you need to be careful when working with energetic X-rays. To keep away from the X-ray source, [Pyrotechnical] used a Roku remote and an IR sensor to control the device from afar. The electronics is pretty easy. You just have to rotate a turntable and trigger the camera while lighting up the X-ray tube.
Making knives at home has become a popular hobby, thanks partly to reality TV and the free time and idle hands afforded by lockdowns. Depending on how far you get into the hobby, builds can range from assembling and finishing a kit with pre-forged parts, to actual blacksmithing with a hammer and anvil. But pretty much every build includes steel from a commercial supplier.
Not this one. Rather than buy his metal from the usual sources, [Thoisoi]’s first stop was an iron mine in the Italian Alps, where he picked up a chunk of iron ore — magnetite, to be precise. Smelting one’s own iron from raw ore and alloying it into steel is generally not a backyard project thanks to the high temperatures needed, a problem [Thoisoi] solved with the magic of thermite. The iron oxide and aluminum in the thermite mix react in an exceptionally exothermic manner to generate elemental iron, which under controlled conditions can be captured as a more or less pure ingot, ready for forging.
After a test with commercially obtained iron oxide, [Thoisoi] tried his pulverized magnetite. And thanks to the addition of goodies like graphite, manganese, nickel, silicon, and chromium, he was eventually able to create a sizable lump of 402 stainless steel. He turned the metal over to an actual blacksmith for rough forging; it sure seemed to act like steel on the anvil. The finished knife looks good and performs well, and the blade has the characteristic look of stainless. Not a bad result, and all at the cost of a couple of clay flowerpots.
If you’ve been following [Joe Barnard]’s rocketry projects for the past few years, you’ll know that one of his primary goals has been to propulsively land a model rocket like SpaceX. Now, 7 years into the rollercoaster journey, he has finally achieved that goal with the latest version of his Scout rocket.
We have touchdown!
Many things need to come together to launch AND land a rocket on standard hobby-grade solid fuel rocket motors. A core component is stabilization of the rocket during the entire flight, which achieved using a thrust-vectoring control (TVC) mount for the rocket motors and a custom flight computer loaded with carefully tuned guidance software. Until recently, the TVC mounts were 3D printed, but [Joe] upgraded it to machined aluminum to eliminate as much flex and play as possible.
Since solid-fuel rockets can’t technically be throttled, [Joe] originally tried to time the ignition time of the descent motor in such a manner that it would burn out as the rocket touches down. The ignition time and exact thrust numbers simply weren’t repeatable enough, so in his 2020 landing attempts, he achieved some throttling effect by oscillating the TVC side to side, reducing the vertical thrust component. This eventually gave way to the final solution, a pair of ceramic pincers which block the thrust of the motors as required.
Another interesting component is the landing legs. Made from light carbon fiber rods, they are released by melting a rubber band with nichrome wire and fold into place under spring tension. They also had to be carefully refined to absorb as much impact as possible without bouncing, which killed a few previous landing attempts.
Scrolling back through [Joe]’s videos and seeing the progress in his engineering is absolutely inspiring, and we look forward to his future plans. These include a functional scale model of the belly-flopping starship, a mysterious “meat rocket”, and the big one, a space shot to exceed 100 km altitude.
Attention Hackaday editors: We on the writing crew hereby formally request budget allocation for installing a Stewart platform head massager on the chair of each workstation in the secret underground writer’s bunker. We think the benefits that will accrue thanks to reduced stress alone will more than justify the modest upfront costs. Thank you for your consideration.
OK, maybe that request is going nowhere, but having been on the receiving end of these strangely relaxing springy scalp stimulators, we can see where [David McDaid] was going with this project. As he clearly states up front, this is a ridiculously over-engineered way to get your scratchies on, but there’s very little not to love about it. Stewart platforms, which can position a surface with six degrees of freedom and range in size from simple ball balancers to full-blown motion simulators, are fascinating devices, and we can’t think of a better way to learn about them than by building one.
Like all Stewart platforms, [David]’s is mechanically simple but kinematically complicated, and he takes great pains to figure out all the math and explain it in an approachable style. The device is mounted with the end-effector pointed down, allowing the intended massagee to insert their noggin into the business end and receive the massage pattern of their choice. Looking at the GIFs below, it’s easy to see why [David] favors the added complexity of a Stewart, which makes interesting patterns like “The Calmer” possible. They’re all intriguing, although the less said about “The Neck Breaker” the better, we’d say.
Hats off (lol) to [David] for this needless complex but entertaining build.