[Davearneson] built a modern version of a classic synthesizer with his DIY Fairlight CMI. If there were a hall of fame for electronic instruments, the Fairlight CMI would be on it. An early sampling synth with a built-in sequencer, the Fairlight was a game changer. Everyone from A-ha to Hans Zimmer has used one. The striking thing about the Fairlight was the user interface. It used a light pen to select entries from text menus and to interact with the audio waveform.
The original Fairlight units sold for £18,000 and up, and this was in 1979. Surviving units are well outside the price range of the average musician. There is an alternative though – [Peter Vogel] has released an iOS app which emulates the Fairlight.
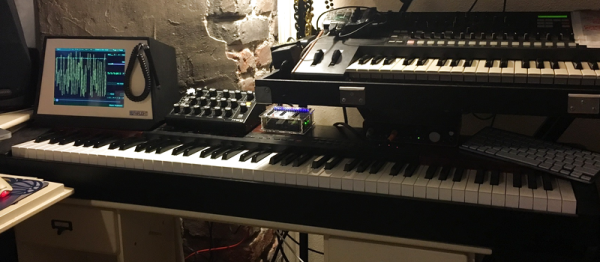
[Davearneson] had an old iPad 2 lying around. Too slow to run many of the latest apps, but just fast enough to run the Fairlight app. An iPad doesn’t exactly look like a classic instrument though. So he broke out the tools and created a case that looked the part.
The front of the case is made of framing mat board. The rest of the shell is wood. [Davearneson] used Plasti-Dip spray to replicate the texture of 1970’s plastics. The audio interface is a Griffon unit, which provides audio and MIDI connections. [Davearneson] extended the connections from the Griffon to the rear of the case, making for a clean interface.
The iPad doesn’t exactly support a light pen, so a rubber tipped stylus on a coil cord takes it place. The result is a device that looks and works like a Fairlight – but doesn’t need a steady diet of 8″ floppy discs to operate.
Interested in classic digital synthesizers that are a bit more budget friendly? Check out Al Williams’ article on the SID chip, or this 3D printed synth based upon the 4046 PLL chip.