Use Your TV Remote As An HID Mouse

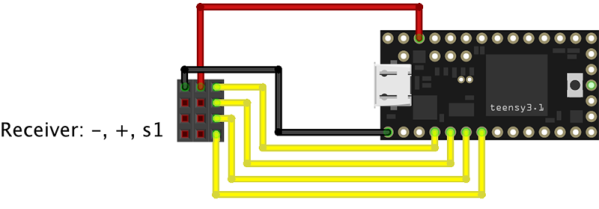
[Vinod’s] latest project lets him use a TV remote control as a mouse. It may not sound like much, but he did it with a minimum of hardware and packed in the maximum when it comes to features.

He’s using an ATmega8 to read the remote control signals and provide USB connectivity. With the V-USB stack he enumerates the device as an HID mouse. One note of warning, he used the PID/VID pair from the USBasp programmer project. If you use that programmer you’ll need to uninstall the drivers to get this to work (we think this is only necessary on a Windows box).

The cursor can be moved in eight directions using the number pad on the remote. The numeral five falls in the center of the directional buttons so [Vinod] mapped that to the left click, with the zero key serving as right click. He even included the scroll wheel by using the volume buttons. The firmware supports cursor acceleration. If you hold one direction the cursor will move slowly at first,then pick up speed. Fine adjustments can be made by single clicking the button. Check out his demonstration embedded after the break.

Continue reading “Use Your TV Remote As An HID Mouse”

Hacking A Brother Thermal Printer To Use Non-OEM Continuous Rolls

You can get your hands on a Brother thermal label printer for $65-75. But if you don’t want to buy the Brother branded continuous feed paper for it you’re out of luck. Unless you pull off this hack which lets you use any thermal paper you want with a Brother QL-500 printer.

The printer is tied to the OEM paper because of a pattern printed on the back of the roll. It’s basically an encoder strip made up of black rectangles spaced at regular intervals. Surely there are other brands that come with this pattern on them, but if you want to use paper without it the secret is in moving the sensor that reads that strip.

The brilliant solution is to use one of the white feed-gears as an encoder wheel. [CheapSkateVideo] used a magic marker to paint two opposite quarters of the gear black. He then removed the optical sensor and placed it on the side of the case facing the wheel. It needs to be adjusted along the radius of that gear until the timing is just right, but once it is you’re ready to go. The sensor is a safety feature to ensure there is media in the printer. If there’s not you can burn up the print head so keep that in mind. See the explanation in the video after the break.

Continue reading “Hacking A Brother Thermal Printer To Use Non-OEM Continuous Rolls”

Playing Footsie With Your Video Games

[Jon] will be tapping away with his toes during gaming session thanks to this foot controller which is packed with buttons and sensors. It’s the second iteration of the build. The original had some solder joints break and the USB stopped working. He had also been experiencing some erratic behavior and so he decided to upgrade the control hardware and add a few more things in the process.

This version uses an Arduino Uno as the interface board. He did a bunch of prototyping to find the best way to hook up all the analog sensors, and how to properly debounce the buttons. Once he was happy with the inputs he set about finding a better way to use the USB HID standard with the device. We were surprised to hear that the ATmega16u2 (one of the new AVR chips which includes USB hardware) doesn’t play nicely with Linux. But [Jon] managed to hack his way around that issue and now he’s gaming with an even better foot controller than before.

Custom Starcraft Controller

This Starcraft controller was designed as a contest entry. The goal of the contest was to provide a custom controller for the Starcraft Real-Time-Strategy game that shared some of the features seen in First Person Shooter controllers.

The design started as rough sketches. From the there button layout was prototyped before actually building a virtual model of the entire controller. A rendering of the model was submitted as a contest entry, and we’re glad it was also seen through to a physical device. This involved sending the design files off for 3D printing. What came back was painted and assembled to achieve the beautiful look seen above.

On the right is a stick that acts as the mouse controller. The buttons on the left are just the most necessary of Starcraft control keys. They all map to the appropriate keyboard keys and the device enumerates as an HID keyboard so no button mapping is necessary. That being said, a player does have the option of remapping if the layout doesn’t suit.

[Via Reddit with more info at Shoryuken]

Turning An Arduino Into A USB Keyboard

The newly released Arduino Leonardo has a few very interesting features, most notably the ability to act as a USB keyboard and mouse thanks to the new ATmega 32U4 microcontroller. This feature isn’t exclusive to the Leonoardo, as [Michael] explains in a build he sent in – the lowly Arduino Uno can also serve as a USB HID keyboard with just a firmware update.

The Arduino Uno (and Mega) communicate to your computer through a separate ATmega8U2 microcontroller. Simply by uploading new firmware with the Arduino Device Firmware Upgrade, it’s easy to have your old Arduino board gain some of the features of newer boards such as the Teensy or Leonardo.

[Michael] goes through the steps required to make this upgrade work and ends his build by showing off an Arduinofied ‘cut, copy and paste’ button project as well as a few multimedia controls. You can check those builds out in the video after the break.

If emulating a USB keyboard isn’t your thing, it’s also possible to install LUFA firmware to emulate everything from joysticks to USB audio devices. Very cool, and very useful.

Continue reading “Turning An Arduino Into A USB Keyboard”

Self-feeding Pen Printer

At first look we thought this was a plotter, but it’s really more of a dot matrix (or line matrix) printer. [Bruno] whipped this up using parts from a DVD optical drive. It is capable of moving the pen along the Z and X axes, and feeding the paper along the Y axis.

The video after the break shows the machine printing Megaman, an image perfectly suited to the low-resolution pixels this can put out. But even without the high-pixel counts you might get from a thermal printer, we just love the look of this one. And who doesn’t have an optical drive sitting around just waiting to be hacked? It looks like the one part you’re going to have to source is the stepper motor and geared feed wheel that moves the paper.

Continue reading “Self-feeding Pen Printer”

Turning The Wii Classic Controller Into A Gaming Rig

A bit of clever design lets you mount a screen and gaming hardware right on this controller. [Valentin Ivanov] had already been using the Wii Classic Controller Pro as an input for his Gadgeteer-based projects. He wanted a way to marry the project board, display, and controller into one single unit.

We’re huge fans the design because it doesn’t require any alteration of the controller. Instead, five carefully designed pieces were cut from some thin plywood. They lock together into an assembly that embraces the top of the controller while providing plenty of mounting options for the prototyping hardware thanks to a large grid of holes. A couple of pieces of bronze rod lock the mounting bracket in place by keying into the screw holes in the bottom of the controller.

In the image above you can see Mini Pacman running on the rig. It’s now nearly portable, only relying on a barrel jack for power but we’re sure a battery pack could stand in if necessary.