Don’t you love it when the title track is the first one on the album? I had to single out this adjustable keyboard called the Protractor, because look at it! The whole thing moves, you know. Go look at the gallery.
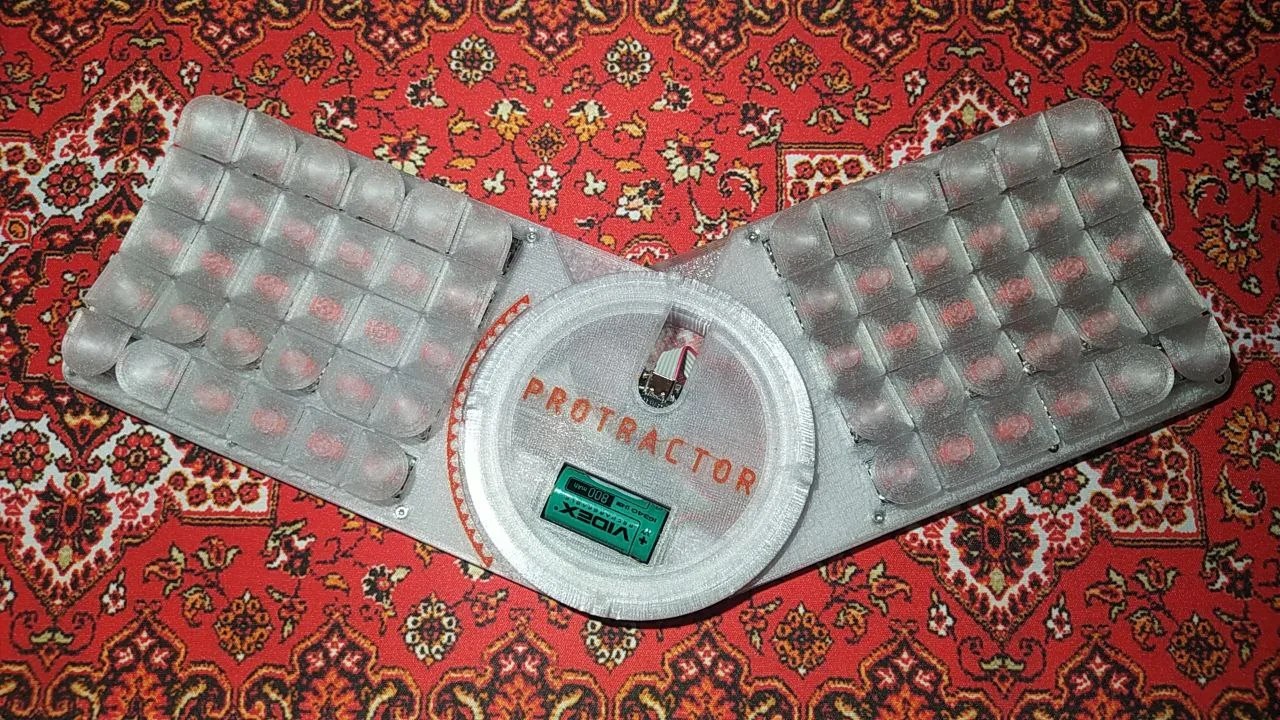
[BFB_Workshop] used a nice!nano v2, but you could use any ZMK-supported board with the same dimensions. This 5 x 12 has 60 Gateron KS-33 switches, which it was made for, and has custom keycaps. You can, of course, see all the nice, neat ribbon cable wiring through the clear PLA, which is a really great touch.
This bad boy is flat enough that you can use the table as your palm rest. To me, that doesn’t sound so comfortable, but then again, I like key wells and such. I’d still love to try a Protractor, because it looks quite interesting to type on. If you want to build one, the files and instructions are available on Printables.
Continue reading “Keebin’ With Kristina: The One With The Protractor Keyboard”