It seems a simple enough concept: as a 3D printer consumes filament, the spool becomes lighter. If you weighed an empty spool, and subtracted that from the weight of the in-use spool, you’d know how much filament you had left. Despite being an easy way to get a “fuel gauge” on a desktop 3D printer, it isn’t something we often see on DIY machines, much less consumer hardware. But with this slick hack from [Victor Noordhoek] as inspiration, it might become a bit more common.
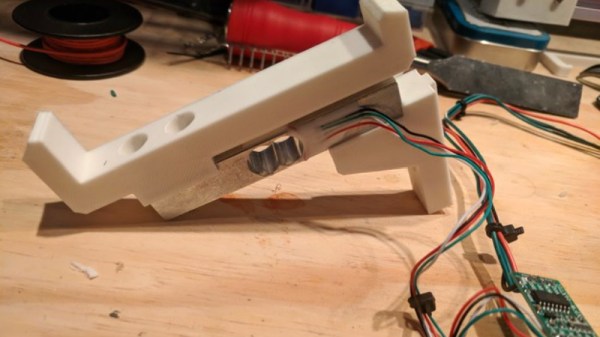
He’s designed a simple filament holder which mounts on top of an HX711 load cell, which is in turn connected to the Raspberry Pi running OctoPrint over SPI. If you’re running OctoPrint on something like an old PC, you’ll need to use an intermediate device such as an Arduino to get it connected; though honestly you should probably just be using a Pi.


On the software side, [Victor] has written an OctoPrint plugin that adds a readout of current filament weight to the main display. He’s put a fair amount of polish into the plugin, going through the effort to add in a calibration routine and a field where you can enter in the weight of your empty spool so it can be automatically deducted from the HX711’s reading.
Hopefully a future version of the plugin will allow the user to enter in the density of their particular filament so it can calculate an estimate of the remaining length. The next logical step would be adding a check that will show the user a warning if they try to start a print that requires more filament than the sensor detects is currently loaded.
This is yet another excellent example of the incredible flexibility and customization offered by OctoPrint. If you’re looking for more reasons to make the switch, check out our guide on using OctoPrint to create impressive time lapse videos of your prints, or how you can control the printer from your mobile device.