Water Cooled Raspberry Pi

If your Raspberry Pi is running a bit hot you can add a few hunks of salvaged heat sink, or you can go all out and machine your own water cooling system.

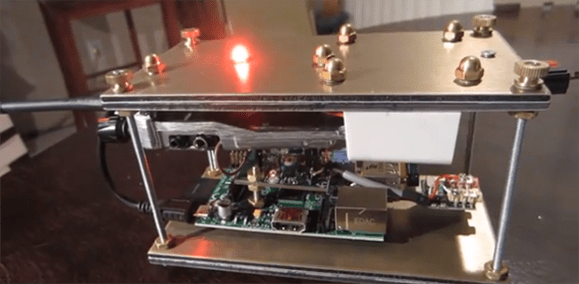
Remember when everyone had a giant desktop computer which was a perfect receptacle for cool lighting effects and somewhat ridiculous cooling systems? Relive that experience with [Phame’s] multi-page forum post that serves as the build log. With the exception of the tiny pump itself, this one’s a fully custom job.

The image on the left shows the machined parts being tried on for side. There is a slug which contacts the ICs on the RPi board, conducting the heat to the chambers inside through which the liquid will flow. The upright rectangular enclosure serves as the reservoir which dissipates the collected heat as the water flows through it. The image on the right shows the finished project. It uses the power pins on the GPIO header to drive the pump.

[Thanks PL via Bit-Tech]

Simple Looking Antique Internet Radio Has A Lot Under The Hood

rpi-internet-radioAt first glance you might not even notice that this 1934 radio has been altered. But close study of the tuning dial will tip you off that changes have been made. It still scrolls through stations just like the original. But it’s not a wheel with some numbers on it. The rotary motion is an effect produced by an LCD screen.

This is the second time we’ve seen one of [Florian Amrhein’s] Internet radio projects. The first used guts from a Laptop paired with an Arduino to pull everything together. This time he’s chosen to wield a Raspberry Pi board. It feeds a USB sound card for a bit better quality. A small amplifier board us used to power one large speaker behind the original grill of the radio.

Check out the demo video to see that radio dial in action. It’s delightful that he went to the trouble to emulate a rotating disc to keep with the theme of the project.

Continue reading “Simple Looking Antique Internet Radio Has A Lot Under The Hood”

The Most Advanced Microwave You’ll Ever Own

raspberry-pi-microwave

Voice activation, one-touch cooking, web controls, cooking settings based on UPC… have you ever seen a microwave with all of these features? We sure haven’t. We thought it was nice that ours have a reheat button with three different settings. But holy crap, what if you could actually program your microwave to the exact settings of your choice? You can, if you let a Raspberry Pi do the cooking.

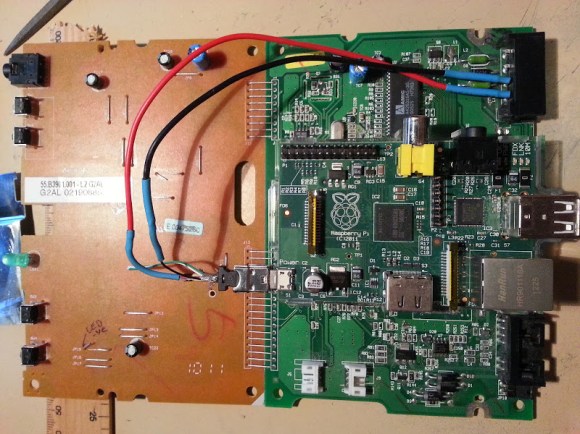
This hack run deep and results in a final product with a high WAF. Nathan started by taking apart his old microwave. He took pictures of the flexible sheets that make up the control button matrix in order to reverse engineer their design. This led him to etch his own circuit board to hook the inputs up to a Raspberry Pi board and take command of all the appliance’s other hardware. Because it also drives the seven segment display you’ll never see the wrong time on this appliance again. It’s set based on NTP.

We mentioned you can tweak settings for a specific food. The best way of doing this is shown in the demo video. The web interface is used to program the settings. Recalling them is as simple as using the barcode reader to scan the UPC. Amazing.

Now you can keep that old microwave working, rather than just scraping it for parts.

Continue reading “The Most Advanced Microwave You’ll Ever Own”

Raspberry Pi Learns The Lost Art Of Teletext

rpi-teletext

Exploring dead protocols is often the calling card of hobby electronics enthusiasts. And why not? The mistakes have already been made and fixed — you can learn from them. This Raspberry Pi TeleText hack is the perfect example. It let [Moonlit] explore the realm of generating composite video, as well as establishing communications between the Raspberry Pi  and a microcontroller.

Teletext was a method of accessing information on a television before computer networks were available to the general public. It was pretty impressive at the time, as you can tell from this Retrotechtacular feature. [Moonlit] started looking into recreating a Teletext device by simply generating a PAL signal with an AVR chip. He was met with an equipment failure (remember, it’s always a hardware problem) in to form of a fake composite to USB dongle. After changing the receiving device he was up and running and ready to explore the particulars of the protocol. As you can see, his success even led him to spin a breakout board which plugs in to the RPi GPIO header. A Y-splitter (joiner?) combines the composite output of the RPi with the the overlay data from his own board.

Bolstering Raspberry Pi HDMI With A Current Regulator

rpi-hdmi-current-regulator

We’ve never tried using an HDMI to VGA converter with Raspberry Pi. We heard they were expensive and have always just used HDMI out (although DVI would be just as easy). Apparently if you have a VGA converter that isn’t powered the RPi board may output unstable video due to lack of current from the connector. [Orlando Cosimo] shows how to fix the problem with a few inexpensive components.

Just this morning we saw a portable PSU using an LM317. This project uses the same part, but in a different way. [Orlando] uses three resistors in parallel to make the LM317 behave like a current regulator (as opposed to a voltage regulator) which will output about 550 milliamps. Input voltage is pulled directly from the 5V line of the microUSB port. The output is injected into the HDMI connector. This will boost the amount of juice available to the unpowered VGA converter, stabilizing the system.

There are a lot of other power hacks out there for the RPi. One of our favorites is pulling the stock linear regulator in favor of a switch mode regulator.

[via Dangerous Prototypes]

Raspberry Pi, Now In A Mini-ITX Form Factor

Shown above is a fairly simple Raspberry Pi setup. There’s the Raspi itself, a 2.5″ hard drive, a USB hub, GPIO expansion, and wireless and Bluetooth adapters. Throw in the power supplies for all these devices, and you’ve got a real mess on your hands. There is a solution to this problem of a Gordian knot of USB and power cables: the Fairywren, a board that turns your Raspberry Pi into a Mini-ITX computer.

The basic idea behind the Fairywren is to take the basic outline of a Mini-ITX motherboard and add goodies like a real-time clock serial port, and USB hub while providing a secure mounting place for a Raspberry Pi. It turns a Raspberry Pi into a proper computer, with all the ports in the rear, and is compatible with a whole slew of Mini-ITX cases.

At £40, the Fairywren isn’t exactly cheap. In fact, it’s more expensive than the Raspberry Pi itself. That being said, you do get a whole lot of hardware for the price, and if you already have a small Mini-ITX case lying around, it may be just the thing to clean up the mess on your electronics bench.

Raspberry Pi Automates Your Tomato Farm

rpi-tomato-farming

Check out the tomato plants [Devon] grew using a monitoring system he built himself. It’s based around a Raspberry Pi. As far as grow controllers go it falls a bit short of full automation. That’s because the only thing it can actuate is the black water line seen hovering above the plants. But [Devon’s] work on monitoring and collecting sensor data should make it easy to add features in the future.

The moisture sensors pictured above monitor the soil in which the plants are growing. But he also has temperature and light sensors. These are very important when growing from seed and could be used in conjunction with a heating mat for plants that require higher soil temperatures (like pepper plants). The tomatoes are also pretty leggy. Now that he’s monitoring light levels it would be good to augment the setup with a grow light. A long term goal could even be a motorized bed which could raise the plants right up to the bulbs so they don’t reach for the light.

Don’t let the stars in our eyes distract you though. He’s done a ton of work on the project both with the physical build, and in plotting the data collected by the system. Great job!

Continue reading “Raspberry Pi Automates Your Tomato Farm”