Watchman Watches You Watching Him Watch You

At this point, society has had over three decades to get used to the Blue Man Group. Maybe that’s why we’re less disturbed by [Graham Jessup]’s face-tracking Watchman than we should be. Either that, or it’s because it reminds us of Data from Star Trek: The Next Generation. Frankly, this is just way too cool to be dismissed out of hand as creepy.

The Watchman finds faces via video feed from a camera module positioned in his forehead as a third eye. The camera is connected to a Pi Zero that’s wearing a Google AIY vision bonnet. The Pi translates the face locations into servo positions and feeds them to an Arduino UNO located in the frontal lobe region to move the eyeballs and lids accordingly.

[Graham] had a bit of trouble with tracking accuracy at first, so he temporarily replaced the pupils with 5 mW lasers and calibrated them by tracking a printed stand-in of his head to avoid burning out his retinas.

This project builds on previous work by [Tjahzi] and the animatronic eye movements of [Will Cogley]. We can only imagine how awesome the Watchman would look with a pair of [Will]’s incredibly realistic eyeballs. Either way, we would totally trust the Watchman to defend our modest supply of toilet paper in the coming weeks. Check out a brief demo after the break, and a whole lot more clips on [Graham]’s site.

Continue reading “Watchman Watches You Watching Him Watch You”

This Compact Pi Terminal Will Show You The Way

The Raspberry Pi holds incredible promise for those looking to build a small mobile terminal that they can take with them on the go, something you can throw into your bag and pull out whenever there’s some hacking to be done. But getting the diminutive Linux board to that point can take quite a bit of work. You need to find a suitably small keyboard, design a custom case, and wire it all up without letting any of that pesky Magic Smoke escape.

But a recent project from [remag293] might make things a bit easier for those looking to get their feet wet in the world of custom mobile computers. The boxy handheld device has everything you need, and nothing you don’t. A basic case, a short parts list, and an absolute minimum of wiring. What’s not to love? Even if you don’t make an exact clone of this device, it’s an excellent reference to quickly bootstrap your own bespoke terminal.

So what’s inside the 3D printed case? Not a whole lot, really. Obviously there’s a Raspberry Pi, a 3.5 inch TFT touch screen display, and a miniature keyboard. The keyboard is of the Bluetooth variety, and other than being freed from its enclosure and wired into the header on the display module for power, it’s otherwise stock.

As for the parts you can’t see from the outside, there’s a 3.7 V 4400 mAh battery pack and an Adafruit PowerBoost 1000 module to handle charging and power distribution. Beyond the big lighted button on the side (which you could certainly replace with something more low-key should you chose), that’s about it. When it’s all together, you’ve got a battery powered computer that’s ready for the road with a minimum amount of fuss.

If you’re looking for something that’s a bit larger, and more than a little unconventional, you could start by printing out a full cyberdeck. After all, if you’re going to build your own non-traditional portable computer, you might as well go all out.

Getting 1000 FPS Out Of The Raspberry Pi Camera

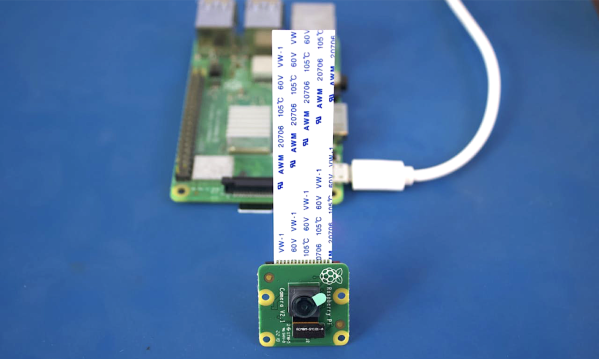
The Raspberry Pi camera has become a de facto standard for many maker projects, making things like object recognition and remote streaming a breeze. However, the Sony IMX219 camera module used is capable of much more, and [Gaurav Singh] set out to unlock its capabilities.

After investigating the IMX219 datasheet, it became clear that it could work at higher bandwidths when configured to use all four of its MIPI CSI lanes. In the Raspberry Pi module, only two MIPI lanes are used, limiting the camera’s framerate. Instead, [Gaurav] developed a custom IMX219 breakout module allowing the camera to be connected to an FPGA using all four lanes for greater throughput.

With this in place, it became possible to use the camera at framerates up to 1,000 fps. This was achieved by wiring the IMX219 direct to an FPGA and then to a USB 3.0 interface to a host computer, rather than using the original Raspberry Pi interface. While 1,000 fps is only available at a low resolution of 640 x 80, it’s also possible to shoot at 60 fps at 1080p, and even 15 fps at 3280 x 2464.

While it’s probably outside the realm of performance required for the average user, [Gaurav] ably demonstrates that there’s often capability left on the table if you really need it. Resources are available on Github for those eager to delve deeper. We’ve seen others use advanced techniques to up the frame rate of the IMX219, too. Video after the break.

Continue reading “Getting 1000 FPS Out Of The Raspberry Pi Camera”

Surviving The Apocalypse With A Briefcase Full Of Pi

Let’s imagine that you’ve spent most of your life indoors tinkering with electronic gadgets and that you don’t have a lot of practical survival experience. Since you’re currently reading Hackaday, it shouldn’t be much of a stretch for you. Let’s further imagine that our entire civilization gets upended by an ecological disaster, nuclear war, invaders from Zeta Reticuli, that sort of thing. What do you do?

If you’re [Evan Meaney], you might start by retrieving the Crash Recovery Device from its EMP shielded storage nook. This mobile digital library is designed to serve as a backup copy of all the information we’d lose in a post-Internet world. It holds detailed geological maps, a library of survival manuals, agriculture guides, and should you get bored, the entirety of Wikipedia.

Of course, having all that information in a digital format is no good if you can’t access it. Rather than designing a device from scratch, [Evan] based his rugged command center on the Raspberry Pi Recovery Kit by [Jay Doscher].

He deleted the more esoteric components such as the mil-spec connectors on the front panel, and improved the ability to switch between different power sources with a capacitor bank big enough to smooth out any momentary interruptions. There’s also added circuitry so the device can be run on a wider range of voltages, allowing the use of whatever batteries or power sources can be scrounged up. [Evan] even thought to use automotive style fuses that could be pilfered from abandoned vehicles if necessary.

We know what you’re probably thinking; a better way to hone your survival skills and prepare for a disaster would be to just go camping a few times a year. Fair enough. But if you’re a city dweller who might not have the option, it’s hard to argue that you wouldn’t be better off having a mobile repository of survival information to consult should you need it. Doubly so if it looks this cool.

Continue reading “Surviving The Apocalypse With A Briefcase Full Of Pi”

IoT Cassette Scroller Never Needs A Pencil

The see-through electronics craze of the ’80s and ’90s clearly had an effect on [MisterM], and we can totally relate. Those candy-colored components inside undoubtedly launched a few thousand kids in the direction of electronics, as we can attest.

Though the odds seemed very much against him, [MisterM] was able to fit all the necessary components for a scrolling IoT notifier inside a standard cassette tape. It took a bit of surgery on both the Raspberry Pi Zero W and the donor cassette in the name of getting all the components to fit in such a tight space. We’re glad he kept at it, because it looks amazing.

The Raspi uses Adafruit.IO and IFTTT to get all kinds of notifications — tweets, weather, soil moisture, you name it — and scrolls them across an 11×7 LED matrix. A vibrating disc motor gives a buzzing heads up first, so [MisterM] doesn’t miss anything. Hit the break button and flip this thing over, because the build video is all queued up on the B-side.

If you’d rather play around with cassette decks, add in some playback speed potentiometers to mess with the sound, or go all out and make a Mellotron.

Continue reading “IoT Cassette Scroller Never Needs A Pencil”

Divvy Out The Crypto With This Physical Bitcoin Faucet

For those unfamiliar with the term, a “Bitcoin Faucet” is usually used as an incentive in software that wants your attention. Complete a captcha or look at and advertisement and you get one millionth of a BTC, that sort of thing. You’re never going to get rich off of one of them, but most people aren’t going to turn down free money either. The latest project from [TJ Bruno] follows that same concept and brings it into the physical world. But you still aren’t going to get rich off of it.

The hardware used for this corporeal Bitcoin Faucet is pretty simple. All you need is a Raspberry Pi, a camera module, and a 2.8″ touch LCD. Naturally you could use a larger screen if you wanted, but then it wouldn’t fit inside of the very slick 3D printed stand that [TJ] developed. We might consider upgrading to a slightly speedier Pi though, in the demonstration video it looks like the Zero is struggling pretty hard to handle the GUI.

Using the Faucet is straightforward enough. You tap the screen and place a QR code representing your Bitcoin wallet on the device’s tray, where it’s scanned by the camera. In a few seconds the Faucet shows a QR code on its own screen that will point your phone’s browser to the transaction details so you can verify your digital coinage is on the way.

You might be wondering why you’d want to have a device that sits there waiting to pay out fractions of a BTC to anyone who’s willing to flash their wallet at it. We’re not entirely sure, though it might make for an interesting way to raise awareness about cryptocurrency. In this particular case though, [TJ] says he was just looking for a project that would give him an excuse to hone his Python skills. Nothing wrong with that around these parts.

Watching the growth of cryptocurrency from our unique vantage point, we can see how the hacker’s interest in Bitcoin as changed over the years. Where we once saw people excited about building custom mining rigs, we now see counters that tick down as the last coins are put into circulation. Looking at projects like this, it seems hackers are happy enough to just give the things away in an interesting way.

CherryPi Mechanical Keyboard Warrants A Long Look

[Gosse Adema] has been poking a Microsoft Natural Elite for the last 20 years, and the curvy old girl is about to give out. Looks like he got bit pretty hard by the DIY mechanical keyboard bug in his quest to replace her. Luckily for us, he documented his build.

Where do we start? A first keeb is decently-sized undertaking, but [Gosse] turned it up a notch and made it as low-profile as he could — it’s 2cm thick with the keycaps on. This ultimately meant designing the board such that the anti-ghosting diodes sit inside a cutout underneath their respective switches, which are low-profile Cherry MX Reds. There is no Eagle template for those yet, so [Gosse] whipped one up and milled a prototype PCB before deciding to go the fab route.

The Raspberry Pi Zero W that controls this keeb lives in a separate controller box in the name of slimness. If you are as-yet unimpressed by this build for some reason, [Gosse] even rolled his own firmware, which he explains as part of this epic journey. Seems the only thing he didn’t do was mold his own keycaps, but not everyone wants to type on blanks. We wonder if [Gosse] is aware of the terrifically low-slung Kailh choc switches, although prefab keycap options for those are even more limited.

Speaking of, here’s a tasty choc-filled game pad.