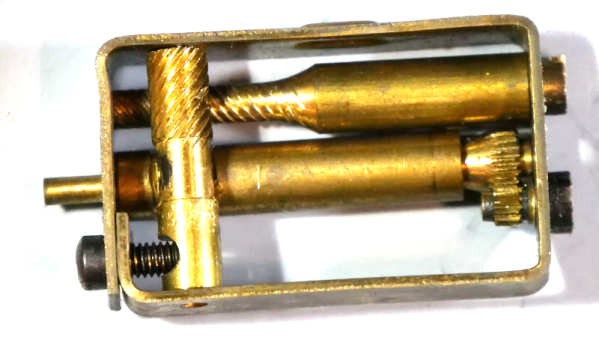
We didn’t know what a C-2400 LP was before we saw [David’s] video below, but it turned out to be pretty interesting. The device is an aircraft compass and after replacing it, he decided to take it apart for us. Turns out, that like a nautical compass, these devices need adjustment for all the metal around them. But while a ship’s compass has huge steel balls for that purpose, the tiny and lightweight aviation compass has to be a bit more parsimonious.
The little device that stands in for a binnacle’s compensators — often called Kelvin’s balls — is almost like a mechanical watch. Tiny gears and ratchets, all in brass. Apparently, the device is pretty reliable since the date on this one is 1966.
The power supply on this particular model has a failure mode where a dying transistor can lead to 13 V on the 5 V line. This causes all the havoc one would expect on the internals of a 1970s era portable computer. This particular computer is rather rare, so instead of calling it a lost cause, our protagonist decides to replace the faulty transistor, install a proper overvoltage protection circuit, and then start the tedious hunt for which chips actually let their magic smoke out. Continue reading “Repairing A Vintage HP 9825 The Hard Way”→
It takes a special eye to see a junkyard car and envision it as your latest hotrod. The guys at RMC found what they termed a “disgusting” Acorn Electron and decided to restore it to its former glory. The Electron was a budget version of the BBC micro with a 6502 running at 2 MHz when executing code from ROM and 1 MHz when it hit the RAM. Apparently, at least some of the bus was operating at 4 bits instead of 8. Go figure.
The 1982 machine was meant to head off the Sinclair ZX and was set to sell for about £200. However, the machine didn’t catch on like the Sinclair and undersold it by around 20 times with a paltry quarter of a million units.
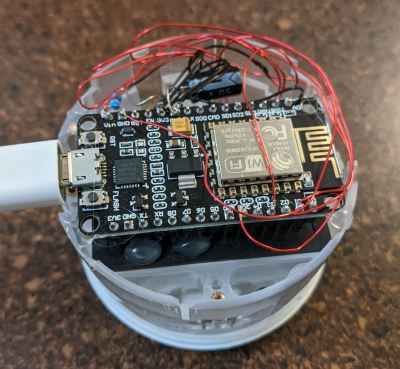
If you have a Hello Sense sleep tracking device lying around somewhere in your drawer of discards, it can be brought back to life in a new avatar. Just follow [Alexander Gee]’s instructions to resurrect the Hello Sense as an IoT air quality data-logger.
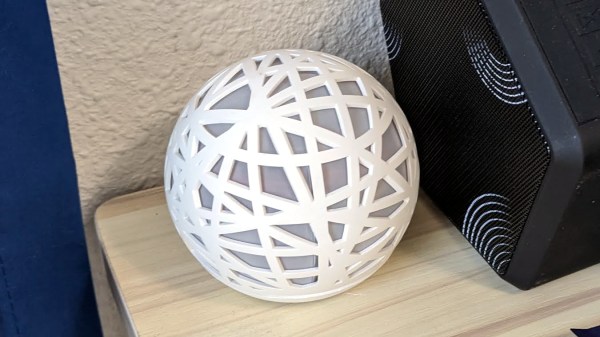
In 2014, startup “Hello” introduced the Sense, an IoT sleep tracking device with a host of embedded sensors, all wrapped up in a slick, injection molded spherical enclosure. The device was quite nice, and by 2015, they had managed to raise $21M in funding. But their business model didn’t seem sustainable, and in 2017, Hello shut shop. Leaving all the Sense devices orphaned, sitting dormant in beautifully designed enclosures with no home to dial back to.
The original Sense included six sensors: illumination, humidity, temperature, sound, dust / particulate matter on the main device, and motion sensing via a separate Bluetooth dongle called the Pill. [Alexander] was interested in air quality measurements, so only needed to get data from the humidity/temperature and dust sensors. Thankfully for [Alexander], a detailed Hello Sense Teardown by [Lindsay Williams] was useful in getting started.
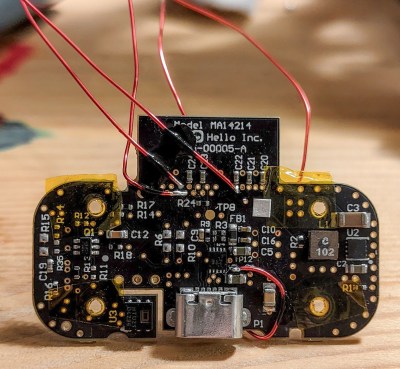
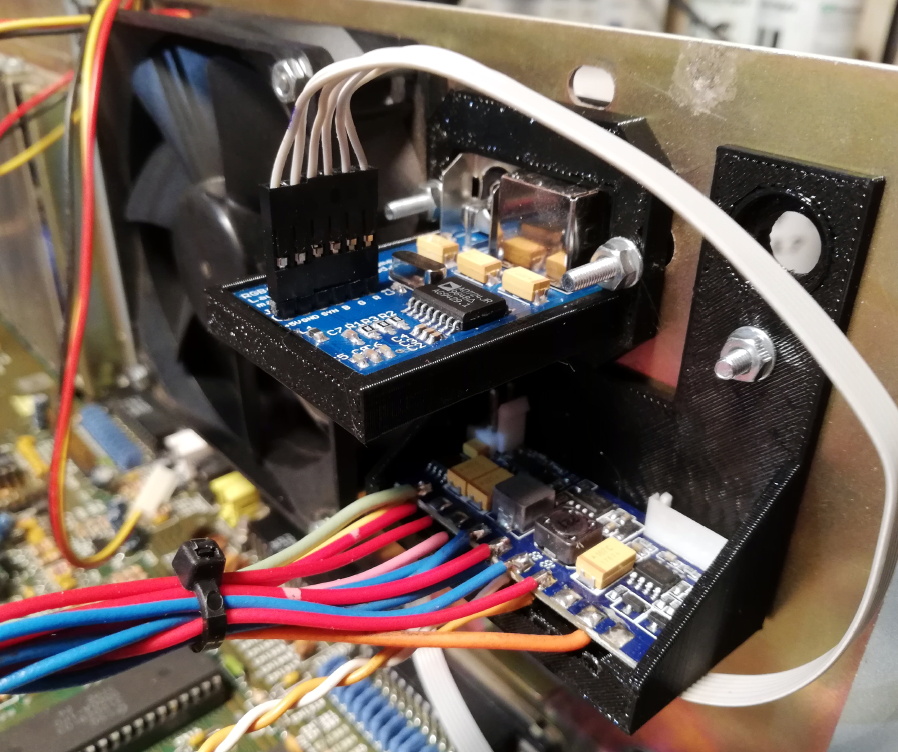
The hardware consisted of four separate PCB’s — power conditioning, LED ring, processor, and sensor board. This ensured that everything could be fit inside the orb shaped enclosure. Getting rid of the LED ring and processor board made space for a new NodeMCU ESP8266 brain which could be hooked up to the sensors. Connecting the NodeMCU to the I2C interface of the humidity/temperature sensor required some bodge wire artistry. Interfacing the PM sensor was a bit more easier since it already had a dedicated cable connected to the original processor board which could be reconnected to the new processor board. The NodeMCU board runs a simple Arduino sketch, available on his Git repo, to gather data and push it online.
Sensor board bodge
NodeMCU
For the online data display dashboard, [Alexander] found a nice solution by [Nilhcem] for home monitoring using MQTT, InfluxDB, and Grafana. It could be deployed via a docker compose file and have it up and running quickly. Unfortunately, such projects don’t usually succeed without causing some heartburn, so [Alexander] has got you covered with a bunch of troubleshooting tips and suggestions should you get entangled.
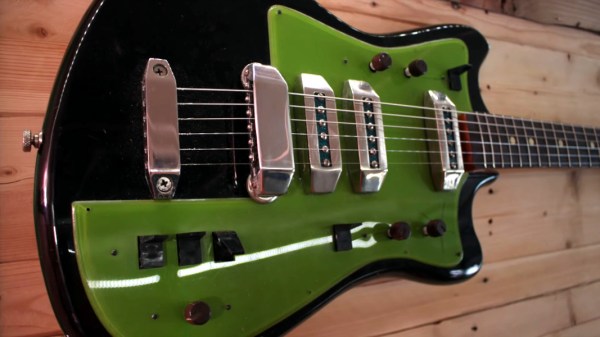
What do you do with a cool-looking misfit guitar that has non-working built-in effects and some iffy design aspects? Do you try to fix it and keep it original, or do you gut it and strut your stuff with new bits from around the shop? This is the conundrum that [Tim Sway] finds himself in with this late 70s/early 80s Formanta Solo II straight out of the USSR. (Video, embedded below.)
[Tim] likes a lot of things about it (and we do, too), especially the acid green pick guard, the sparkly pickups, and the beefy bridge that lets him set the string spacing individually, on the fly. It even has a built-in phaser and distortion, but those aren’t working and may never have worked that well at all.
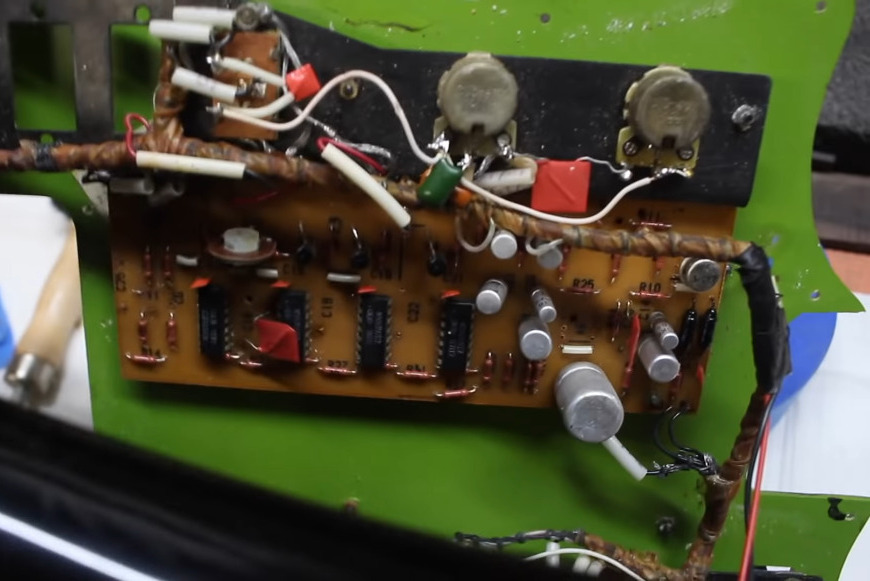
The non-working effects guts.
As you can see in the video below, [Tim] has already spent a few hours making it playable and a little more palatable in order to figure out what to do with it electronics-wise. He started by making the 9 V compartment big enough to actually fit a battery inside, and drilled out bigger holes for new tuners.
Interestingly, these guitars had a 5-pin DIN receptacle instead of a 1/4″ jack. [Tim] bought an adapter just in case, but once someone dug up a schematic and sent it over, he decided to rewire it with a 1/4″.
For all of its plus sides, [Tim] doesn’t like the headstock on this thing at all and found the neck to be too chunky for the modern guitarist, so he cut down the headstock, shaved down the neck a bit, and stained it dark. He also made a new nut out of what looks like rosewood. Then it was on to the more standard stuff — file down the frets and polish them, oil the fretboard, and clean up the body.
The point of this exercise is to make a usable guitar for the modern musician. As [Tim] says, this is not a particularly valuable guitar, nor is it rare, and it wasn’t built that well to begin with. One of the issues is the switches — they’re kind of light and cheesy feeling, and one of them is directly in the strum path. Will [Tim] change those out but fix the original effects, or will he make the thing completely his own? We wait with bated breath.
The first issue that needed sorting out was the broken case. This Amiga must have had one wild ride, as there were several nasty cracks in the front panel and whole chunks had been broken off. We’ve seen [Drygol] repair broken computer cases before, but it seems like each time he comes up with some new tricks to bring these massacred pieces of plastic back to like-new condition. In this case plastic welding is used to hold the parts together and fill in the gaps, and then brass mesh is added to the backside for strength. The joints are then sanded, filled in with polyester putty, and finally sprayed with custom color matched paint. While he was in the area, he also filled in a hole the previous owner had made for a toggle switch.
Before
After
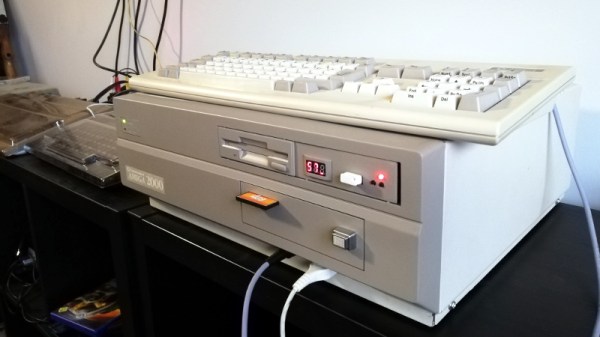
Then [Drygol] moved onto the internals. Some of the traces on the PCB had been corroded by a popped battery, a socket needed to be replaced, and as you might expect for a machine of this vintage, all of the electrolytic capacitors were suspect and needed to go. Finally, as the system didn’t have a power supply, he wired in a picoPSU. That got the 34 year old computer back up and running, and at this point, the machine was almost like new again. So naturally, it was time to start with the upgrades and modifications.
Case fan, video adapter, and picoPSU.
[Drygol] added an IDE interface and connected a CompactFlash adapter as the computer’s primary drive. For the secondary, he installed a GoTek floppy drive emulator that lets you replace a mountain of physical disks with a USB flash drive full of images. Between the two, all of the computer’s storage needs are met with nary a moving part.
The emulator was given its own 3D printed front panel to fit with the Amiga’s visual style, and he also printed out a holder for the RGB4ALL S-Video/Composite adapter installed on the rear of the machine. To help keep all this new gear cool, he finished things off with a new case fan.
[Jan Derogee] pulled out his phonograph the other day to hear the 100+ year old wax cylinder warble of “It’s a Long Way to Tipperary”, but couldn’t locate the reproducer — this is the small circular bit that holds the stylus and transfers the groove-driven vibrations to the center of a thin diaphragm, which vibrates into the sound horn. It’s easily the most important part of a cylinder phonograph. What do you do when you lose your reproducer? You could search ebay for a replacement, but that wouldn’t be nearly as fun as reproducing your reproducer yourself.
Traditionally, diaphragms were made from mica or celluloid, and the Edison disk phonograph used seven layers of shellac-soaked rice paper. Reproducers typically have a Dagwood sandwich of gaskets surrounding the membrane, but they don’t have to be so convoluted to work — a single strong membrane will do just fine. Just ask [Jan], who made a new reproducer with a 3D-printed case, a hand-pulled glass stylus, and a disposable aluminum foil pan for the diaphragm.
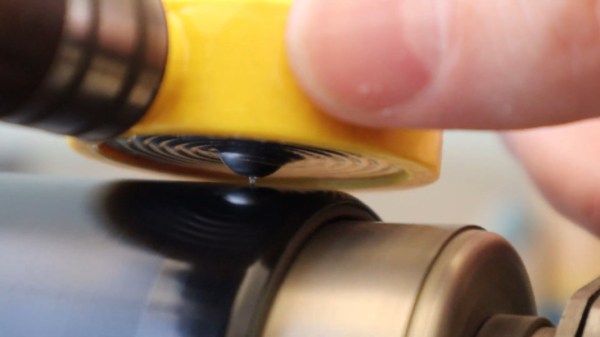
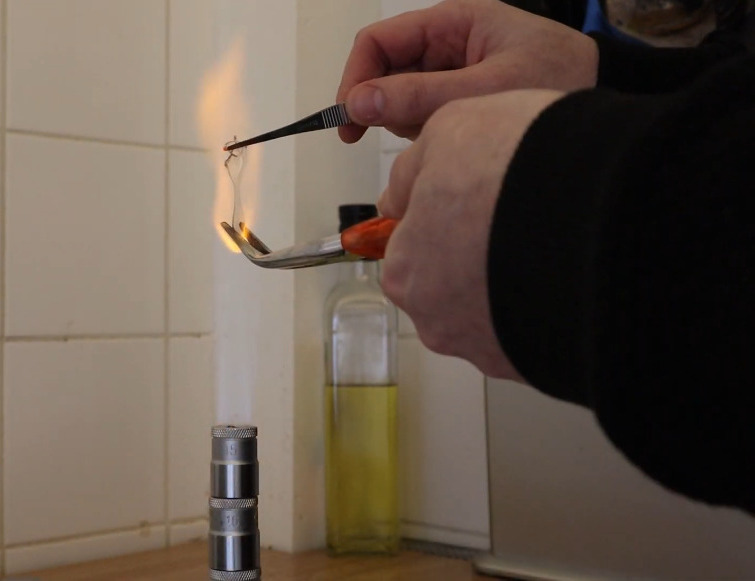
It’s difficult for us to say which part looks more fun — stretching the glass shard over a gas kitchen stove with the flame focused by a stack of wrench sockets, or cutting up a bicycle inner tube and using a car jack to press the aluminum into shape against a 3D-printed mold. The whole video is awesome and you can check it out after the break.
As [Jan] notes in the video and on the project site, the glass stylus should really be made from borosilicate because it’s harder than regular soda lime glass (that’s why they often make vaccine vials out of it). Regular glass will work and takes much less time and gas to reach the pull-able stage, so that’s what [Jan] used in the video, but it will wear out much more quickly. Fortunately, this was a temporary solution, because as soon as [Jan] made a replacement, the missing reproducer showed up.