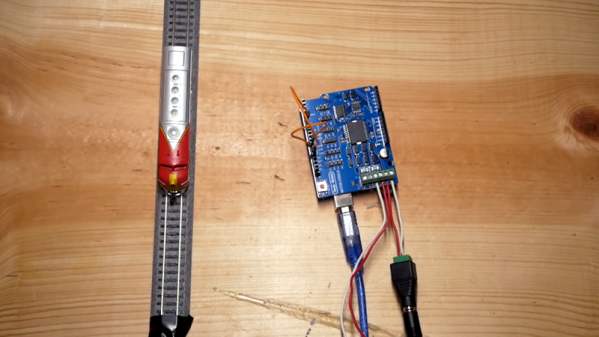
Certain hobbies come in clusters. It isn’t uncommon to see, for example, ham radio operators that are private pilots. Programmers who are musicians. Electronics people who build model trains. This last seems like a great fit since you can do lots of interesting things with simple electronics and small-scale trains. [Jimmy] at the aptly-named DIY and Digital Railroad channel has several videos on integrating railroad setups with Arduino. These range from building a DCC system for about $45 (see below) to a crossing signal.
There are actually quite a few basic Arduino videos on the channel, although most of them are aimed at beginners. However, the DCC — Digital Command and Control — might be new to you if you are a train neophyte. DCC is a standard defined by the National Model Railroad Association.
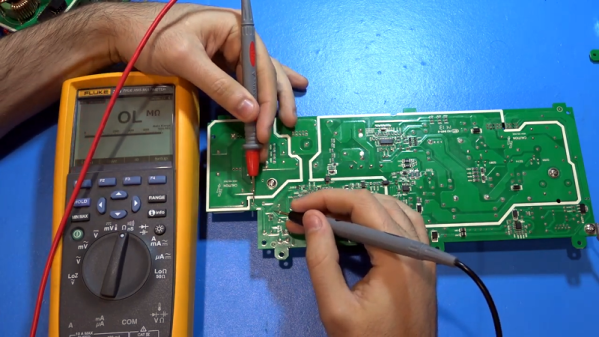
[TheSignalPath] wanted to repair a broken Instek PSW80-40.5 because it has a lot of output for a programmable power supply — 1,080 watts, to be exact. This isn’t a cheap supply — it looks like it costs about $2,200 new. The unit wasn’t working and when he took it apart, he found a nasty surprise. There is a base PCB and three identical power supply modules, and virtually no access without disconnecting the boards. He continued the teardown, and you can see the results in the video below.
Each of the power supply modules are two separate PCBs and the design has to account for the high currents required. The power supply is a switching design with some filtering on the motherboard. One of the boards of the power supply module rectifies the incoming line voltage to a high DC voltage (about 400 volts). The second board then does DC to DC conversion to the desired output.
The portable air compressors sold at big box hardware stores like Lowe’s and Home Depot are perfectly suited for the jobs they’re advertised for: namely throwing some nails into the wall or filling tires. But if you try to respray your car with that $50 Black Friday pancake air compressor, you’re going to have a bad day. The relatively small amount of air they hold is almost guaranteed to be contaminated with oil and moisture, making it unsuitable for painting or even just blowing the dust out of electronics.
But all is not lost. [Stephen Saville] has done an excellent job documenting his work to turn these low cost homeowner-grade air compressors into something suitable for spraying auto body panels. But even if you aren’t looking to put a sick pearlescent finish on the family minivan, these tips are worth checking out. From increasing the usable volume of air in the system to separating out contaminants, these modifications can unlock a whole new world of pneumatic projects.
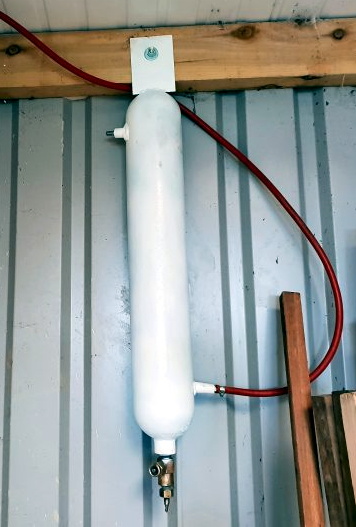
The big one (literally and figuratively) is the swirl tube [Stephen] builds out of an old CO2 cylinder. The idea is that this will centrifugally clean the air, not unlike a cyclonic dust separator. As the air enters the top of the cylinder and spins around, contact with the cold metal will cause any moisture to condense out and collect down at the bottom. Oil and other particles in the air should also get spun out, leaving a central column of cleaner air. The collected water and contaminants at the bottom can be occasionally purged out by way of the cylinder’s original valve.
With a source of clean and dry air sorted, [Stephen] next wanted a way to get it around his shop. Using scrap metal pipes he puts together a system that not only gives him air where he needs it, but also increases the volume of compressed air he has available. By using large smooth metal pipes rather than something like flexible rubber hose, the plumbing puts very little resistance on air flow. The pipes therefore can be considered something of an extension of the compressor’s primary tank.
In the video after the break, [Stephen] shows off his new air system by laying down a very nice looking coat of paint on a car hood, but he also goes through the whole build process if you want to see the nuts and bolts of his system. He gives some great tips on welding and working with dissimilar metals which are worth the price of admission alone.
We’ve seen a lot of unique large-format scrolling message boards on these pages, but most of them use some sort of established technology – LEDs, electromechanical flip-dots, and the like – in new and unusual ways. We’re pretty sure this air-bubble dot matrix display is a first, though.
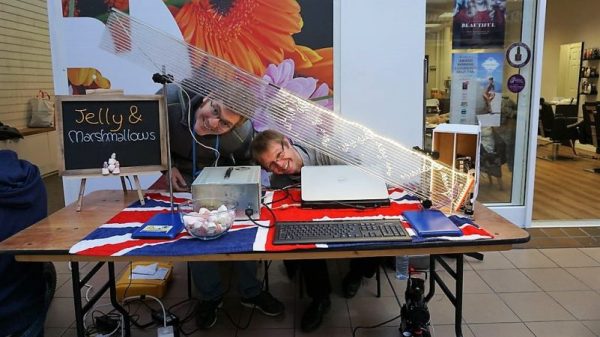
While it may not be destined for the front of a bus or a train station arrivals and departures board, [jellmeister]’s bubble display shows some pretty creative thinking. It started with a scrap of multiwall polycarbonate roofing – Corotherm is the brand name – of the type to glaze greenhouses and other structures. The parallel tubes are perfect for the display, although individual tubes could certainly be substituted. A plastic end cap was fabricated; air nozzles in each channel were plumbed to an air supply through solenoid valves. An Arduino with a couple of motor driver hats allows pulses of air into each channel to create reasonably legible characters that float up the tube. The video below shows it in use at a Maker Faire, where visitors could bubble up their own messages.
It took some tweaking to get it looking as good as it does, but there’s plenty of room for improvement. We wonder whether colored liquid might help, or perhaps adding a Neopixel or even a laser to each channel to add some contrast. Maybe something to cloud the water slightly would help; increasing the surface tension with a salt solution might make the bubbles more distinct. We doubt it’ll ever have the contrast ratio of a flip-dot display, but it certainly has a charm all its own.
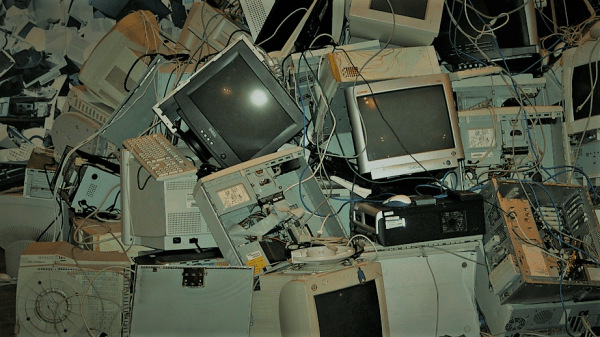
It seems crazy having to explain what a piece of technology was like to someone who is barely fifteen years your junior, but yet we have reached that point when it comes to CRTs. There may still be remnants of CRT televisions and monitors left out in the wild, however, the chances that a kid preparing to enter high school has encountered one is slim. While there may be no substitute for the real thing, there is this raw video from [Glenn] who shared his tour of the Sony Trinitron assembly line in the early 2000s.
Sony Electronics’ cathode ray tube manufacturing facility was located alongside headquarters in Rancho Bernado, CA. The facility was shuttered in 2006 when Sony transitioned wholly onto digital displays like the flat-panel LCD line of Bravia televisions. [Glenn]’s video shows that the manufacturing process was almost entirely automated from end to end. A point that was made even more clear with the distinct lack of human beings in the video.
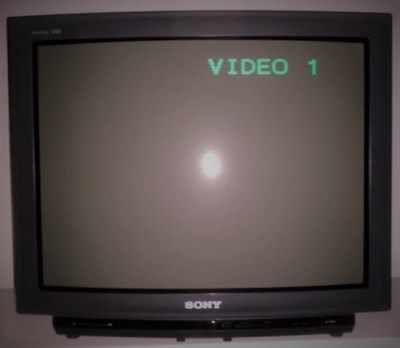
The Trinitron line of televisions first appeared in 1968. At a time where most manufacturer’s were offering black and white picture tubes, Sony’s Trinitron line was in color. That name carried through until the end when it was retired alongside tube televisions themselves. Sony’s focus on technological innovation (and proprietary media formats) made them a giant in the world of consumer electronics for over forty years in the United States, but in the transition to a digital world saw them seeding market share to their competitors.
A quick word of warning as the video below was shot directly on Sony’s factory floor so the machinery is quite loud. Viewers may want to reduce the volume prior to pressing play.
We live in a Golden Age of single-board computers. There was a time when a portable computer that was any good was a relatively rare and expensive device, certainly not something you could expect to replicate for yourself. A Psion, or later a Palm or perhaps a WinCE device would have been a lot more than an impulse purchase, and could not easily have been replicated using the components then available to the experimenter.
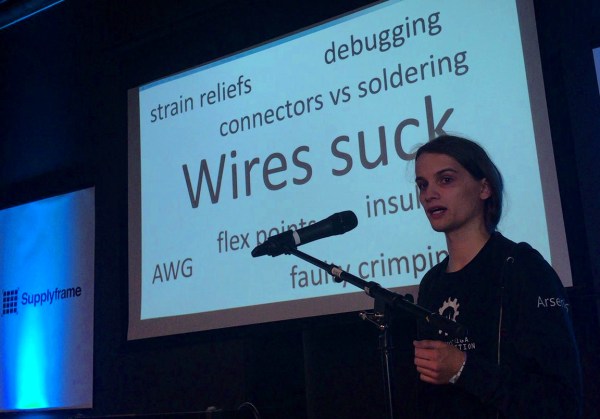
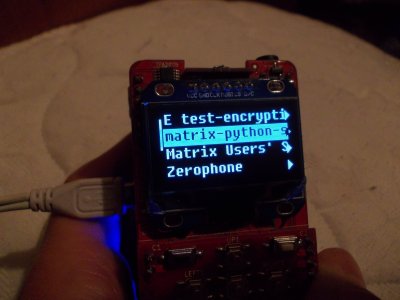
Thanks to spin-offs from technology developed for set-top boxes and mobile phones we can now buy any one of a pile of different boards that have almost equivalent power to a desktop computer. The experimenter can leverage that computing power to create their own small portables. Zerophone creator Arsenijs Picugins spoke about the tricky parts of designing a LInux portable at the recent Hackaday Superconference. You’ll find his talk below the break, which makes for a fascinating primer for those tempted to walk in his footsteps.
Minor Details of Portables are the Majority of the Build
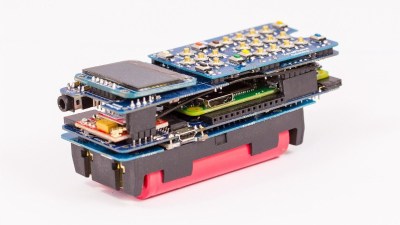
In theory, it’s pretty easy to use one of these boards to make a portable computer. Take one of the smaller members of the Raspberry Pi or Beaglebone families, add a battery and a display, and away you go. But as always the devil is in the detail, and for a truly successful build there are a wealth of variables to attend to.
In his talk, Arsenijs takes us through the challenges of power supplies, connectors, and interfaces. In particular there is considerable challenge to running an SBC from a battery small enough to be portable, as efficiency concerns and the ability to easily recharge make for a critical set of choices. Then we learn of another pitfall, that of using USB as a default interface. Power loss in converting 5V to 3.3V that is inconsequential for a desktop computer is a battery-killer in a small device, so we’re pointed at the array of alternatives.
If you’ve been tempted by one of those cheap Raspberry Pi touch screens, you’ll certainly understand that while a full desktop on a screen the size of a playing card looks cool, the reality is almost unusable. Your device will require a user interface that fits its form factor, which from his experience, Arsenijs suggests is best achieved through the medium of buttons rather than a touchscreen on smaller screens. There are a variety of UI and display libraries he introduces us to which make the whole process significantly easier.
Arsenijs’ Zerophone Raspberry Pi smartphone was a finalist in the 2017 Hackaday Prize, and remains an exemplary portable project from which many others can gain inspiration. We are privileged that he was able to bring his experience to speak at the Superconference, and his talk makes for a fascinating watch.
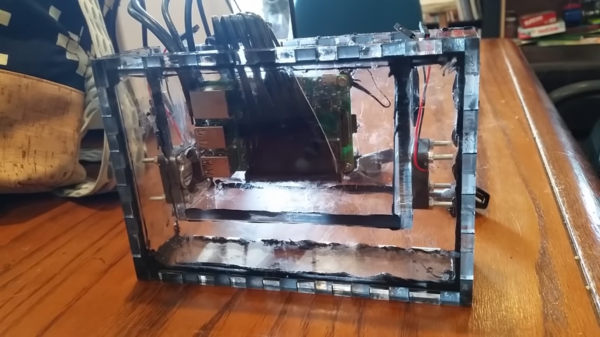
Liquid cooling is a popular way to get a bit of extra performance out of your computer. Usually this is done in desktops, where a special heat sink with copper tubing is glued to the CPU, and the copper tubes are plumbed to a radiator. If you want dive deeper into the world of liquid cooling, you can alternatively submerge your entire computer in a bath of mineral oil like [Timm] has done.
The computer in question here is a Raspberry Pi, and it’s being housed in a purpose-built laser cut acrylic case full of mineral oil. As a SoC, it’s easier to submerge the entire computer than it is to get a tiny liquid-cooled heat sink for the processor. While we’ve seen other builds like this before, [Timm] has taken a different approach to accessing the GPIO, USB, and other connectors through the oil bath. The ports are desoldered from the board and a purpose-built header is soldered on. From there, the wires can be routed out of the liquid and sealed off.
One other detail used here that we haven’t seen in builds like this before was the practice of “rounding” the flat ribbon cable typically used for GPIO. Back in the days of IDE cables, it was common to cut the individual wires apart and re-bundle them into a cylindrical shape. Now that SATA is more popular this practice has been largely forgotten, but in this build [Timm] uses it to improve the mineral oil circulation and make the build easier to manage.