Emulating A 6502 In ROM

The Gigatron TTL microcomputer is an exercise in alternative history. What if, by some bizarre anomaly of invention and technology, the 1970s was not the age of the microprocessor? What if we could have had fast, high density ROM and RAM in the late ’70s, but the ability to put a microprocessor in silicon was beyond our comprehension? Obviously we would figure out a way to compute with this, and the Gigatron is the answer. It’s a computer from that era that’s designed with a CPU that’s entirely made of microcode.

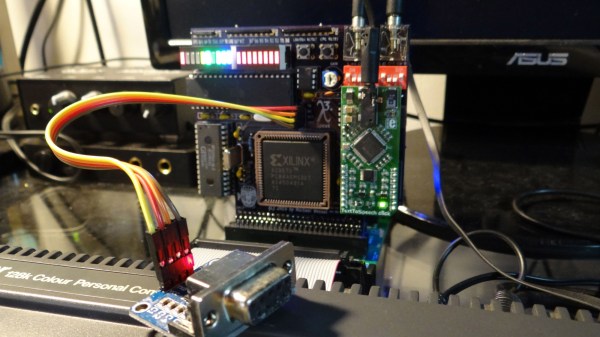
While the Gigatron is a popular product in the world of weird electronics kits, the creator, [Marcel van Kervinck], is going beyond what anyone thought possible. Now the Gigatron is emulating a 6502 processor, the same CPU found in the Apple II and almost every other retrocomputer that isn’t running a Z80.

There’s a thread over on the Gigatron forums for this. Although it’s still very early in development, the Gigatron can now run 6502 machine code,  and in doing so the Gigatron is now the only dual-core computer without a CPU. All of the addressing modes have been implemented, along with half of the instructions and most of the status flags. All of this interacts with the Gigatron’s existing video subsystem, and all code can switch in between the Gigatron’s virtual CPU and 6502 code with just a few instructions.

This opens the door to a wide variety of software that’s already written. MicroChess is possible, as is MS Basic. This is great; the biggest downside of the Gigatron is that there was no existing code for the machine when it was first designed. That changed when the Gigatron got a C compiler, but now somehow we’ve got a logic chip implementation of a 6502 in far fewer chips than are found in an Apple II. It’s not fast ( about 1/8th the speed of a 1 MHz 6502), but in the video below you can see a munching squares demo.

Continue reading “Emulating A 6502 In ROM” →

Bit Preserve: A Sanctuary For Modern Captures Of Vintage Schematics

Vintage parts may be documented, but that doesn’t mean they’re particularly useful or accessible. If the phrase “eyestrain from unsearchable, badly-scanned PDF datasheets” makes your lower eyelid twitch in sympathy, read on.

While [Bald Engineer] was researching how he might make a portable Apple II, he was delighted to find that the vintage components he needed to examine were documented. However, he became frustrated with the seemingly endless number of poor quality PDF scans and the inability to search effectively. He decided to re-create the entire Apple IIgs schematic in KiCad, and in the process the Bit Preserve project was born. The goal is to act as a safe haven for modern and editable versions of vintage electronic schematics. The GitHub repository can be found here.

[Bald Engineer] talks a bit about his Apple II project, as well as the ideas behind the Bit Preserve project in his KiCon 2019 talk “Preserving History with KiCad”. KiCon was wild, and we have loads of photos of the projects and details so be sure to check it out.

The Benefits Of Restoring A C64 With A Modern FPGA Board

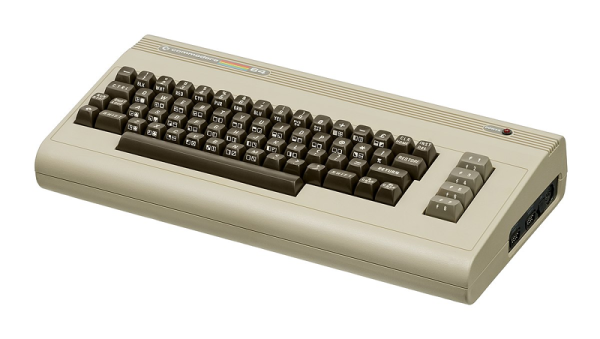
The Commodore 64 was the highest selling computer of all time, and will likely forever remain that way due to the fragmentation of models in the market ever since. Due to this, it’s hardly surprising that it still has a strong following many years after its heyday. This means that the avid restorer has a wide range of parts and support available at the click of a button. [DusteD] is just one such person who had a busted-up C64 laying around, and decided to make it a project.

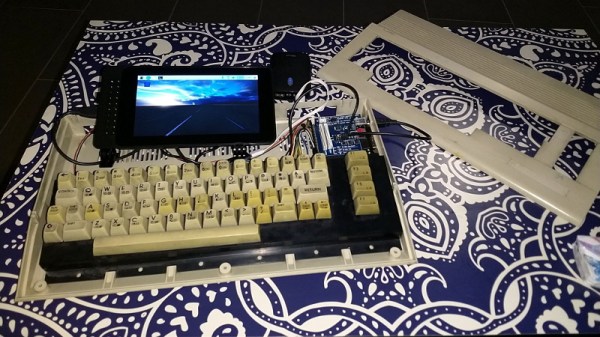
[DusteD] wanted to reuse the original case, and decided it should remain a Commodore 64 after an initial attempt at a mini-ITX swap went awry. Desiring a reliable machine, an Ultimate64 FPGA board was selected to replace the original faulty motherboard. This has the benefit of being hardware compatible with the classic C64, while allowing [DusteD] to tinker and program to his heart’s content, without having to worry about blowing up valuable original parts. It also provides several interesting modern features, like HDMI output, USB, and even Ethernet connectivity. This allows one to experiment with the platform without the hassles of all the inherent limitations of 1980s technology.

As a fan of the classic SID sound chip, [DusteD] was also highly interested in the audio output of the Ultimate64. Recordings were made of the emulated output from the FPGA, as well as the sound output from a real SID installed in the board, both through the mixed output and directly from the chip via a SIDTAP. Those interested can download the 800MB of recordings and compare the output; there’s a summary of the differences noted listed on the site as well.

[DusteD] makes a great argument for the benefits of building up a C64 rig in this way. It’s a great way to get started for those eager to explore the world of Commodore’s 8-bit hardware without the hassles and expenses of buying all the real gear. As it stands, the C64 aftermarket is so advanced now, that you can build an entirely new machine from scratch if you so desire. Go forth and enjoy!

VR On The 6502

The MOS Technology 6502 was one of the more popular processors of the 1980s. It ran the Commodore 64, the NES in a modified form, and a whole bunch of other hardware, too. By modern standards, it’s barely fit to run a calculator, but no matter – [Nick Bild] built a VR game that runs on the retro CPU anyway!

[Nick]’s project is built on his 6502 computer, the Vectron 64. Being a breadboard build, it’s easy to modify things and add additional hardware, and that’s precisely what he did. The VR system uses two 320 x 240 LCD screens, one for each eye. These are controlled over SPI, but the humble 6502 simply doesn’t have the speed to clock out enough bits fast enough for a video game. Instead, additional hardware is added to generate pulses to run the screens. There’s a bunch of other neat hacks as well that help make the game playable, like overclocking the CPU to 1.75 MHz and drawing common elements to both screens at the same time.

To test out the VR system, [Nick] coded a basic Asteroids VR game. It’s not really practical to demonstrate the game without the hardware, but we’d love to try it out. There’s something compelling about a low-resolution VR game with 8-bit graphics, and we hope to see the concept further developed in future.

More grunt would make this project even more capable, and for that, a 6502 running at 20MHz could come in handy. Video after the break.

[Thanks to Fred Gimble for the tip!]

Continue reading “VR On The 6502” →

A TTL CPU, Minimising Its Chip Count

By now we should all be used to the astonishing variety of CPUs that have come our way created from discrete logic chips. We’ve seen everything from the familiar Von Neumann architectures to RISC and ever transport-triggered architecture done in 74 TTL derivatives, and fresh designs remain a popular project for many people with an interest in the inner workings of a computer.

[Warren Toomey]’s CSCvon8 is an interesting machine that implements an 8-bit computer with a 64-bit address space using only 17 chips, and without resorting to any tricks involving microcontrollers. It implements a fairly conventional Von Neumann architecture using TTL with a couple of tricks that use modern chips but could have been done in the same way in decades past. Instruction microcode is stored in an EEPROM, and the ALU is implemented in a very large EPROM that would probably once have been eye-wateringly expensive. This in particular removes many discrete TTL chips from the total count, in the absence of the classic 74181 single-chip part. To make it useful there is 32k each of RAM and EEPROM, and also a UART for serial access. The whole is brought together on a neat PCB, and there is a pile of demo code to get started with. Everything can be found in the project’s GitHub repository.

At the start of this article we mentioned a couple of unconventional TTL CPUs. The transport triggered one we featured in 2017, and the RISC one is the Gigatron which has appeared here more than once.

The OS/2 Operating System Didn’t Die… It Went Underground

One problem with building things using state-of-the-art techniques is that sometimes those that look like they will be “the next big thing” turn out to be dead ends. Next thing you know, that hot new part or piece of software is hard to get or unmaintained. This is especially true if you are building something with a long life span. A case in point is the New York City subway system. Back in the 1990s the transit authority decided to adopt IBM’s new OS/2 operating system. Why not? It was robust and we used to always say “no one ever got fired for buying IBM.”

There was one problem. OS/2 was completely eclipsed by other operating systems, notably Windows and — mostly — has sunk from the public view. [Andrew Egan’s] post covers just how the conversion to a card-based system pushed OS/2 underground all over the Big Apple, and it is an interesting read.

Continue reading “The OS/2 Operating System Didn’t Die… It Went Underground” →

Reverse Engineering The Sound Blaster

The first sound card to output PCM audio — the kind you need for audio samples — wasn’t the Sound Blaster. The AdLib Music Synthesizer Card could output PCM audio over software. The AdLib card also cost $200 at the time of its release. This was too much for some, and in time the Creative Labs Sound Blaster was released for the rock-bottom price of $125. This was a more capable card, and in the years since prices on the used market have gone through the roof. In 1990, you could buy a Sound Blaster for a Benjamin and a half, in 2019, prices on eBay are reaching and exceeding $400.

With the prices of used cards so high, we start to get into the territory where it starts to make sense to reverse engineer and re-manufacture the entire card. This hasn’t been done before, but that’s no matter for [Eric Schlaepfer], or [@TubeTimeUS]; he’s done crazier projects before, and this one is no different.

In reverse-engineering the Sound Blaster, there are a few necessary components. The Sound Blaster had an OPL2 chip for sound synthesis, which you can get through various vendors. The trick, though, is the microcontroller. This is really just an 8051 with a custom mask ROM.

The goal of this project is actually just to dump the ROM on the Intel 8051-alike microcontroller. This is something that’s relatively commonly done in high-tech labs, and luckily the Bay Area has [John McMaster], the guy who will take you into his lab and strip a die from its epoxy. Looking at the chip under the microscope, it was discovered the mask ROM on this chip was an implant ROM, with the ones and zeros represented by invisible ions in the substrate itself. There was no hope of reverse-engineering this chip from a purely visual inspection, but there was a sense amplifier on one of the data lines. By probing this sense amplifier while running through the address space, [Eric] was able to dump all the bytes of the ROM one bit at a time.

However, and there’s always a however, there are clone Sound Blasters out there, usually from China, and you can dump these chips if you’re lucky enough to get your hands on one. [Eric] reached out to the community and found these clone microcontrollers didn’t have the code protect bit set; dumping these was easy. This ROM was compared to the work [Eric] did with the sense amplifier, and after figuring out the order of the bits, it was found the code matched. The code was successfully cloned, and now new Sound Blasters can be made. Don’t tell eBay that, because someone is trying to sell one of [Eric]’s clone cards for $180.

All the code, files, materials, and everything needed to clone a Sound Blaster can be found in [Eric]’s GitHub, although there are a few open questions as to what’s going on in the Sound Blaster’s microcontroller. There’s a ‘secret’ 512-byte ROM on the die, and no one outside of an Intel NDA knows what it does. This could be used for a manufacturing test, but who knows. Other than that, there are a few features in the code that weren’t used, like previously unknown DSP commands, an ADPCM lookup table, and a routine that plays from SRAM without using DMA. It’s a deep dive into the inner workings of the most popular sound card of all time, and it’s quite simply amazing.