A Z80 Homebrew Console, With A Bit Of Modern Help

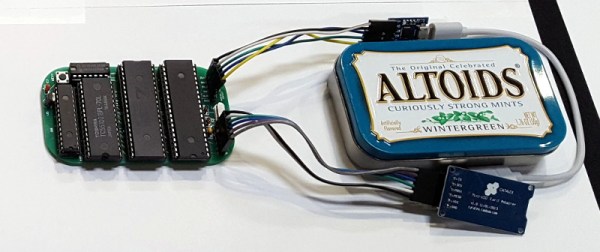
We see a lot of retrocomputing projects here at Hackaday that take devices from the 8-bit era and re-create them in the 21st century. Sometimes they remain period-accurate and stick to all contemporary devices, but in other cases they take full advantage of four decades of advancing technology. [Pkiller]’s Z80 console is one of this later category, creating peripherals for the classic CPU using microcontrollers in the place of the banks of 74 logic or ULA chips that might have graced a 1980s machine.

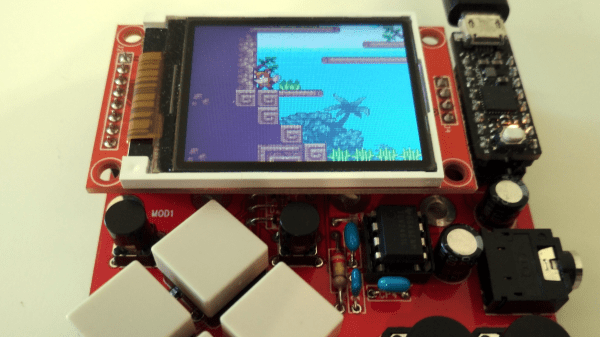
The video generation hardware produces a PAL signal using an interesting technique involving two RAM buffers. An ATmega644 microcontroller composites a single frame into one of the buffers while another ATmega644 is generating the previous frame of video from the other buffer. On each change of frame the buffers are switched between the two microcontrollers, requiring some extra 74 logic chips. Another AtMega chip provides the Z80 with I/O interfacing, and the sound comes via another dual-buffer microcontroller setup and a quick return to classic hardware with a YM3438 FM synthesis chip. The result can be seen in the video below, and would have not looked out of place in a late-’80s or even early-’90s living room.

Some people might ask why so much trouble should be gone to in the pursuit of a project like this one, but to do so is to miss the point. Sure, a Sega Master System can be had from the usual sources, but in creating  project such as this one the builder has to truly understand the technologies such as PAL generation or the internals of a Z80 in great detail. The result while it is undeniably impressive is almost secondary to the process of reaching it.

Continue reading “A Z80 Homebrew Console, With A Bit Of Modern Help”

Make Your Commodore 16 64k, But Not A Commodore 64

The Commodore 16 was a budget home computer from the mid 1980s, the entry-level model in a wider range of machines. As its name suggests it only has 16k of memory in keeping with its budget status, and while it has the rest of the hardware necessary to run software intended for its 64k stablemates, that 16k is impossible to expand without modifying the machine. Should you have a ’16 in your collection this is not a particularly arduous process, and Tynemouth Software have gone into great detail over how it can be achieved.

As was quite common in machines of the period, the address lines for the RAM area above the fitted 16k are not wired to disable it when those addresses are selected, so the same 16k appears mirrored three times in the space between it and the 64k limit. Thus simply plugging in a 64k cartridge would result in the top 48k being unusable, and some means of disabling or supplanting the internal chips was called for. Contemporary upgrades required pin or track snipping, but as they go on to show us there are some less ugly alternatives both permanent and reversible. Whichever you might favor they all at least don’t carry the huge cost hurdle in 2019 that they might have been when the machine was new. Sadly even though their cases may be similar the resulting machine will not be a Commodore 64, not even a new one.

Long-time Hackaday readers will know that the hardware designer for these machines was our Hackaday colleague [Bil Herd], and all followers of Commodore and his work should read his account of the CES trade show at the heady height of Commodore’s  fame.

World’s Oldest Computer Festival Is This Weekend

There was a time when owning a home computer was kind of a big deal. In the days before the popularization of the Internet, so-called “computer shows” were the best way to meet with others to swap advice, information, and hardware. Of course today, things are very different. The kind of people who are building their computers just buy the parts online, and everyone else is probably using a $200 laptop from Walmart that isn’t worth spending the time or money on to upgrade.

Small sampling of the talks at TCF 2019

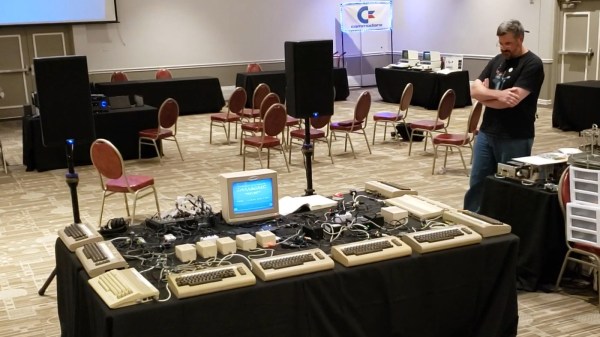
So while the Trenton Computer Festival (TCF) may have started in 1976 as a way for people to buy early computers like the Altair 8800, over the years it has morphed into something much closer to the modern idea of a “con”. Those who visit the 44th TCF on March 23rd at the College of New Jersey will likely spend most of their time at the festival attending the 40+ talks and workshops that will be happening in a span of just six hours. But anyone who’s got some cash to burn can still head over to the flea market area where they’ll be able to buy both modern and vintage hardware.

Talks run the gamut from Arduino to quantum computing, and if you don’t see something that piques your interest in this year’s program, one might wonder how you found yourself reading Hackaday in the first place. If you manage to find some spare time between all the talks, the New Jersey chapter of the The Open Organisation Of Lockpickers (TOOOL) will be there giving a hands-on lock picking class, and if you don’t mind taking the crash course, you can even get your ham radio license. All for the princely sum of just $20 at the door.

In fact, there’s so much going on at TCF that it can be somewhat overwhelming. As I found out during my visit last year, the number of simultaneous events means you’ll almost certainly have some difficult decisions to make. I’ll be making the trip out to the College of New Jersey campus again this year for TCF, and will have plenty of Hackaday stickers and buttons to give out to anyone who manages to stop me while I dash between talks.

Vintage Atari Becomes Modern Keyboard

The modern keyboard enthusiast is blessed with innumerable choices when it comes to typing hardware. There are keyboards designed specifically for gaming, fast typing, ergonomics, and all manner of other criteria. [iot4c] undertook their own build for no other reason than nostalgia – which sounds plenty fun to us.

An Arduino Leonardo is pressed into service for this hack. With its USB HID capabilities, it’s perfectly suited for custom keyboard builds. It’s built into a working Atari 65XE computer, and connected to the keyboard matrix. The Keypad and Keyboard libraries are pressed into service to turn keypresses on the 80s keyboard into easily digseted USB data.

There’s plenty of room inside the computer for the added hardware, with the USB cable neatly sneaked out the rear. [iot4c] notes that everything still works and the added hardware does not cause any problems, as long as it’s not used as a computer and a keyboard at the same time.

It’s possible to do a similar hack on the Commodore 64, too. If you’re doing tricky keyboard builds yourself, you know where to send ’em.

The MiniITX Retro System

There are hundreds of modern, retrocomputing projects out there that put ancient CPUs and chips in a modern context. The Neon816 from [Lenore] is perhaps one of the most impressive projects like this we’ve seen. It’s a classic system in a modern form factor, with modern video output, mashed together into a MiniITX motherboard.

The powerhouse of this computer is the Western Design Center W65C816 CPU. This is the second generation of the venerable 6502 CPU, the same chip found in everything from the Commodore 64 to the Apple II to the Nintendo Entertainment System. The 65816 is a 6502 at start-up until you flip a bit in a register, at which time the signalling on the address bus becomes much weirder. We’ve seen some single board computers based on the 65816 before and The 8-Bit Guy has a few ideas to build a computer around this CPU, but for the foreseeable future work on that will be trapped in development hell.

Of note, the Neon816 will feature DVI output (I guess technically you can just run the analog signals through the connector), a PS/2 Joystick input, two Atari / Sega joystick ports, MIDI in and out, a PC-style floppy disc connector, and a Commodore serial bus. It’s a hodge-podge of classic retrotainment, all in a single MiniITX motherboard.

The key other feature of the Neon816 is an FPGA, specifically a Lattice XP2 8000 LUT chip that is used for video and audio. This is combined with 1MB of main RAM (looks like a simple SRAM) and 128k of Flash storage for the ROM. There’s also an SD card in there for storage.

Right now, [Lenore] is populating the first prototype board, and we can’t wait to see some video generated with this impressive little system.

3D-Printed Rotary Dial Keypad Is Wonderfully Useless

Right up front, let us stipulate that we are not making fun of this project. Even its maker admits that it has no practical purpose. But this 3D-printed Commodore-style rotary dial keypad fails to be practical on so many levels that it’s worth celebrating.

And indeed, celebrating deprecated technology appears to be what [Jan Derogee] had in mind with this build. Rotary dials were not long ago the only way to place a call, and the last time we checked, pulse dialing was still supported by some telephone central office switchgear. Which brings us to the first failure: with millions of rotary dial phones available, why build one from scratch? [Jan] chalks it up to respect for the old tech, but in any case, the 3D-printed dial is a pretty good replica of the real thing. Granted, no real dial used a servo motor to return the dial to the resting state, but the 3D-printed springs [Jan] tried all returned the dial instantly, instead of the stately spin back that resulted in 10 pulses per second. And why this has been done up VIC-20 style and used as a keypad for Commodore computers? Beats us. It had to be used for something. That the software for the C-64  generates DTMF tones corresponding to the number dialed only adds to the wonderful weirdness of this. Check out the video below.

We’ll hand it to [Jan], he has a unique way of looking at the world, especially when it comes to clocks. We really enjoyed his persistence of phosphorescence clock, and his screw-driven linear clock turns the standard timekeeping UI on its head.

Continue reading “3D-Printed Rotary Dial Keypad Is Wonderfully Useless”

It’s Raining Brand-new Commodore 64s

There’s never been a better time to build your own Commodore 64, apparently. Within a day of each other, we got tipped off on three (3!) separate C64 builds from two different hackers.

This has been made possible by a series of disparate projects that have individually recreated a piece of the full machine. Replacement motherboards exist, like the Ultimate 64 and the C64 Reloaded Mk2. New cases can be had courtesy of Pixelwizard. Even new keyboard bases can be had thanks to the Mechboard 64 project.

[Eric Hill] took all these parts and built his own C64 from scratch. And not content with one, he repeated the process and built another.

These two machines serve as demos for the two different motherboard options. Taken together, they serve to demonstrate how many of the vintage Commodore components have been remanufactured by the fan community: with the exception of the keycaps and possibly some of the silicon, all the parts in both machines are new.

Did we just say “keycaps?” This became the pet project of [Perifractic], who discovered that certain Lego Technic pieces had the same cross-shaped slot as the original Commodore 64 keys. After some experimentation, a full set of Lego keycaps was produced. (YouTube, embedded below.) Far from a thrown-together set of random pieces, the sets are available for order with printed tiles with recreation graphics. And this lets you build a C64 using precisely zero parts that came out of a Commodore factory. It’s a testament to the popularity of the world’s best selling computer that it is now once again possible to build one with brand new parts.

If you want to replicate this feat, [Perifractic]’s website is set up to make ordering everything you need easy. Things have certainly come a long way from the first reproduction cases launched on Kickstarter a few years ago.

[Thanks to Keith O for the tip!]

Continue reading “It’s Raining Brand-new Commodore 64s”