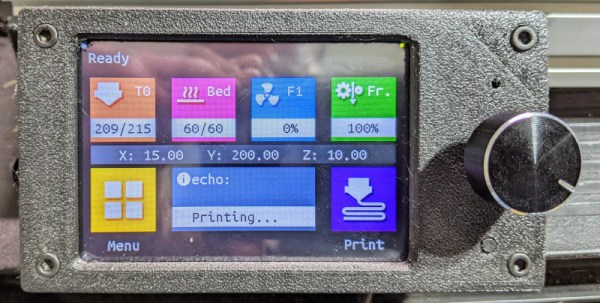
The Pi Zero 2 W Is The Most Efficient Pi

Last week we saw the announcement of the new Raspberry Pi Zero 2 W, which is basically an improved quad-core version of the Pi Zero — more comparable in speed to the Pi 3B+, but in the smaller Zero form factor. One remarkable aspect of the board is the Raspberry-designed RP3A0 system-in-package, which includes the four CPUs and 512 MB of RAM all on the same chip. While 512 MB of memory is not extravagant by today’s standards, it’s workable. But this custom chip has a secret: it lets the board run on reasonably low power.

When you’re using a Pi Zero, odds are that you’re making a small project, and maybe even one that’s going to run on batteries. The old Pi Zero was great for these self-contained, probably headless, embedded projects: sipping the milliamps slowly. But the cost was significantly slower computation than its bigger brothers. That’s the gap that the Pi Zero 2 W is trying to fill. Can it pull this trick off? Can it run faster, without burning up the batteries? Raspberry Pi sent Hackaday a review unit that I’ve been running through the paces all weekend. We’ll see some benchmarks, measure the power consumption, and find out how the new board does.

The answer turns out to be a qualified “yes”. If you look at mixed CPU-and-memory tasks, the extra efficiency of the RP3A0 lets the Pi Zero 2 W run faster per watt than any of the other Raspberry boards we tested. Most of the time, it runs almost like a Raspberry Pi 3B+, but uses significantly less power.

Along the way, we found some interesting patterns in Raspberry Pi power usage. Indeed, the clickbait title for this article could be “We Soldered a Resistor Inline with Raspberry Pis, and You Won’t Believe What Happened Next”, only that wouldn’t really be clickbait. How many milliamps do you think a Raspberry Pi 4B draws, when it’s shut down? You’re not going to believe it.

Continue reading “The Pi Zero 2 W Is The Most Efficient Pi”

A troublesome Triple-Z80 arcade board requires negative voltage for audio output

Vintage Arcade Used Negative Voltage To Turn Volume Up To 11

When [Nicole Express] got her hands on the logic board for the 1986 SNK arcade game Athena, she ran into a rather thorny problem: The board expected to be fed negative five volts! [Nicole]’s analysis of the problem and a brilliant solution are outlined in her well written blog post.

[Nicole]’s first task was to find out which devices need negative voltage. She found that the negative five volts was being fed through a capacitor to the ground pins on the Mitsubishi M151516L, an obscure 12 W audio amplifier. After finding the data sheet, she realized something strange: the amp didn’t call for negative voltage at all! A mystery was afoot.

To fully understand the problem, she considered a mid-1980’s arcade and its cacophony of sounds. How would a manufacturer make their arcade game stand out? By making it louder, obviously! And how did they make their game louder than the rest?

The answer lays in the requirement for negative five volts. The amplifier is still powered with a standard 12 V supply on its VCC pin. But with ground put at -5 V, the voltage potential is increased from 12 V to 17 V without overpowering the chip. The result is a louder game to draw more players and their fresh stacks of quarters.

How was [Nicole Express] to solve the problem? ATX PSU’s stopped providing -5 V after the ISA slot disappeared from PC’s, so that wouldn’t work. She could have purchased an expensive arcade style PSU, but that’s not her style. Instead, she employed a wonderful little hack: a charge pump circuit. A charge pump works by applying positive voltage to a capacitor. Then the capacitor is quickly disconnected from power, and the input and ground are flipped, an equal but negative voltage is found on its opposite plate. If this is done with a high enough frequency, a steady -5 V voltage can be had from a +5 V input. [Nicole Express] found a voltage inverter IC (ICL7660) made just for the purpose and put it to work.

The IC doesn’t supply enough power to get 12 W out of the amplifier, and so the resulting signal is fed into an external amplifier. Now [Nicole]’s arcade game has sound and she can play Athena from the original arcade board, 1986 style!

Arcades are few and far between these days, but that doesn’t mean you can’t introduce your young ones to the joys of dropping a quarter or two, or build a gorgeous oak Super Mario Bros cabinet complete with pixel art inlays. Do you have a favorite hack to share? Be sure let us know via the Tip Line!

Shortwave Radio Picks Up Sideband

With the push to having most of a radio receiver as part of a PC, it might seem odd to have a standalone communication receiver, but [OM0ET] reviews the latest one he picked up, an ATS25. Inside isn’t much: a battery, a speaker, an encoder, and a Si4732 that provides the RF muscle.

It appears the receiver is pretty broadband which could be a problem. [OM0ET] suggests adding selectivity in the antenna or adding an extra board to use as a bandpass filter.

Continue reading “Shortwave Radio Picks Up Sideband”

Books You Should Read: Bil Herd’s Back Into The Storm

It’s a morning ritual that we guess most of you share with us; before whatever work a new day will bring to sit down with a coffee and catch up with the tech news of the moment on Hackaday and other sites. Most of us don’t do many exciting things in our everyday lives, so reading about the coolest projects and the most fascinating new developments provides us with interest and motivation. Imagine just for a moment then that by a twist of fate you found yourself taking a job at the epicentre of the tech that is changing the world,  producing the objects of desire and pushing the boundaries, the place you’d give anything to work at.

This is the premise behind our Hackaday colleague Bil Herd’s autobiographical chronicle of time in the mid 1980s during which he worked at Commodore, maker of some of the most iconic home computers of the day. We follow him through the three years from 1983 to 1986 as hardware lead on the “TED” series of computers including the Commodore 16 and Plus/4, and then the Commodore 128, a dual-processor powerhouse which was arguably the last of the big-selling 8-bit home computers.

It’s an intertwined set of narratives peppered with personal anecdotes; of the slightly crazy high-pressure world of consumer videogames and computing, the fine details of designing a range of 8-bit machines, and a fascinating insight into how the culture at Commodore changed in the period following the departure of its founder Jack Tramiel.

Continue reading “Books You Should Read: Bil Herd’s Back Into The Storm”

Review: Hands On With The Swarm Satellite Network Eval Kit

If you have devices out in the field, you probably want to connect with them. There was a time when that was hard to do, requiring telephone wires or specialized radio gear. Now cellular data is prevalent, but even cellular isn’t everywhere. If you have the cash, you can pay a number of satellite companies to carry your data, but that’s generally pricey and has its own challenges.

The age of satellite constellations is changing that. Of course everyone by now has heard of Starlink which is offering satellite internet via numerous satellites that are much smaller than traditional telecom satellites. But they’re not the only came in town.

A company called Swarm has put up a constellation of 1/4U cube satellites in low orbits. They offer a ground station that uses an omni antenna and a subscription access program for small amounts of data. They sent us a unit to review, and while I haven’t used the system in a real project yet, the kit was pretty impressive.

About Swarm

Swarm tile device
The Swarm Tile is made to mount on a PCB

The Swarm “tile” is a tiny radio that can talk bi-directionally with small satellites in low Earth orbit. The little unit is made to mount on a PCB, can control its power consumption, and talks to your system via a standard 3.3V UART connection. It does, however, require a small antenna and maybe even a smaller antenna for its GPS module. Small, in this case, is about a mid-size handy talkie antenna. There is a half-wave antenna that doesn’t need a ground plane and a shorter antenna that does need a ground plane.

Continue reading “Review: Hands On With The Swarm Satellite Network Eval Kit”

Hands-On: MNT Reforms The Laptop

When we met our contact from MNT in the coffee shop, he was quietly working away on his laptop. Jet black and standing thick it was like an encyclopedia that didn’t quite blend in with the sea of silver MacBook lookalikes on the surrounding tables. After going through all the speeds and feeds we eagerly got our 64 piece driver kit out to open it up and see what made this marvel tick, but when the laptop was turned over it became clear that no tools were needed. The entire bottom of the machine was a single rectangle of transparent acrylic revealing everything from sharp white status LEDs on the bare mainboard to individual 18650 LiFePO4 battery cells in a tidy row. In a sense that’s the summary of the entire product: it’s a real laptop you can use to get work done, and every element of it from design to fabrication is completely transparent.

a view of the inside of a MNT Reform laptop, showing screen and keyboard
The MNT Reform

The device pictured here is called the Reform and is designed and manufactured by MNT, a company in Berlin, Germany (note MNT stands for MNT, it’s not an acronym). The Reform is a fully open source laptop which is shipping today and available via distribution through Crowd Supply. If the aesthetic doesn’t make it clear the Reform is an opinionated product designed from the ground up to optimize for free-as-in-freedom: from it’s solid metal chassis to the blob-free GNU/Linux distribution running inside.

We’re here to tell you that we’ve held one, it’s real, and it’s very well built.

Continue reading “Hands-On: MNT Reforms The Laptop”

Review: Mini AMG8833 Thermal Camera

In our ceaseless quest to bring you the best from the cheaper end of the global electronics markets, there are sometimes gadgets that we keep an eye on for a while because when they appear they’re just a little bit too pricey to consider cheap.

Today’s subject is just such a device, it’s a minimalist infra-red camera using the 8 pixel by 8 pixel Panasonic AMG8833 thermal sensor. This part has been around for a while, but even though any camera using it has orders of magnitude less performance than more accomplished models it has remained a little too expensive for a casual purchase. Indeed, these mini cameras were somewhere above £50 ($70) when they first came to our attention, but have now dropped to the point at which they can be found for somewhere over £30 ($42). Thirty quid is cheap enough for a punt on a thermal camera, so off went the order to China and the expected grey parcel duly arrived.

The interface on this camera is about as simple as it gets.

It’s a little unit, 40 mm x 35 mm x 18 mm, constructed of two laser-cut pieces of black plastic held together by brass stand-offs that hold a PCB between them, and on the front is a cut-out for the sensor while on the rear is one for the 35mm OLED display.At the side on the PCB is a micro USB socket which serves only as a power supply. It’s fair to say that this is a tiny unit.

Applying power from a USB battery bank, the screen comes up with a square colour thermal picture and a colour to temperature calibration stripe to its left. The colours adapt to the range of temperatures visible to the sensor, and there is a crosshair in the centre of the picture for which the temperature in Celsius is displayed below the picture. It’s a very straightforward and intuitive interface that requires no instruction, which is handy because the device has none. Continue reading “Review: Mini AMG8833 Thermal Camera”