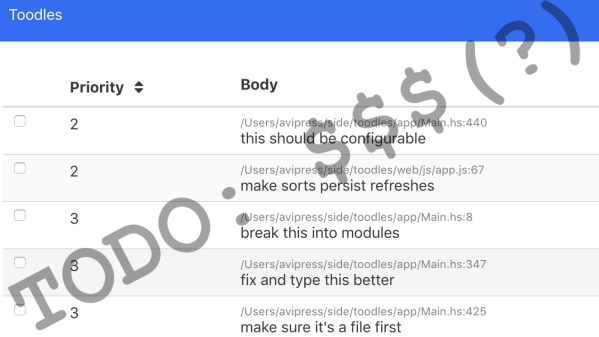
Debugging An Arduino With An Arduino

As every Hackaday reader knows, and tells us at every opportunity in the comments, adding an Arduino to your project instantly makes it twice as cool. But what if, in the course of adding an Arduino to your project, you run into a problem and need to debug the code? What if you could use a second Arduino to debug the first? That would bring your project up to two Arduinos, instantly making it four times as awesome as before you started! Who could say no to such exponential gains?

Debugging an ATTiny85

Not [Wayne Holder], that’s for sure. He writes in to let us know about a project he’s been working on for a while that allows you to debug the execution of code on an Arduino with a second Arduino. In fact, the target chip could even be another AVR series microcontroller such as a the ATTiny85. With his software you can single-step through the code, view and modify values in memory, set breakpoints, and even disassemble the code. Not everything is working fully yet, but what he has so far is very impressive.

The trick is exploiting a feature known as “debugWIRE” that’s included in many AVR microcontrollers. Unfortunately documentation on this feature is hard to come by, but with some work [Wayne] has managed to figure out how most of it works and create an Arduino Sketch that lets the user interact with the target chip using a simple menu system over the serial monitor, similar to the Bus Pirate.

[Wayne] goes into plenty of detail on his site and in the video included after the break, showing many of the functions he’s got working so far in his software against an ATTiny85. If you spend a lot of time working on AVR projects, this looks like something you might want to keep installed on an Arduino in your tool bag for the future.

Debugging microcontroller projects can be a huge time saver when your code starts running on real hardware, but often takes some hacking to get working.

Continue reading “Debugging An Arduino With An Arduino”

Easier End-User Setup For ESP32 Projects

As hackers, we occasionally forget that not everyone is enamored with the same nerdy minutia that we are. Configuring hardware by changing some lines in the code and compiling a new firmware doesn’t sound like that big of a deal to those of us who’ve been around the block a few times, but might as well be ancient Sanskrit to the average person. As long as your projects are for personal use this isn’t really a concern, but what if you plan on distributing the code for a project or perhaps even selling finished products? Shipping it out with hard-coded variables simply isn’t an option.

Code for loading configuration file from SPIFFS

In a recent video, [Proto G] shows a clever way to use WiFiManager to make configuring your ESP32 project easier for end-users. Not only can you use the captive portal system to configure the ESP32’s WiFi against a nearby access point, but it can allow users to enter in configuration data which can be picked up in your code by using SPI Flash File System (SPIFSS).

With the setup demonstrated in the video below by [Proto G], you don’t need anything more exotic than a web browser to configure the device. The end user simply searches for the device’s WiFi network, connects to it, and is presented with an easy to understand dialog which has them select a WiFi network to configure against along with some fields to enter in custom variables. All this information is then stored to a file on the SPI flash. When the ESP32 reboots, it reads the configuration from the saved file and applies the requested settings.

This is very similar to how many consumer devices are now configured, and even the less technically-inclined recipients of such a device should be able to work through the setup with a bit of hand-holding. If you plan on handing one of your ESP32 projects to John Q. Public, this is the kind of configuration you should be aiming for.

We’ve covered using WiFiManager to make ESP32 projects easier to manage, but the addition of arbitrary variables to the captive portal opens up a lot of possibilities. Just the kind of thing you need when you start considering the leap to commercial product.

Continue reading “Easier End-User Setup For ESP32 Projects”

Learn To Reverse Engineer X86_64 Binaries

Opening up things, see how they work, and make them do what you want are just the basic needs of the average hacker. In some cases, a screwdriver and multimeter will do the job, but in other cases a binary blob of random software is all we have to work with. Trying to understand an unknown binary executable is an exciting way to discover a system’s internal functionality.

While the basic principles of software reverse engineering are universal across most platforms, the details can naturally vary for different architectures. In the case of the x86 architecture, [Leonora Tindall] felt that most tutorials on the subject focus mostly on 32-bit and not so much on the 64-bit specifics. Determined to change that, she ended up with an extensive introduction tutorial for reverse engineering x86_64 binaries starting at the very basics, then gradually moving forward using crackme examples. Covering simple string analysis and digging through disassembled binaries to circumvent fictional security, the tutorial later introduces the Radare2 framework.

All example source code is provided in the accompanying GitHub repository, although it is advised to avoid looking at them to keep it more interesting and challenging. And in case you are looking for more challenges later on, or generally prefer a closer connection to the hardware, these MSP430 based capture the flag online challenges might be worth to look at next.

Hack Your Own Computer Science Degree

We ran across something interesting on GitHub of all places. The “Open Source Society University” has a list of resources to use if you want to teach yourself computer science for free. We found it interesting because there are so many resources available it can be hard to pick and choose. Of course, you can always pick a track from one school, but it was interesting to see what [Eric Douglas] and contributors thought would be a good foundation.

If you dig down, there are really a few potential benefits from going to college. One is you might learn something — although we’ve found that isn’t always a given, surprisingly. The second is you can get a piece of paper to frame that impresses most people, especially those that want to hire you but can’t determine if you know what you are talking about or not. Lastly, if you go to the right school you can meet people that might be useful to know in the future for different reasons.

The Internet has really changed all of those things, you can network pretty easily these days without a class ring, and there are lots of ways to earn accredited diplomas online. If you are interested in what we think is the most important part — the education — there are many options for that too.

Continue reading “Hack Your Own Computer Science Degree”

Accident Forgiveness Comes To GPLv2

Years ago, while the GPLv3 was still being drafted, I got a chance to attend a presentation by Richard Stallman. He did his whole routine as St IGNUcius, and then at the end said he would be answering questions in a separate room off to the side. While the more causal nerds shuffled out of the presentation room, I went along with a small group of free software aficionados that followed our patron saint into the inner sanctum.

When my turn came to address the free software maestro, I asked what advantages the GPLv3 would have to a lowly hacker like myself? I was familiar with the clause about “Tivoization“, the idea that any device running GPLv3 code from the manufacturer should allow the user to be able to install their own software on it, but this didn’t seem like the kind of thing most individuals would ever need to worry about. Was there something in the new version of the GPL that would make it worth adopting in personal or hobby projects?

Yes, he really dresses up like this.

Interestingly, a few years after this a GPLv2 program of mine was picked up by a manufacturer and included in one of their products (never underestimate yourself, folks). So the Tivoization clause was actually something that did apply to me in the end, but that’s not the point of this story.

Mr. Stallman responded that he believed the biggest improvement GPLv3 made over v2 for the hobbyist programmer was the idea of “forgiveness” in terms of licensing compliance. Rather than take a hard line approach like the existing version of the GPL, the new version would have grace periods for license compliance. In this way, legitimate mistakes or misunderstandings of the requirements of the GPL could be resolved more easily.

So when I read the recent announcement from Red Hat that said they would be honoring the grace period for GPLv2 projects, I was immediately interested. Will the rest of the community follow Red Hat’s lead? Will this change anyone’s mind when deciding between the GPL v2 and v3? Is this even a good idea? Join me below as I walk through these questions.

Continue reading “Accident Forgiveness Comes To GPLv2”

Lisp In 200 Lines

Contrary to popular belief, LISP does not stand for “lots of irritating spurious parenthesis.” However, it is true that people tend to love or hate this venerable programming language. Whichever side of the fence you’re on, many of the ideas it launched decades ago have become staples of other newer languages. How much C code do you think it takes to make a functional LISP system? If you guessed more than 200, you’ll want to go look at this GitHub repository.

Actually, the code isn’t as good as the (sort of) literate programming white paper on the program, but it gives a good overview of how 200 lines of C code can produce a working LISP-like language good enough to create its own eval loop. It does lack memory handling and error detection, so if you really wanted to use it, you’d probably need to spruce it up a bit.

Continue reading “Lisp In 200 Lines”

Exploring The BBC Micro:Bit Software Stack

The BBC micro:bit has been with us for about eighteen months now, and while the little ARM-based board has made a name for itself in its intended market of education, we haven’t seen as much of it in our community as we might have expected.

If you or a youngster in your life have a micro:bit, you may have created code for it using one of the several web-based IDEs, a graphical programming system, TypeScript, or MicroPython. But these high level languages are only part of the board’s software stack, as [Matt Warren] shows us with his detailed examination of its various layers.

The top layer of the micro:bit sandwich is of course your code. This is turned into a hex file by the web-based IDE’s compiler, which you then place on your device. Interestingly only the Microsoft TypeScript IDE compiles the TypeScript into native code, while the others bundle your code up with an interpreter.

Below that is the micro:bit’s hardware abstraction layer, and below that in turn is ARM’s Mbed OS layer, because the micro:bit is at heart simply another Mbed board. [Matt] goes into some detail about how the device’s memory map accommodates all these components, something essential given that there is only a paltry 16 kB of RAM in hand.

You might wish to program a micro:bit somewhat closer to the metal with the Mbed toolchain, but even if that is the case it’s still of interest to read a dissection of its official stack. Meanwhile, have a look at our review of the board, from summer 2016.