Raspberry Pi Zero Stepper Driver, First Of Many Modules

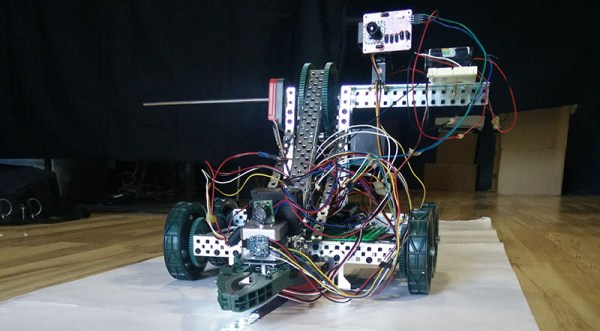
The Raspberry Pi in general (and the Zero W model in particular) are wonderful pieces of hardware, but they’re not entirely plug-and-play when it comes to embedded applications. The user is on the hook for things like providing a regulated power source, an OS, and being mindful of proper shutdown and ESD precautions. Still, the capabilities make it worth considering and [Alpha le ciel] has a project to make implementation easier with the Raspberry Pi Zero W Stepper Motor Module, which is itself part of a larger project plan to make the Pi Zero W into a robust building block for robotic and CNC applications.

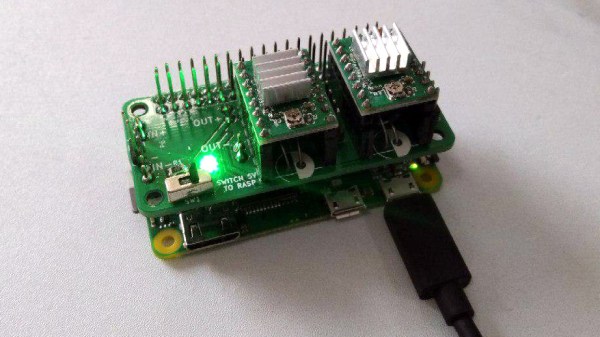
[Alpha le ciel] is building this stepper motor module as the first of many Raspberry Pi hats meant to provide the Raspi with the hardware for robotics applications. This module, in particular, features two A4988 stepper motor drivers, a connector for a power supply or battery providing 7-20V, and a buck converter to bring that power down to the 5V needed by the Pi itself. All the relevant pins are broken out onto the Pi’s GPIO header, making this module the simplest way possible to add a pair of motors to a Pi. What does that mean? Printers or self-balancing robots, really whatever you want.

A stepper driver that conforms to the footprint of the Pi Zero is a good start, and the larger concept of creating additional modules is a worthy entry to the Hackaday Prize.

DEXTER Has The Precision To Get The Job Done

Robotic arms – they’re useful, a key part of our modern manufacturing economy, and can also be charming under the right circumstances. But above all, they are prized for being able to undertake complex tasks repeatedly and in a highly precise manner. Delivering on all counts is DEXTER, an open-source 5-axis robotic arm with incredible precision.

DEXTER is built out of 3D printed parts, combined with off-the-shelf carbon fiber sections to add strength. Control is through five NEMA 17 stepper motors which are connected to harmonic drives to step the output down at a ratio of 52:1. Each motor is fitted with an optical encoder which provides feedback to control the end effector position.

Unlike many simpler projects, DEXTER doesn’t play in the paddling pool with 8-bit micros or even an ARM chip – an FPGA lends the brainpower to DEXTER’s operations. This gives DEXTER broad capabilities for configuration and expansion. Additionally, it allows plenty of horsepower for the development of features like training modes, where the robot is stepped manually through movements and they are recorded for performance later.

It’s a project that is both high performing and open-source, which is always nice to see. We look forward to seeing how this one develops further!

XLIDAR Is A Merry-Go-Round Of Time-Of-Flight Sensors

[JRodrigo]’s xLIDAR project is one of those ideas that seemed so attractively workable that it went directly to a PCB prototype without doing much stopping along the way. The concept was to mount a trio of outward-facing VL53L0X distance sensors to a small PCB disk, and then turn that disk with a motor and belt while taking readings. As the sensors turn, their distance readings can be used to paint a picture of the immediate surroundings (at least within about 1 meter, which is the maximum range of the VL53L0X.)

The hardware is made to be accessible and has a strong element of “what you see is what you get.” The distance sensors are on small breakout boards, and the board turns the sensor disk via a DC motor and 3D printed belt drive. Even the method of encoding the disk’s movement and zero position has the same WYSIWYG straightforwardness: a spring contact and an interrupted bare copper trace on the bottom of the sensor disk acts as a physical switch. In fact, exposed copper traces in concentric circular patterns and spring pins taken from an SD card socket are what provide power and communications as the disk turns.

The prototype looks good and sounds like it should work, but how well does it hold up? We’ll find out once [JRodrigo] does some testing. Until then, the board designs are available on the project’s GitHub repository if anyone wants to take a shot at their own approach without starting from scratch.

Simple Quadcopter Testbed Clears The Air For Easy Algorithm Development

We don’t have to tell you that drones are all the rage. But while new commercial models are being released all the time, and new parts get released for the makers, the basic technology used in the hardware hasn’t changed in the last few years. Sure, we’ve added more sensors, increased computing power, and improved the efficiency, but the key developments come in the software: you only have to look at the latest models on the market, or the frequency of Git commits to Betaflight, Butterflight, Cleanflight, etc.

With this in mind, for a Hackaday prize entry [int-smart] is working on a quadcopter testbed for developing algorithms, specifically localization and mapping. The aim of the project is to eventually make it as easy as possible to get off the ground and start writing code, as well as to integrate mapping algorithms with Ardupilot through ROS.

The initial idea was to use a Beaglebone Blue and some cheap hobby hardware which is fairly standard for a drone of this size: 1250 kv motors and SimonK ESCs, mounted on an f450 flame wheel style frame. However, it looks like an off-the-shelf solution might be even simpler if it can be made to work with ROS. A Scanse Sweep LIDAR sensor provides point cloud data, which is then munched with some Iterative Closest Point (ICP) processing. If you like math then it’s definitely worth reading the project logs, as some of the algorithms are explained there.

It might be fun to add FPV to this system to see how the mapping algorithms are performing from the perspective of the drone. And just because it’s awesome. FPV is also a fertile area for hacking: we particularly love this FPV tracker which rotates itself to get the best signal, and this 3D FPV setup using two cameras.

Next Weekend: Beginner Solar Workshop

Next week, Hackaday is hosting a workshop for all you hackers ready to harness the power of the sun. We’re doing a Beginner Solar Workshop at Noisebridge in San Francisco. You’re invited to join us on July 7th, we’ll provide the soldering irons.

The instructor for this workshop will be [Matt Arcidy], avid Hackaday reader and member of Noisebridge. He’s contributed to the incredible Noisebridge Gaming Archivists Live Arcade Cabinet, given talks on electronic components for the Arduino ecosystem, and now he’s hosting a workshop on the basics of solar charging.

This workshop will cover the theory of solar charging, how solar cells convert light into electricity, when and where this technology is appropriate, and the safe handling of lithium-ion batteries. At the end of the workshop, every attendee will have built a system that captures power from the sun and charges a battery, ready to be used in any future projects.

This is a big deal. Right now, the Hackaday Prize is in the middle of its third challenge, the Power Harvesting Module Challenge. This is a big part of the prize, and already there are some fascinating projects which harvest electricity from stomach acid, and even the gravitational potential of the Earth. Of course, some of those are more practical than others, and we’re really interested to see where this Power Harvesting Challenge goes and what great projects will be created.

Improving Indoor Navigation Of Robots With IR

If the booths at CES are to be believed, the future is full of home robots: everything from humanoid robots on wheels to Alexas duct taped to a Roomba. Back in reality, home robots really aren’t a thing yet. There’s an obvious reason for this: getting around a house is hard. A robot might actually need legs to get up and down stairs, and GPS simply doesn’t exist indoors, at least to the accuracy needed. How on Earth does a robot even navigate indoors?

This project for the Hackaday Prize solves the problem of indoor navigation, and it does it in an amazingly clever way. This is using QR codes for navigation, but not just any QR codes. They’re QR codes read by an infrared camera, and painted on the walls and ceilings with a special IR sensitive paint that’s invisible to the human eye. It’s navigation for robotic vision, and it’s a fantastic idea.

The basic idea behind this project is to use an IR camera — or basically any webcam with the IR blocking filter removed — and a massive amount of IR LEDs to illuminate any target. So far, the proof of concept works. A computer can easily read QR codes, and if paint is invisible to the human eye but visible to an IR camera, the entire project is merely a matter of implementation.

There have been a number of projects that try to add indoor navigation to robots. Some of them use LIDAR, some use computer vision and SLAM. These are computationally expensive. Some even use wireless beacons to navigate indoors like the SubPos Ranger from the 2016 Hackaday Prize. Using IR and QR codes is just so simple and hacker-friendly, and we think it’s fantastic.

Controlling Robotics Visually

The world — and the Hackaday Prize — is filled with educational robots. These are small, wheeled robots loaded up with sensors, actuators, a few motor drivers, and some sort of system that is easy to program. The idea behind these educational robots is to give students an easy-to-use platform to test out code, learn inverse kinematics, and realize odometry is a lot harder than you think it is. Give these kids some time and patience, and you’ll have a fleet of Battlebots at the end of the semester, if the teacher is cool.

But there’s a problem with all educational robots. The programming. For someone just starting out in robotics club, being able to code isn’t a guarantee. You need an easy to use programming interface. This project for the Hackaday Prize gives all students a great visual programming interface. It’s basically like the first generation of Lego Mindstorms, only you don’t need a weird IR tower attached to a serial port.

Of course you can’t program a robot without a board, and this project brings it in spades. The brain for this platform is built on an ARM microcontroller, has Bluetooth, supports up to six DC motors, twelve analog inputs, PWM and serial ports, and all the ports are color-coded for kids who can’t read so good.

This is a visual programming environment, though, and with that, you get a fancy IDE filled with loops that wrap around commands, IO access that’s in easy to read blocks, and control software that gives students a dashboard filled with buttons and odometers and the video feed from the camera. It’s a great Hackaday Prize entry, and an excellent way to introduce kids to robotics.