Heavy Metal Power Bank Uses Tool Batteries

At one time or another, most of us have seen a gadget for sale and thought we could build something similar for cheaper. Of course, we’re almost always wrong. Not about being able to build it, mind you. But when you add up the cost of the materials, the tool or two you almost inevitably end up buying, and the time spent chasing perfection, you’re lucky if you haven’t doubled the original price.

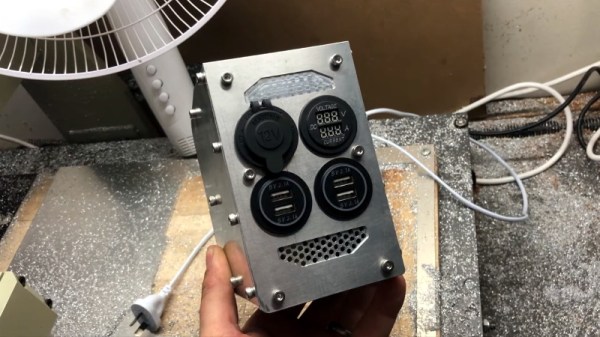
We’re not sure how much money [Taylor Hay] ended up saving by building his own portable power bank. But we do know it’s a gorgeous piece of hardware that’s certainly built far better than the average consumer gadget. The CNC-cut aluminum side panels look like something pulled out of a tank, and while we know some might balk at the 3D printed internal frame, we’re confident you could use this thing as an impromptu step stool without a problem.

Inside there’s 150 watt 240 VAC inverter, complete with a temperature-controlled fan to keep it cool under load. There are also four USB ports providing 2.1 A each, a standard 12 VDC accessory port, and a LED display that shows battery voltage and current being drawn. Rather than come up with his own battery pack, [Taylor] used a 3D printed interface that accepts an 18 V Milwaukee cordless tool battery. Naturally, the design could be adapted to take another brand’s cells if you were so inclined.

Around these parts, we know that a good project doesn’t have to be cheaper or even more practical than what’s already on the market. There’s an inherent value in building something exactly the way you want it that you simply can’t put a monetary price on.

Continue reading “Heavy Metal Power Bank Uses Tool Batteries”

Homemade Gear Cutting Indexer Blends Art With Engineering

Ordinarily, when we need gears, we pop open a McMaster catalog or head to the KHK website. Some of the more adventurous may even laser cut or 3D print them. But what about machining them yourself?

[Uri Tuchman] set out to do just that. Of course, cutting your own gears isn’t any fun if you didn’t also build the machine that does the cutting, right? And let’s be honest, what’s the point of making the machine in the first place if it doesn’t double as a work of art?

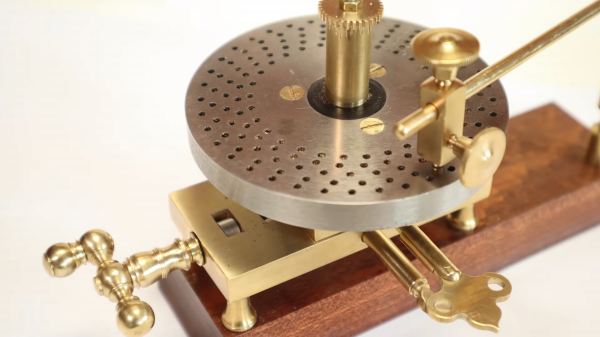
[Uri’s] machine, made from brass and wood, is simple in its premise. It is placed adjacent to a gear cutter, a spinning tool that cuts the correct involute profile that constitutes a gear tooth. The gear-to-be is mounted in the center, atop a hole-filled plate called the dividing plate. The dividing plate can be rotated about its center and translated along linear stages, and a pin drops into each hole on the plate as it moves to index the location of each gear tooth and lock the machine for cutting.

The most impressive part [Uri’s] machine is that it was made almost entirely with hand tools. The most advanced piece of equipment he used in the build is a lathe, and even for those operations he hand-held the cutting tool. The result is an elegant mechanism as beautiful as it is functional — one that would look at home on a workbench in the late 19th century.

[Thanks BaldPower]

Continue reading “Homemade Gear Cutting Indexer Blends Art With Engineering”

A Geared Bench Vise To Clamp All The Things

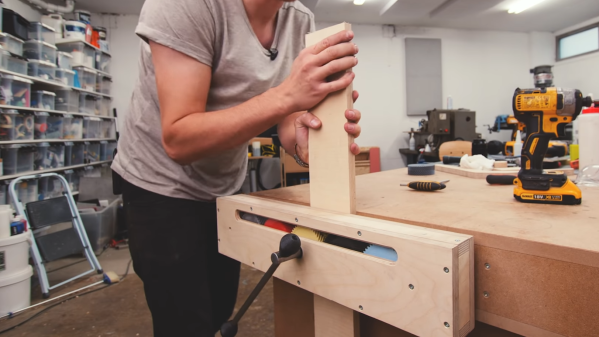
On the eternal quest of workshop upgrades, [Alexandre Chappel] has combined woodworking and 3D printing to add a versatile 0.5 m wide vise with some clever internals to his workbench.

The challenge with such a wide vise is that it requires two timed lead screws on either end of the vise to prevent if from pulling skew under force. This can be done with a chain, belt, or [Alexandre]’s choice, gears. Inside the moving part of the vise he fitted series of 5 herringbone gears. By turning the center gear with a lever, it rotates the gears on the end which are fixed to tow lead screws. The external surfaces of the clamp are made with plywood, and the gears are printed with PLA and high infill percentage. [Alexandre] does say that he is not sure durable the gears are, but they definitely aren’t flimsy. He added an acrylic inspection window to the box section, which we think looks superb with the colored gears peaking through. The back of the vise is mounted inside the workbench, which keeps the look clean and doesn’t take up any bench space.

[Alexandre] does a lot of filming in his workshop, so recently he also built a very impressive and practical camera arm to avoid having to move tripods the whole time. A vise is a must-have tool in almost any workshop, so we’ve seen a few DIY versions, like magnetic base vise and one with a hydraulic vise.

Scratch-Built XY Table Gets The Job Done

Unless you have one large pile of cash to burn through, properly equipping a workshop can take years of burning through little piles of cash. Whether to save a bit of cash or simply for the challenge, [Workshop from Scratch] is doing exactly what his channel name suggests, and his latest project is a XY table. (Video, embedded below.)

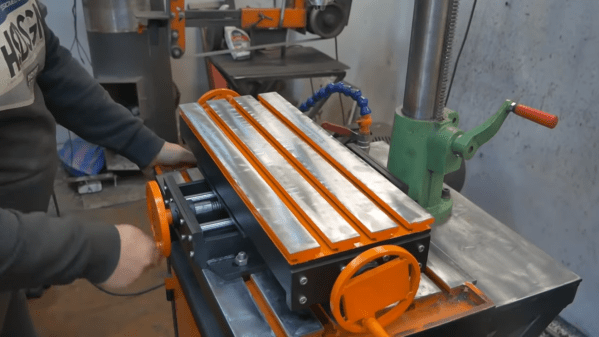
A XY table, or cross table, allows a workpiece to be translated in two dimensions, usually on a drill press or milling machine. On a drill press they make repetitive task like drilling a series of holes simpler and quicker. [Workshop from Scratch] built most of the frame with steel flat bar, and the moving parts run on ground steel rods with linear bearings. Lead screws with hand wheels are used to translate the table.

A machine like this requires the opposing plates of each table to be perfectly aligned, which [Workshop from Scratch] achieved by spot welding the matching plates together and drilling them in one operation. He also added T-slot top surface, created by welding wide flat bar on top of narrower flat bar.

With the lack of dials, it doesn’t look like it’s meant for precision work, but we would still be interested to know how repeatable the lead screw positioning is. Regardless, it’s still a useful addition to the shop.

[Workshop from Scratch] is building a rather impressive collection of DIY tools, including a magnetic vise (that he already used with the XY table), magnetic drill press and a hydraulic lift table. We look forward to seeing what’s next on the list. Continue reading “Scratch-Built XY Table Gets The Job Done”

Spare SMD Storage, With Stacking SMT Tape Reels

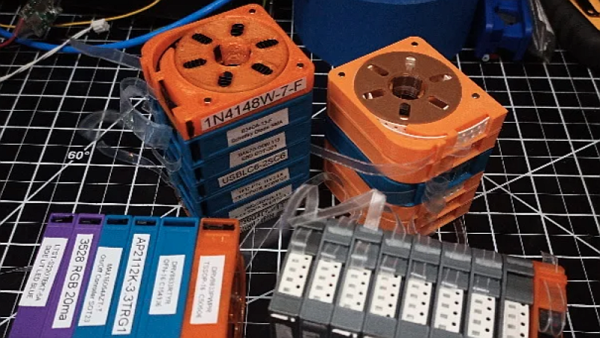
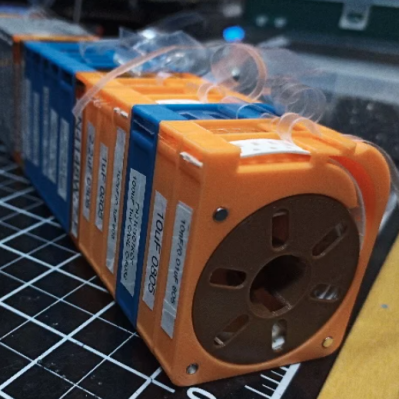
[Kadah]’s solution for storing short tapes of SMT parts is as attractive as it is clever. The small 3D-printed “tape reels” can double as dispensers, and stack nicely onto each other thanks to the sockets for magnets. The units come in a few different sizes, but are designed to stack in a consistent way.

We love the little touches such as recessed areas for labels, and the fact that the parts can print without supports (there are a couple of unsupported bridges, but they should work out fine.) Also, the outer dimensions of the units are not an accident. They have been specifically chosen to nestle snugly into the kind of part drawers that are a nearly ubiquitous feature of every hardware hacker’s work bench.

STLs are provided for handy download but [Kadah] also provides the original Fusion 360 design file, with all sizes defined as easily-customized parameters. In addition, [Kadah] thoughtfully provided each model in STEP format as well, making it easy to import and modify in almost any 3D CAD program.

Providing 3D models in STEP format alongside STLs is nice to see, because it gives more options to people if things need some tweaking, because editing the STL file can be done if needed, but isn’t optimal. Thankfully the ability to export STEP files is still open to hobbyists using Fusion 360, since Autodesk decided to leave that feature available to personal use licenses.

Custom Tool Helps Hakko Set Threaded Inserts

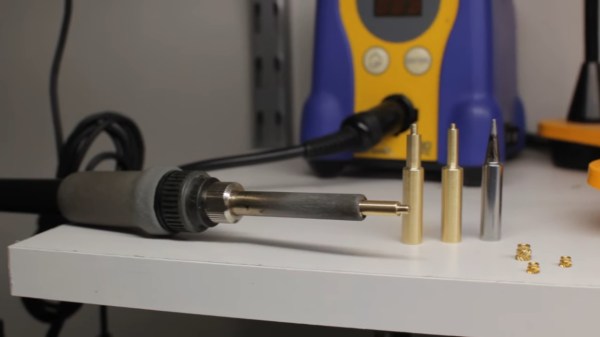
When the tool you need doesn’t exist, you have to make it yourself. Come to think of it, even if the tool exists, it’s often way more fun to make it yourself. The former situation, though, is one that [Sean Hodgins] found himself in with regard to threaded inserts. Rather than suffer from the wrong tool for the job, he machined his own custom threaded insert tool for his Hakko soldering iron.

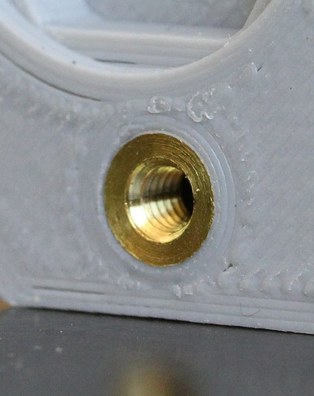
Like many of us, [Sean] has embraced the use of heat-set threaded inserts to beef up the mechanical connections on his 3D-printed parts. [Sean] dedicated a soldering iron to the task, equipping it with a tip especially for the job. But it was the flavor of iron proverbially known as a “fire stick” and he found that this iron was too hot for PLA prints. As the new owner of a lathe, he was able to make quick work of the job using a piece of brass rod stock. Luckily, Hakko tips just slip on the heating element, so no threading operations were needed. [Sean] made insert tips for multiple sized inserts, and the results speak for themselves.
If you haven’t tried these out yet, check out [Joshua Vasquez’s] excellent guide on heat-set inserts. You’ll find this guide to the relative merits of the different types useful when ordering inserts. And if you’ve got the itch to buy a lathe now, we’ve got you covered there too.

Continue reading “Custom Tool Helps Hakko Set Threaded Inserts”

Teaching An Old Lathe New Tricks With A Programmable Power Feed

Ask anybody whose spent time standing in front of a mill or lathe and they’ll tell you that some operations can get tedious. When you need to turn down a stainless rod by 1/4″ in 0.030″ increments, you get a lot of time to reflect on why you didn’t just buy the right size stock as you crank the wheel back and forth. That’s where the lead screw comes in — most lathes have a gear-driven lead screw that can be used to actuate the z-axis ( the one which travels parallel to the axis of rotation). It’s no CNC, but this type of gearing makes life easier and it’s been around for a long time.

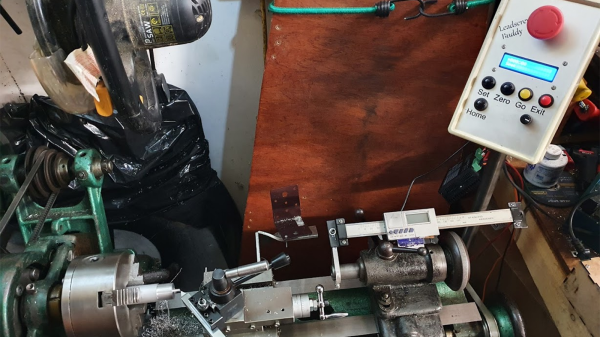
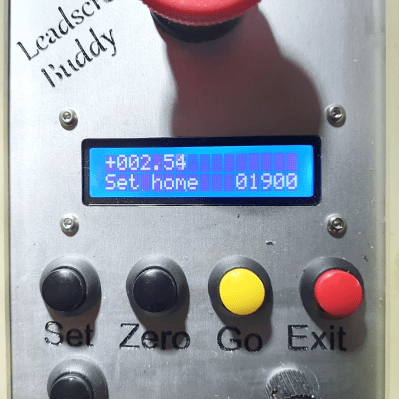
[Tony Goacher] took this idea a few steps further when he created the Leadscrew Buddy. He coupled a beautiful 1949 Myford lathe with an Arduino, a stepper motor, and a handful of buttons to add some really useful capabilities to the antique machine. By decoupling the lead screw from the lathe’s gearbox and actuating it via a stepper motor, he achieved a much more granular variable feed speed.

If that’s not enough, [Tony] used a rotary encoder to display the cutting tool’s position on a home-built Digital Readout (DRO). The pièce de résistance is a “goto” command. Once [Tony] sets a home position, he can command the z-axis to travel to a set point at a given speed. Not only does this make turning easier, but it makes the process more repeatable and yields a smoother finish on the part.

These features may not seem so alien to those used to working with modern CNC lathes, but to the vast majority of us garage machinists, [Tony]’s implementation is an exciting look at how we can step up our turning game. It also fits nicely within the spectrum of lathe projects we’ve seen here at Hackaday- from the ultra low-tech to the ludicrously-precise.

Continue reading “Teaching An Old Lathe New Tricks With A Programmable Power Feed”