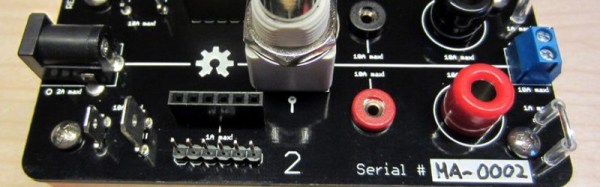
It seems that any time you have a circuit on the bench, there’s wires. Lots of wires. If you are working on something new, it is a good bet that some of those wires are clipped to other wires using some field expedient, especially the power wires. We often have an alligator clip awkwardly grabbing the shell of a BNC. [Felicitus] got tired of this, so he created Monsieur Adaptateur, a breakout board that has common connectors you’ll need when working on a prototype.
What kind of connectors?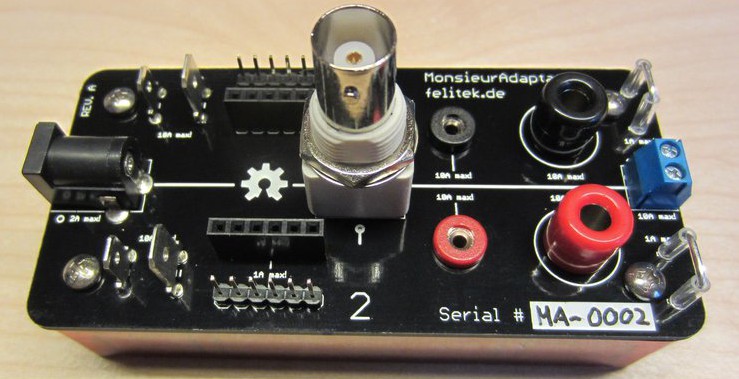
- DC Jack 2.1mm
- 2mm Jacks
- 4mm Jacks
- BNC Connector
- Terminal Block
- Scope probe connector
- Standard 6 pin 0.1″ female header
- Standard 6 pin 0.1″ male header
- 4.75 and 6.3mm blade connectors
The dual conductor items (like the 2.1mm jack and the BNC) connect to both sides of the board. The other connectors are in pairs. The idea is you can connect, for example, a BNC cable from a signal generator to some jumper wires on the male header, connect the scope to the scope probe connector, and still have the banana jacks to hook up, say, a digital meter.
No one would say this is going to change the world, but this is one of those things that is simple, but very useful. The plans are all on Github, and obviously you could adapt it with connectors that make sense for your specific situation.
Continue reading “Monsieur Adaptateur: Jacques Of All Connector Trades”

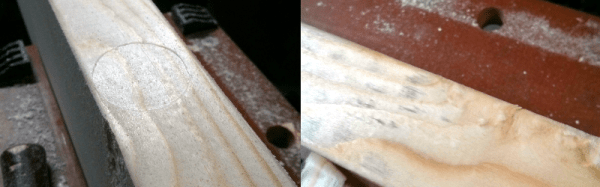
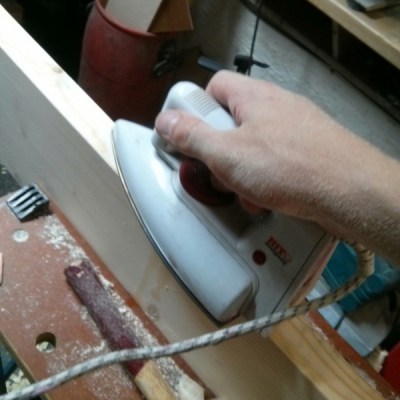 The Technique itself is dead simple and takes only a few minutes to perform. Simply apply a small amount of water, let it seep into the wood, and then bring a hot iron down onto the soaked wood to evaporate off the soaked water–instantly inflating the wood back into its original form!


