Wood Sphere made with circular saw

Circular Saw Cuts Balls… Wooden Balls, Don’t Worry

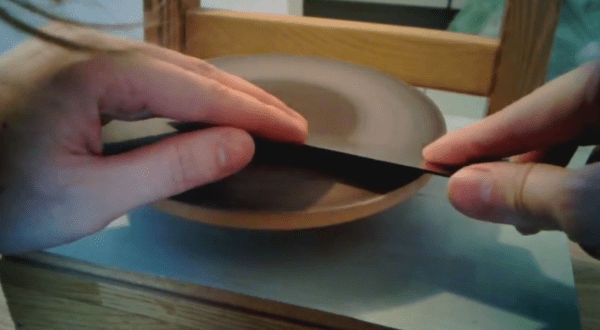
Ever wonder how wood spheres are made? Normally they are made on a wood lathe with some fancy jigs and fixtures. [Izzy Swan] set out to bring wood sphere manufacturing to the masses by designing an inexpensive machine that uses a standard circular saw to carve a block of wood into a sphere.

Here’s how it works: a piece of wood is held in a wood fixture and spun using a hand drill. The fixture and drill are mounted to a wooden ring that rotates about a perpendicular axis. The user manually moves the entire assembly back and forth about that second axis while spinning the drill. Meanwhile, a circular saw is moved closer and closer to the soon-to-be-sphere, nibbling away little by little. After most of the material has been cut from the block of wood, it is removed from the fixture and spun 90 degrees to cut the two remaining nubs. The end result is a pretty nice looking sphere.

Continue reading “Circular Saw Cuts Balls… Wooden Balls, Don’t Worry”

Rechargeable Work Lamp Brightens Your Night

Portable power station has DC, AC and Light on board.

Most of us tinkerers will at some point find ourselves needing electrical power in a remote area. Cordless tools are an option, but what if you need more than that? [Garage Monkey San] set out to solve this problem by creating a portable power station that has on-board AC outlets, 12v and 5vdc outputs and an integrated spot light.

This project is housed in a plastic ammo case that’s large enough to contain all of the necessary parts and has a convenient carrying handle. The 12vdc sealed lead acid battery power source is kept topped off by a car battery float charger. Light is provided by an LED off road fog lamp mounted to the top of the case that has a small appetite for power, ensuring long battery life. An easy addition at this point was a 12v car accessory outlet which only adds to the versatility of the project.

Continue reading “Rechargeable Work Lamp Brightens Your Night”

Circular Saws In The Kitchen, Good Idea Or Best Idea?

Kitchen centrifuge using a circular saw

[Mike Warren] was contemplating risky but exciting projects he could do when he came up with this magnificent contraption. A centrifuge made out of an old circular saw!

First question — why? Well if you’re a foody or you enjoy the study of molecular gastronomy, bringing a centrifuge to the kitchen can allow for some more technical dishes. It suddenly becomes possible to separate food based on its density, just like how it works in the lab. Practical applications for super fancy dishes — we’re not too sure — but it involves relatively unsafe power tools and food so we felt obliged to share it!

Let’s start off with the generic warning — in fact, [Mike] states this before the Instructable begins:

Do not replicate this project, it is incredibly dangerous!

The project makes use of an old corded circular saw, a few salad bowls, some threaded rod, a few nuts, some binder clips and some metal plates to hold the plastic test tubes. At 4900RPM (the speed of his saw),he’s calculated his G-Force to be around 1879G’s. Holy cow. A person passes out at around 10Gs, and a bullet fired from a typical handgun is well over 50,000 — on the extreme end of things, a professional lab ultra-centrifuge can hit over 300,000.

These all of course pale by comparison to the Large Hadron Collider, which can accelerate protons at approximately 190,000,000G’s! And to conclude, this is what happens when lab centrifuges blow up. Don’t do it — but do watch the following video and enjoy!

Continue reading “Circular Saws In The Kitchen, Good Idea Or Best Idea?”

Finally, A Desktop CNC Machine With A Real Spindle

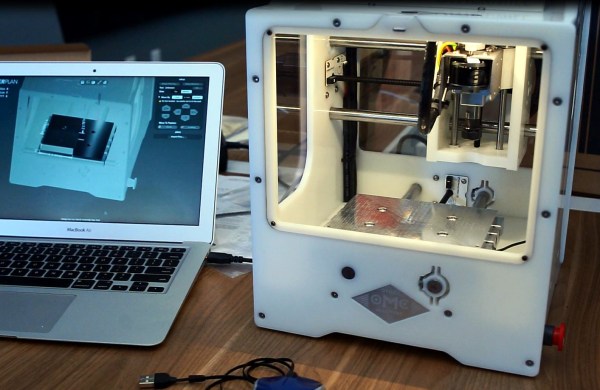
While cheap hobby CNC mills and routers are great machines that allow you to build things a 3D printer just can’t handle, they do have their limitations. They’re usually powered by a Dremel or other rotary tool, so speed control of the spindle via Gcode is nigh impossible. They’re also usually built with a piece of plywood as the bed – cheap, but not high on repeatability. The Nomad CNC mill fixes these problems, and manages to look good and be pretty cheap, to boot.

Instead of using a Dremel or other rotary tool to cut materials, the Nomad team is using a brushless DC motor connected to a real spindle. With a few certain motors, this allows for closed loop control of the spindle;  Sending S4000 Gcode to the mill will spin the spindle at 4000 RPM, and S6000 runs the spindle at 6000 RPM, whether it’s going through foam or aluminum. This is something you just can’t do with the Dremel or DeWalt rotary tools found in most desktop mills and routers.

Along with a proper spindle, the Nomad also features homing switches, a tool length probe, and a few included fixtures that make two-sided machining – the kind you need it you’re going to machine a two-layer PCB – possible, and pretty simple, too. The softwares controlling the mill are Carbide Motion and MeshCAM, a pretty popular and well put together CNC controller. Of course the mill itself speaks Gcode, so it will work with open source CNC software.

It’s all a very slick and well put together package. Below you can find a video of the Nomad milling out a Hackaday logo.

Continue reading “Finally, A Desktop CNC Machine With A Real Spindle”

A DIY Atomic Force Microscope

AFM

For looking at really small stuff, an optical microscope will only go so far. Looking at things at the nanometer level, though, usually requires some sort of electron microscope, with all the hassle of vacuum chambers and high voltages. There is another way to investigate the domain of the very small: an atomic force microscope. Unlike their electron spewing brothers, they don’t require high voltages or hard vacuums. They can also be built for about $1000, as [whoand] over on the Instructables shows us.

Instead of shooting light or electrons at an object and picking up the reflections, an atomic force microscope drags a very, very tiny stylus across an object. This stylus is attached to a probe that will reflect laser light off of it into a photosensor, eventually rendering an image on a display. [whoand] is using a laser diode and pickup unit from a DVD-ROM drive for the optical pickup unit, a frame made from soldered together PCBs, and a few piezos to vibrate the probe.

The probes themselves are incredible pieces of engineering with a tip size of a few nanometers. They’re consumable, and expensive, ranging from $20 to $500 per probe. Still, with these probes, [whoand] can look at the pits in a CD or DVD, measure the surface of an eraser, or check out the particulate matter floating around in the atmosphere in Beijing.

Thanks [Rob] for the tip.

TherMOFOrmer

Mofo

3D printers are the tool of choice for all the hackerspaces we’ve been to, and laser cutters take a close second. There’s another class of plastic manipulating machines that doesn’t get enough credit with the hackerspace crowd – the vacuum thermoformer. Surprisingly, there haven’t been many – if any – vacuum formers on Kickstarter. Until now, that is.

[Ben] and [Calvin] are the guys behind the MOFO, and built their machine around ease of use and reliability. After a few prototypes, they settled on their design of aluminum extrusion for the frame, a ceramic heating element for the heater, and an off-the-shelf PID controller for the electronics.

The MOFO has so far been tested with polycarbonate, acrylic, PETG and styrene with good results. The Kickstarter has reward levels of $500 for a 12″x12″ work area, and $1000 for a 24″x24″ work area. That’s not too bad, and building your own similar thermoformer would probably cost just as much. Just the thing if you need to print out a few dozen sets of storm trooper armor.


Rebuilding A Custom IC Saves HP Pulse Generator


Rebuilding an HP Custom IC[Matthew] got himself into a real pickle.  It all started when he was troubleshooting a broken Hewlett Packard 8007A pulse generator. While trying to desolder one of the integrated circuits, [Matthew] accidentally cracked it. Unfortunately, the chip was a custom HP Pulse shaper IC – not an easy part to source by any means. That broken chip began a 5 year mission: to explore strange new repair methods. To seek out new life for that HP 8007A. To boldy fix what no one had fixed before.

[Matthew’s] first repair attempt was to build a drop in replacement for the HP chip. He took a look at the block diagram, and realized the chip was just some simple logic gates. He built his version with a small PCB and Fairchild TinyLogic gates. Unfortunately, the TinyLogic series is fast CMOS, while HP’s original chip used Emitter-coupled Logic (ECL). Thanks to the wildly different voltage levels of the two logic families, this design had no chance of working.

Five years later, [Matthew] was going to school at MIT, and had access to a wire bonding machine. He rebuilt the package using some epoxy, and managed to re-run the various bond wires. While everything looked promising, this attempt was also a failure. After all that work, the chip was blown.

Continue reading “Rebuilding A Custom IC Saves HP Pulse Generator”