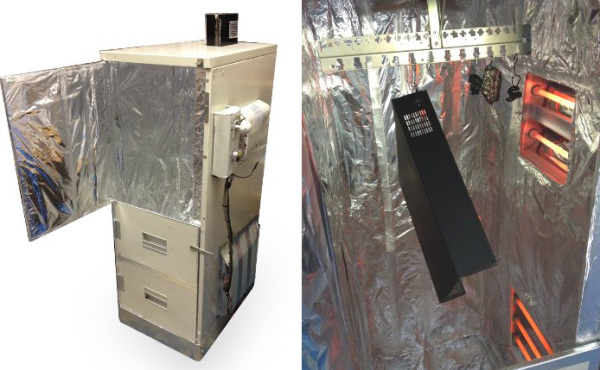
[Bob] needed an oven for powder coating metal parts. Commercial ovens can cost thousands of dollars, which [Bob] didn’t have. He did have an rusty old file cabinet though. And thus, a plan was born. The file cabinet’s steel shell would make a perfect oven body. He just had to remove all the drawers, sliders, and anything combustible. A few minutes with an angle grinder made quick work of the sheet metal. The drawer fronts we re-attached with hinges, allowing the newly fashioned door to swing out-of-the-way while parts are loaded into the oven.
The oven’s heating elements are two converted electric space heaters. The heating elements can be individually switched off to vary power to the oven. When all the elements are running, the oven pulls around 2000 watts, though full power is only used for pre-heating.
[Bob] used a lot of pop rivets in while building this oven, and plenty of them went into attaching sheet metal guards to protect the outside of the heating units. To complete the electrical equipment, a small fan was placed on top of the oven to circulate the air inside.
The most important part of the build was insulation. The entire inside of the oven was coated with aluminum foil and sealed with heat proof aluminum tape. On top of that went two layers of fiberglass matting. Metal strips kept the fiberglass in place, and the stays were held down with rivets. One last layer of aluminum foil was laid down on top of the fiberglass. Curing powder coating produces some nasty gasses, so [Bob] sealed the gaps of the oven with rolled fiberglass matting covered by aluminum foil and tape.
[Bob] was a bit worried about the outside of the oven getting hot enough to start a fire. There were no such problems though. The fiberglass matting makes for an extremely good insulator. So good that the oven goes from room temperature to 400 °F in just 5 minutes. After an hour of operation, the oven skin is just warm to the touch.
If you need to find [Bob], he’ll be out in his workshop – cooking up some fresh powder coated parts.
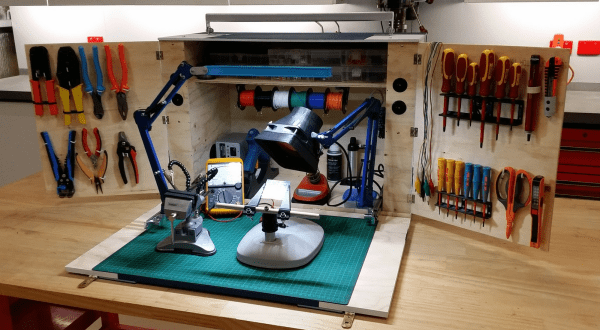
 The basic box is built from a single sheet of 7mm plywood. The front work area is a smaller piece of 12mm plywood. Working with 7mm plywood did prove to be a challenge – [Tez] had to use some very small screws for his hinges. The basic box construction was easy though – [Tez] used a pneumatic nailer and PVA (wood) glue.

 The project featured in this post is