Hack Your Heathkit To Trace MOSFET Curves

[TRX Lab] has an old Heathkit model IT-1121 curve tracer, and wants to modify it so he can plot the I-V curves of MOSFETs. For the uninitiated, curve tracers are used to determine the precise characteristics of components by measuring the output for a set of specific inputs – either voltage or current depending on the device you’re testing.

The IT-1121 was introduced in 1973 and supports bipolar and FET transistors of types NPN, PNP, N-channel, and P-channel, along with various other semiconductor devices. But [TRX] wanted to enhance the tester to deal with MOSFETs as well.

The IT-1121 is very flexible, and has selector switches for all the usual polarity and sweep settings — Heathkit also sold a model IT-3121 in later years, but this seems to have been the same basic tester. [TRX] found two shortcomings when plotting the I-V curve of MOSFETs. First, there is no way to apply a Vgs threshold voltage to the curves. Second, when set for FET testing, the polarity of the gate voltage stair step waveform doesn’t match the desired polarity of the drain-source voltage.

In the video below the break, [TRX] first walks us through some of the reasons you’d want a curve tracer in your lab. In the next part of the video, he breadboards up the modification for testing, and finally buttons it up and installs it. Implementing the modification was pretty straightforward. [TRX] designed four op-amp circuit that adds the adjustable offset and a switch to toggle the polarity of the gate voltage waveform. The whole thing fits on a small breadboard inside the case. Two holes are drilled in the panel for the potentiometer and switch.

There’s no GitHub repository for this project, but he presents the full details in the video and says viewers are free to make snapshots of the schematics and layout if they want to build their own.

Modern I-V curve tracers are pretty pricey. Even used, decades-old professional curve tracers are above the budget of most home and small office labs. If you have, or can get one of these at a decent price, this would be a modification well worth considering. You might also consider a home-brew tracer, like this one we covered last year.

Continue reading “Hack Your Heathkit To Trace MOSFET Curves”

A Fancy Connected Caliper For Not A Lot

An essential for the engineer is a decent caliper, to measure dimensions with reasonable accuracy. Some of us have old-fashioned Vernier scales, while many up-to-date versions are electronic. When entering large numbers of dimensions into a CAD package matters can become a little tedious, so the fancier versions have connectivity for automatic reading transfer. [Mew463] didn’t want to shell out the cash for one of those, so modified a cheaper caliper with an ESP32-C3 microcontroller to provide a Bluetooth interface.

Many cheaper calipers have a handy hidden serial port, and it’s to this interface the mod is connected via a simple level shifter. The ESP and associated circuitry is mounted on a custom PCB on the back of the caliper body, with a very neatly designed case also holding a small Li-Po cell. It adds a little bulk to the instrument, but not enough to render it unusable. Whether the work required to design and build it is worth the cost saving over an off-the-shelf connected caliper is left to the reader to decide.

We’ve covered similar hacks in the past, but this one’s to a very high standard. Meanwhile if calipers are of interest to you then they’re a subject we’ve examined in some significant detail.

More Drill Press Mods: Adding A VFD Means No More Belt Changes

A decent drill press is an essential machine tool for almost any kind of shop, and marks a significant step up in precision compared to a hand drill. The ability to drill square, true holes is one thing, but the added power over what’s possible with a portable tool is the real game changer. If only you didn’t have to switch around those damn belts to change speeds, though.

You don’t, of course, if you go through the effort to add a variable frequency drive to your drill press like [Midwest Cyberpunk] did, along with some other cool mods. The donor tool for these mods came from — where else? — Harbor Freight. Some will quibble with that choice, but the tool was pretty cheap, and really all [Midwest] was interested in here was some decent castings and a quill with acceptable runout, since the entire power train of the tool was slated for replacement. The original motor gave way to a beefy Baldor 3-phase/240-volt motor controlled by a VFD mounted on a bracket to the left of the drill press head, allowing the stock belt and step pulley transmission to be greatly simplified. Continue reading “More Drill Press Mods: Adding A VFD Means No More Belt Changes”

Power Tool Battery Fume Extractor

A solder fume extractor is something we could probably all use. While there isn’t much to them, [Steven Bennett] put a lot of thought into making one that was better for him, and we admired his design process, as well as the extractor fan itself. You can see the finished result in the video below.

The electrical design, of course, is trivial. A computer fan, a switch, and a battery — in this case, a Makita power tool battery. But the Fusion 360 design for the 3D printed parts got a lot of thought to make this one of the best fume extractor fans we’ve seen.

Continue reading “Power Tool Battery Fume Extractor”

[Bunnie] Peeks Inside ICs With IR

If you want to see inside an integrated circuit (IC), you generally have to take the die out of the package, which can be technically challenging and often destroys the device. Looking to improve the situation, [Bunnie] has been working on Infra-Red, In Situ (IRIS) inspection of silicon devices. The technique relies on the fact that newer packages expose the backside of the silicon die and that silicon is invisible to IR light. The IR reflects off the bottom metalization layer and you can get a pretty good idea of what’s going on inside the chip, under the right circumstances.

As you might expect, the resolution isn’t what you’d get from, say, a scanning electron microscope or other techniques. However, using IR is reasonably cheap and doesn’t require removal from the PCB. That means you can image exactly the part that is in the device, without removing it. Of course, you need an IR-sensitive camera, which is about any camera these days if you remove the IR filter from it. You also need an IR source which isn’t very hard to do these days, either.

Do you need the capability to peer inside your ICs? You might not. But if you do and you can live with the limitations of this method, it would be a very inexpensive way to get a glimpse behind the curtain.

If you want to try the old-fashioned way, we can help. Just don’t expect to be as good as [Ken] at doing it right away.

Continue reading “[Bunnie] Peeks Inside ICs With IR”

Stepper Killer Killer Killed, Repair Attempted

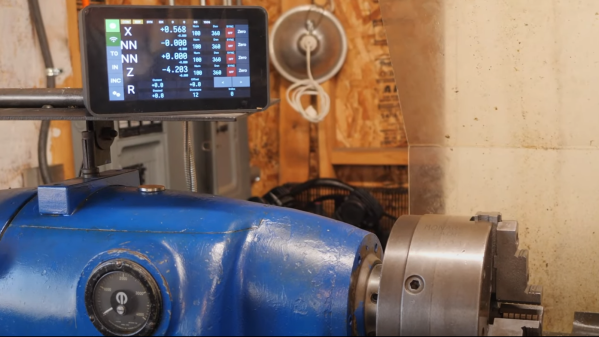
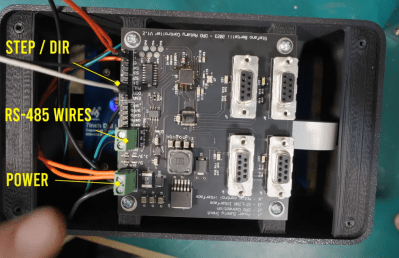
The low-cost servo motor in [Clough42]’s lathe’s electronic leadscrew bit the dust recently, and he did a great job documenting his repair attempts ( see video below the break ). When starting the project a few years ago, he studied a variety of candidate motors, including a ClearPath servo motor from Teknic’s “Stepper Killer” family. While that motor was well suited, [Clough42] picked a significantly lower-cost servo motor from China which he dubbed the “Stepper Killer Killer”.

He does a very thorough post-mortem of the motor’s integrated servo controller, checking the circuits and connections on the interface PCB first. Not finding any obvious problem, he proceeds to the main PCB which contains the microcontroller, motor driver transistors, and power supplies. There is no visible damage, but a check of the logic power supply shows 1.65V where 3.3V is expected. Looking at the board with a smart-phone mounted IR camera, he quickly finds the bad news — the microcontroller has shorted out.

Continue reading “Stepper Killer Killer Killed, Repair Attempted”

Hacking A €15 8051-Based Portable Soldering Iron With Custom Firmware

With soldering irons being so incredibly useful, and coming on the heels of the success of a range of portable, all-in-one soldering irons from the likes of Waveshare and Pine64, it’s little wonder that you can get such devices for as little as 10 – 15 Euro from websites like AliExpress. Making for both a great impulse buy and reverse-engineering target, [Aaron Christophel] got his mittens on one and set to work on figuring out its secrets.

The results are covered in a brief video, as well as a Twitter thread, where this T12 soldering iron’s guts are splayed around and reprogrammed in all their glory. Despite the MCU on the PCB having had its markings removed, some prodding and poking around revealed it to be an STC8H3K62S2, an 8051-based MCU running at a blistering 11 MHz. As a supported PlaformIO target, reprogramming the MCU wasn’t too complicated after wiring up a USB-TTL serial adapter.

Completing this initial foray into these cheap T12 soldering irons is the GitHub repository, which contains the pin-outs, wiring diagrams and further information. Although [Aaron] indicates that he’ll likely not pursuing further development, the mixed responses by people to the overall quality of the firmware on the as-purchased T12 may inspire others to give it a shake.

Continue reading “Hacking A €15 8051-Based Portable Soldering Iron With Custom Firmware”