[enhydra] needed to modify a bunch of side inserts from some cheap ABS enclosures, and to save time and effort, he created a simple vacuum table with swappable inserts to precisely fit the parts. Suction is provided by a shop vacuum (plugged in near the bottom in the photo above) and it worked very well! Sealing and gaskets weren’t even required.
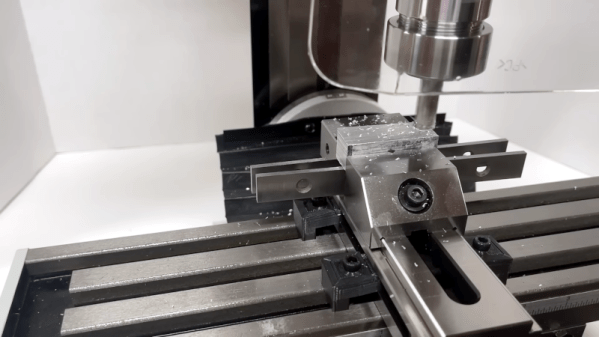
A vacuum table provides a way to hold workpieces flat and secure while a CNC machine does its thing, and because no clamps are involved, it can really speed up repetitive work. [enhydra]’s solution combines a vacuum table with a jig that ensures every rectangular piece is held exactly where the machine expects it to be, making the whole process of modifying multiple units significantly more efficient.
The whole thing — vacuum table and modular top — was straightforward to CNC cut out of what looks like particle board and worked as-is, no added gaskets or seals required, making this a very economical solution.
Vacuum tables can be pretty versatile and applied in more than one way, so keep that in mind the next time you’re wondering how best to approach a workshop problem. We’ve seen a well-engineered table used to speed up PCB milling, and we’ve also seen a DIY vacuum table combined with a heat gun and plastic plates from the dollar store make a bare-bones thermoforming rig.