You know, not every solution needs to be complicated to be absolutely awesome. Take the humble clothespin, for example, two pieces of cleverly carved wood (or plastic; we won’t judge) and a spring. And yet, the service it provides is useful for many applications.
The same simple elegance is also present in [Anteneh]’s overgrazing shield. When sheep and other animals are allowed to eat the vegetation down to the soil, it leads to soil erosion if not kept in check with regular grazing location rotation. As it turns out, if you want to keep an animal from eating grass and plants down to the soil, just slip a leather harness over its neck with a piece of wood in the right place so it literally can’t graze any lower than the wood allows.
According to [Anteneh]’s prototype tests, it only takes a few seconds to fit the shield to the animal’s head and neck, and then they’re off to grazing to the prescribed depth. We think this is a great solution and hope to see it in wide use along with regular rotation.
Few things get a Hackaday staffer excited like bunches of tiny LEDs. The smaller and denser the better, any form will do as long as we can get a macro shot or a video of a buttery smooth animation. This time we turn to [Sawaiz Syed] and [Open Kolibri] to deliver the brightly lit goods with the minuscule HALO 90 reactive LED earrings.
The HALO 90’s are designed to work as earrings, though we suspect they’d make equally great brooches, hair accessories, or desk objects. To fit this purpose each one is a minuscule 24 mm in diameter and weighs a featherweight 5.2 grams with the CR2032 battery (2.1 g for the PCBA alone). Functionally their current software includes three animation modes, each selectable via a button on device; audio reactive, halo (fully lit), and sparkle. Check out the documentation for details on expected battery life in each mode, but suffice to say that no matter what these earrings will make it through a few nights out.
In terms of hardware, the HALO 90’s are as straightforward as you’d expect. Each device is driven by an STM8 at its maximum 16MHz which is more than fast enough to keep the 90 charliplexed 0402 LEDs humming along at a 1kHz update rate, even with realtime audio processing. In fact the BOM here is refreshingly simple with just 8 components; the LEDs, microcontroller and microphone, battery holder and passives, and the button. [Sawaiz] even designed an exceptionally slick case to go with each pair of earrings, which holds two HALO 90’s with two CR2032’s and includes a magnetic closure for the most satisfying lid action possible.
As with some of his other work, [Sawaiz] has produced a wealth of exceptional documentation to go with the HALO 90’s. They’re available straight from him fully assembled, but with documentation this good the path to a home build should be well lit and accessible. He’s even chosen parts with an eye towards long availability, low cost, and ease of sourcing so no matter when you decide to get started it should be a snap.
It was difficult to choose just a few images from [Sawaiz]’s mesmerizing collection, so if you need more feast your eyes on the expanded set after the break.
We’ve seen a number of open source smart watches over the years, and while they’ve certainly been impressive from a technical standpoint, they often leave something to be desired in terms of fit and finish. Exposed PCBs and monochromatic OLED displays might be fine for a trip to the hackerspace, but it wouldn’t be our first choice for date night attire.
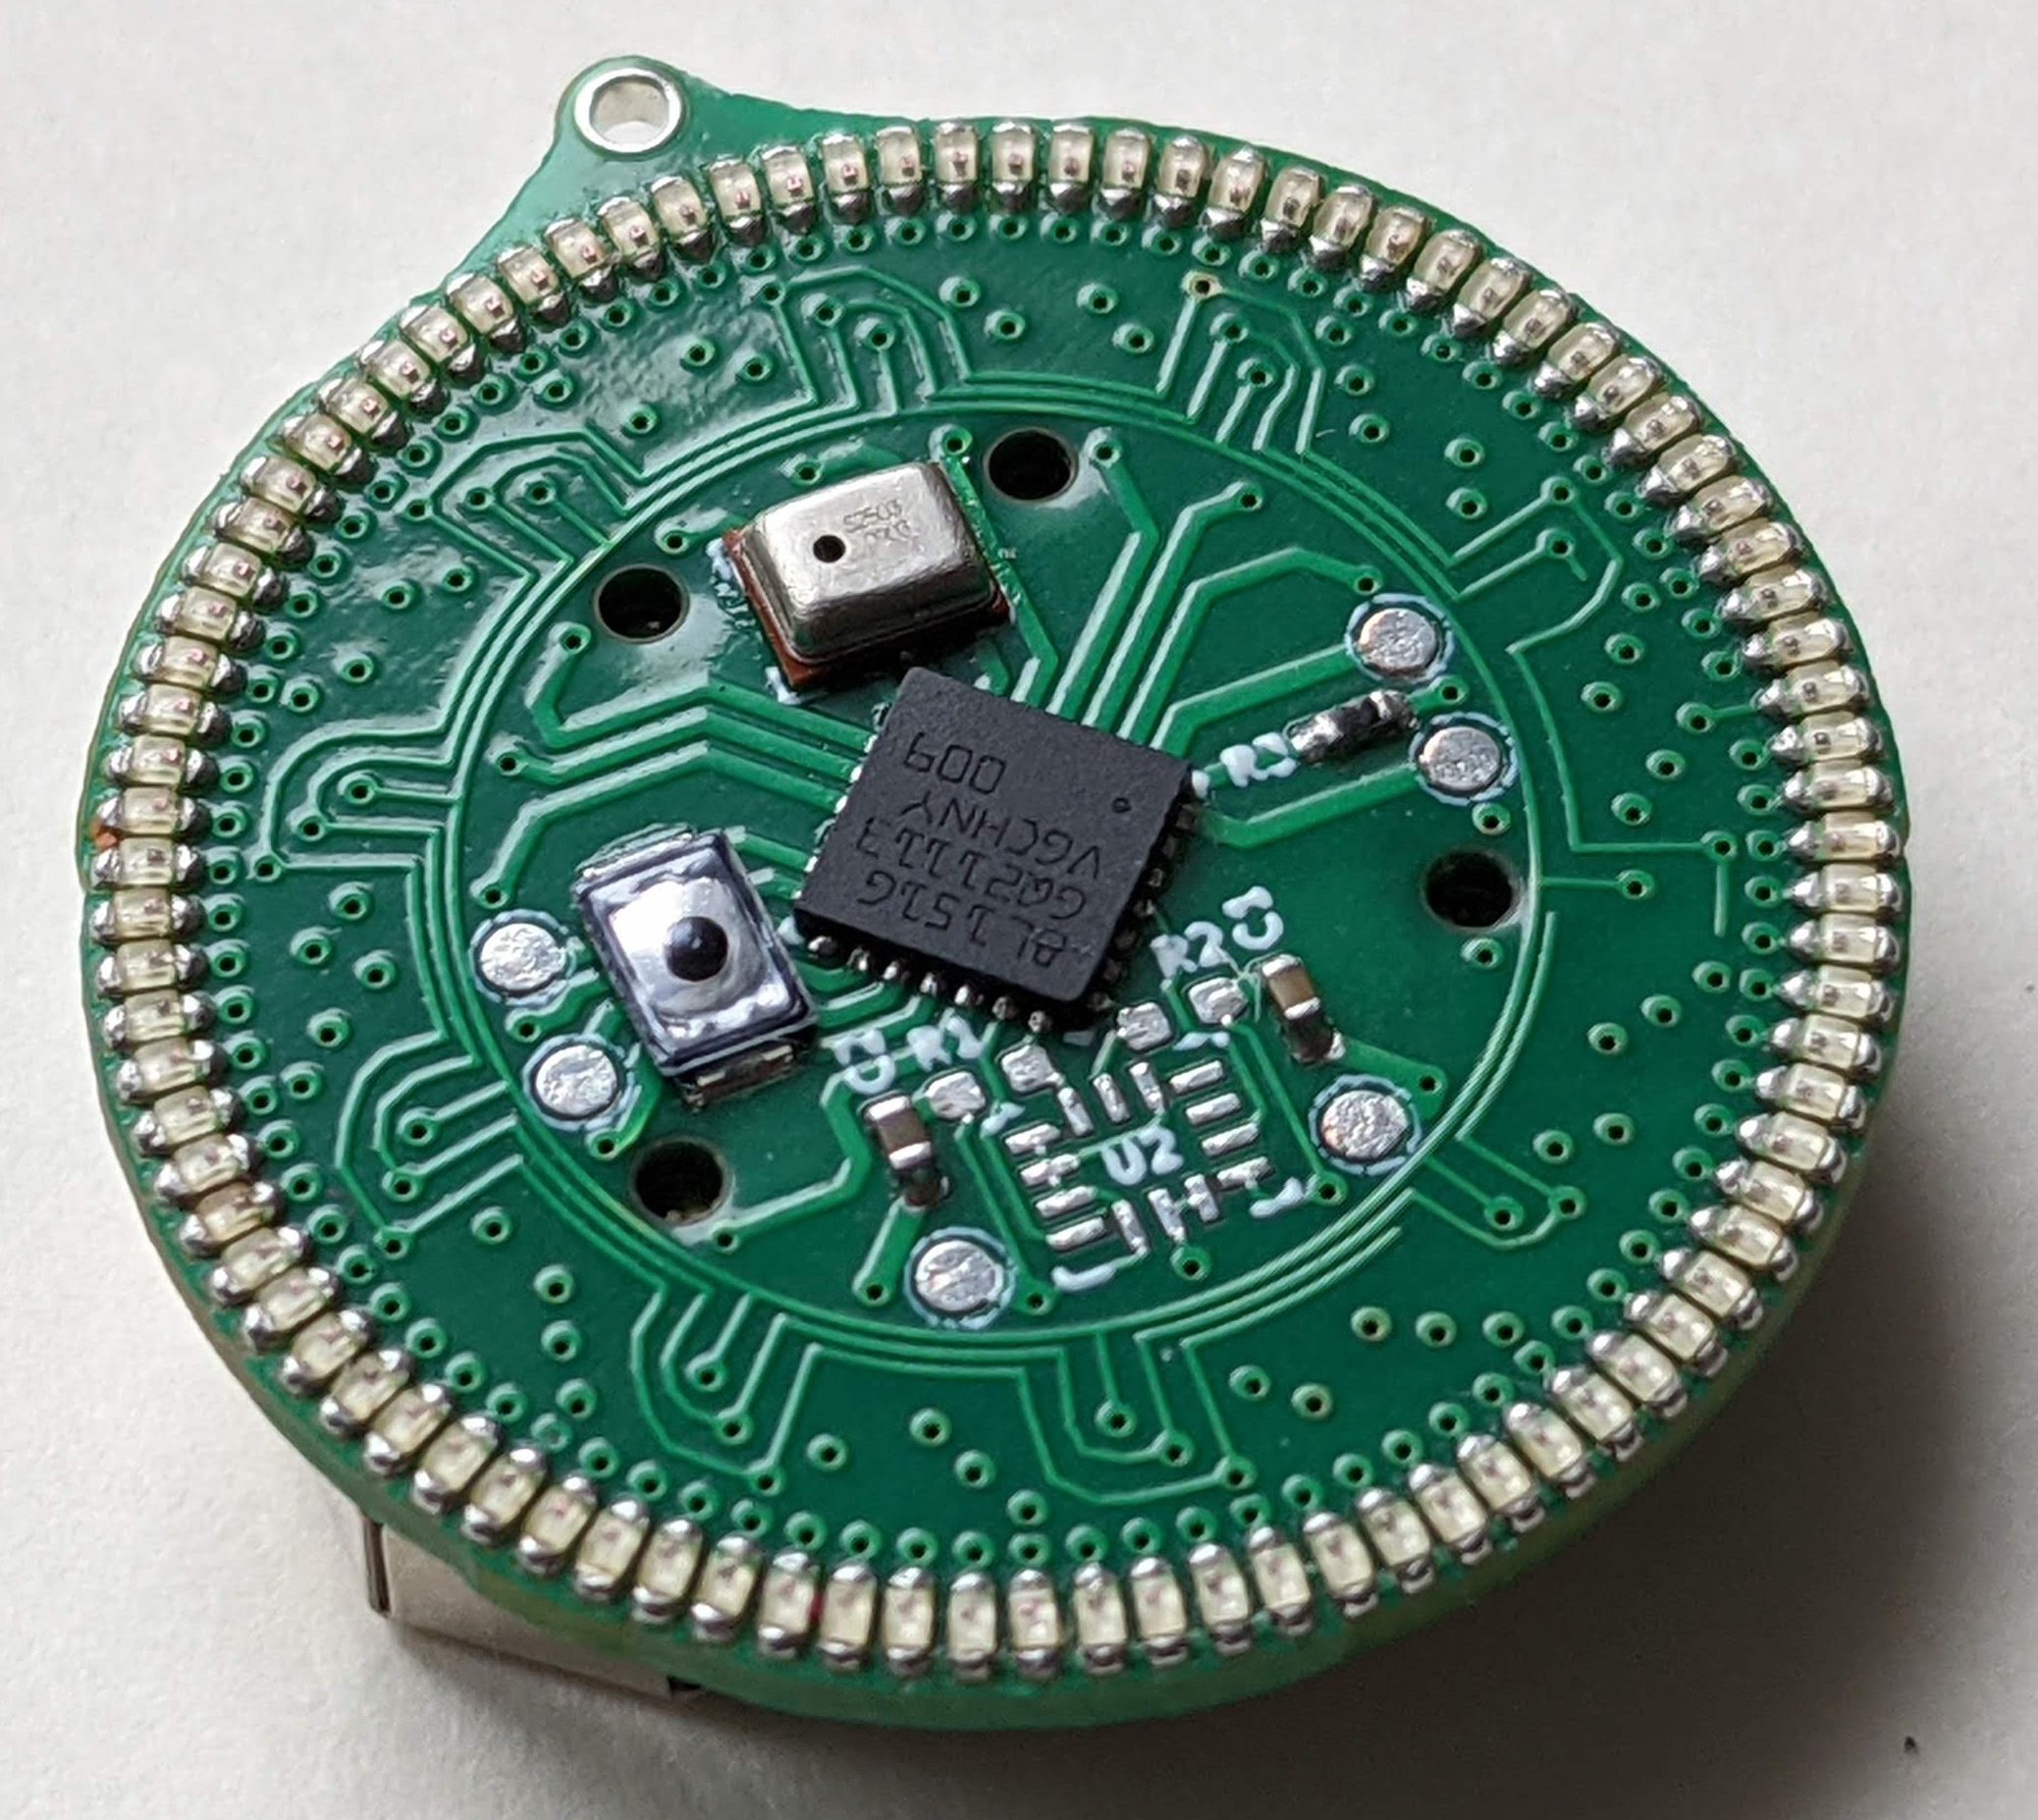
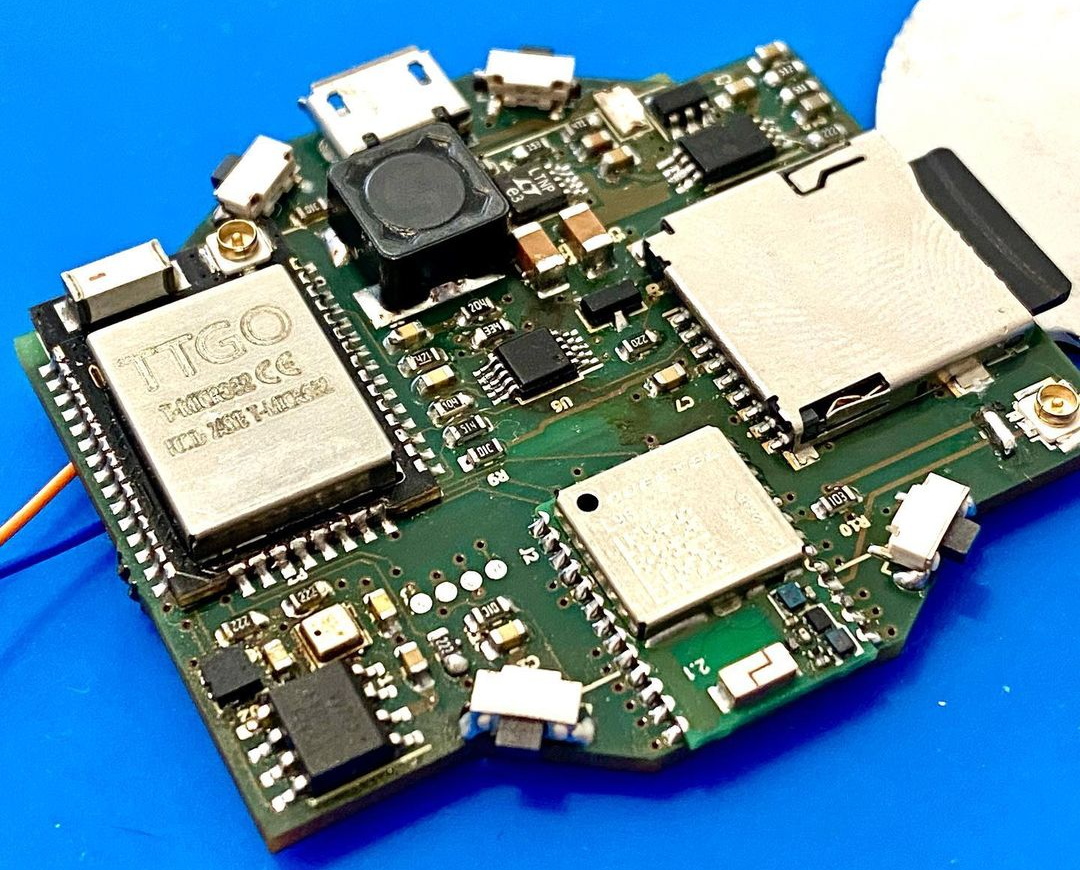
Enter the Open-SmartWatch from [pauls_3d_things]. This ESP32 powered watch packs a gorgeous circular 240×240 TFT display, DS323M RTC, BMA400 three-axis accelerometer, and a 450 mAh battery inside of a 3D printed enclosure that can be produced on your average desktop machine. WiFi and Bluetooth connectivity are a given with the ESP32, but there’s also an enhanced edition of the PCB that adds another 4 MB of RAM, a micro SD slot, and a Quectel L96 GPS receiver.
The GPS edition of the PCB
As it’s an open source project you’re free to download the PCB design files and get the board produced on your own, but [pauls_3d_things] has actually partnered with LILYGO to do a run of the Open-SmartWatch electronics which you can pick up on AliExpress right now for just $24 USD. You’ll still need to order the battery separately and 3D print your own case, but it still seems like a pretty sweet deal to us.
On the software front, things are pretty basic right now. The watch can update the time from NTP using a pre-configured WiFi network, and there’s a Bluetooth media controller and stopwatch included. Of course, as more people get the hardware in their hands (or on their wrists, as the case may be), we’ll likely start seeing more capabilities added to the core OS.
While getting our own code running on commercially produced smartwatches holds a lot of promise, the Open-SmartWatch is arguably the best of both worlds. The partnership with LILYGO brings professional fabrication to the open hardware project, and the GPLv3 licensed firmware is ripe for hacking. We’re very excited to see where the community takes this project, and fully expect to start seeing these watches out in the wild once we can have proper cons again.
Augmented reality (AR) and natural gesture input provide a tantalizing glimpse at what human-computer interfaces may look like in the future, but at this point, the technology hasn’t seen much adoption within the open source community. Though to be fair, it seems like the big commercial players aren’t faring much better so far. You could make the case that the biggest roadblock, beyond the general lack of software this early in the game, is access to an open and affordable augmented reality headset.
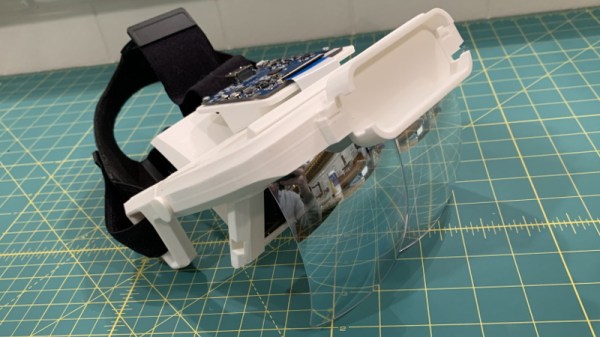
Which is precisely why [Graham Atlee] has developed the Triton. This Creative Commons licensed headset combines commercial off-the-shelf components with 3D printed parts to provide a capable AR experience at a hacker-friendly price. By printing your own parts and ordering the components from AliExpress, basic AR functionality should cost you $150 to $200 USD. If you want to add gesture support you’ll need to add a Leap Motion to your bill of materials, but even still, it’s a solid deal.
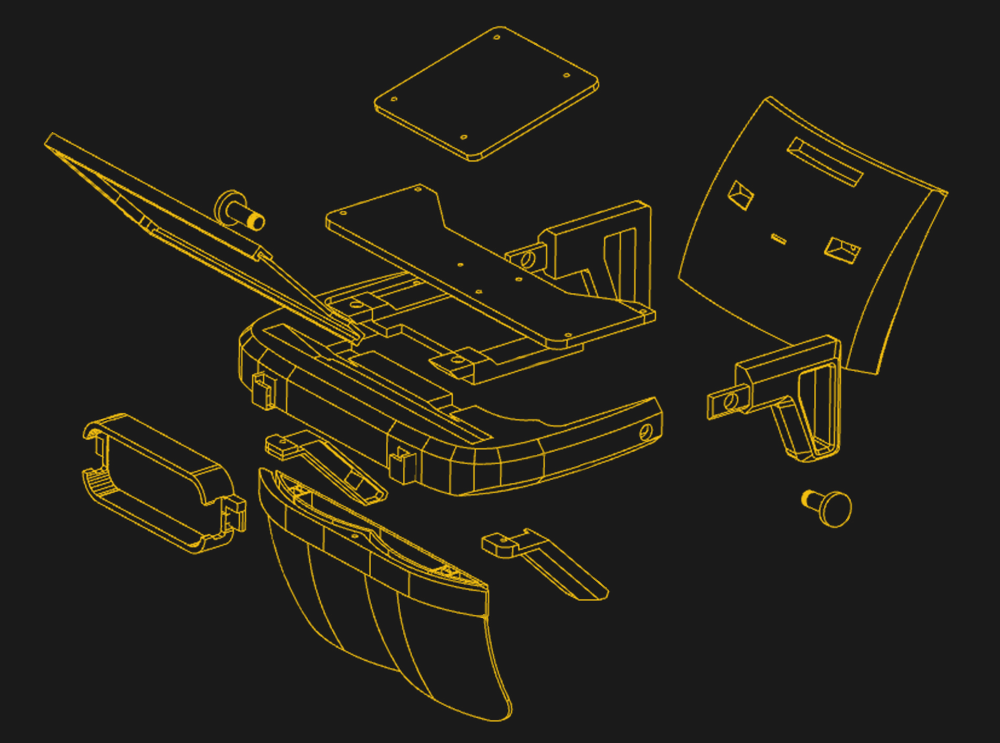
Exploded view of the Triton
The trick here is that [Graham] is using the reflectors from a surprisingly cheap AR headset designed to work with a smartphone. By combining these mass produced optics with a six inch 1440 x 2560 LCD panel inside of the Triton’s 3D printed structure, projecting high quality images over the user’s field of view is far simpler than you might think.
If you want to use it as a development platform for gesture interfaces you’ll want to install a Leap Motion in the specifically designed socket in the front, but otherwise, all you need to do is plug in an HDMI video source. That could be anything from a low-power wearable to a high-end gaming computer, depending on what your goals are.
[Graham] has not only provided the STLs for all the 3D printed parts and a bill of materials, but he’s also done a fantastic job of documenting the build process with a step-by-step guide. This isn’t some theoretical creation; you could order the parts right now and start building your very own Triton. If you’re looking for software, he’s also selling a Windows-based “Triton AR Launcher” for the princely sum of $4.99 that looks pretty slick, but it’s absolutely not required to use the hardware.
Of course, plenty of people are more than happy to stick with the traditional keyboard and monitor setup. It’s hard to say if wearable displays and gesture interfaces will really become the norm, of they’re better left to science fiction. But either way, we’re happy to see affordable open source platforms for experimenting with this cutting edge technology. On the off chance any of them become the standard in the coming decades, we’d hate to be stuck in some inescapable walled garden because nobody developed any open alternatives.
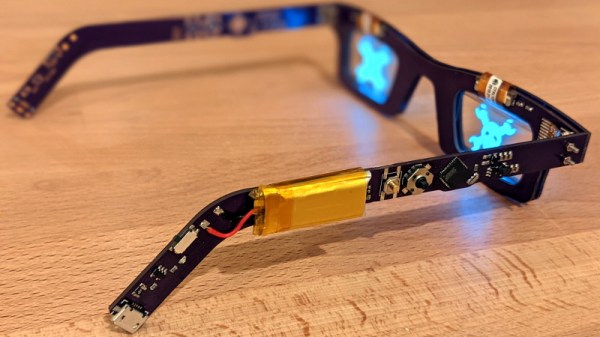
Tiny OLED displays are an absolute must-have in the modern parts bin, so what better way to show your allegiance to the maker movement than with a pair of Arduino-compatible OLED glasses? Created by Arduboy mastermind [Kevin Bates], these digital spectacles might not help you see any better — in fact, you’ll see a bit worse — but they’ll certainly make you stand out in the crowd at the next hacker con. (Whenever we can have one of those again, anyway.)
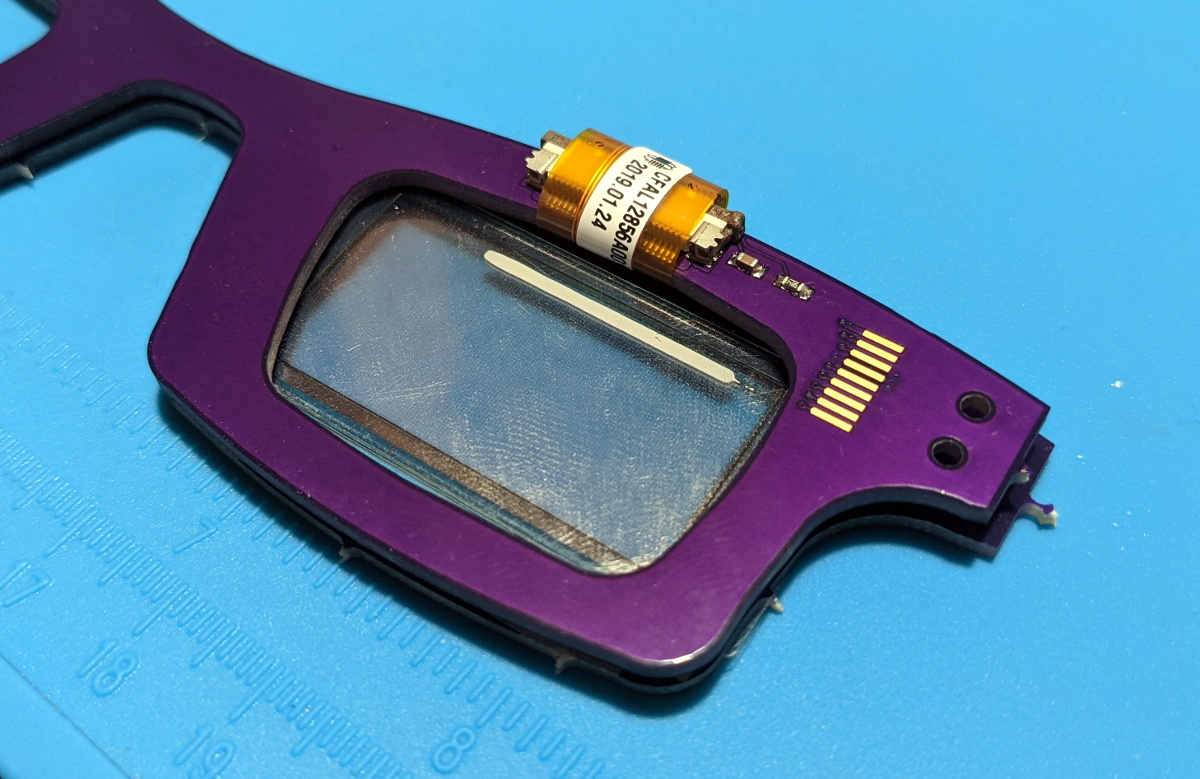
The key to this project is a pair of transparent CrystalFonts OLED displays, just like the ones [Sean Hodgins] recently used to produce his gorgeous volumetric display. In fact, [Kevin] says it was his success with these displays that inspired him to pursue his own project. With some clever PCB design, he came up with some boards that could be manufactured by OSH Park and put together with jewelry box hinges. Small flexible circuits, also from OSH Park, link the boards and allow the frames to fold up when not being worn.
The Arduglasses use the same ATmega32U4 microcontroller as the Arduboy, and with a few basic controls and a small 100 mAh rechargeable battery onboard, they can technically run anything from the open source handheld’s extensive software library. Of course, technically is the operative word here. While the hardware is capable of playing the games, [Kevin] reports that the OLED displays are too close to the wearer’s eyes to actually focus on them. That said the ability to easily create software for these glasses offers plenty of opportunity for memes, as we see in the video below.
For reasons that are probably obvious, [Kevin] considers the Arduglasses an experiment and isn’t looking to turn them into a commercial product or kit. But if there’s interest, he’s willing to put the design files up on GitHub for anyone who wants to add a pair of Arduino glasses to their cyberpunk wardrobe.
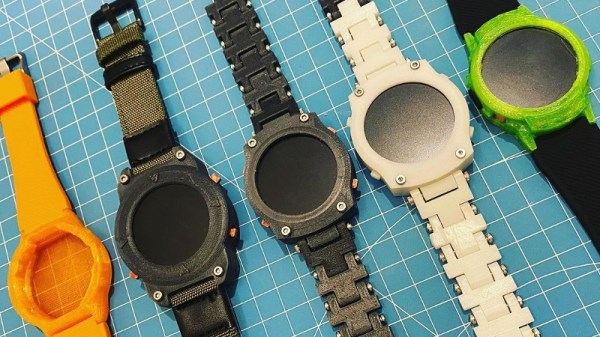
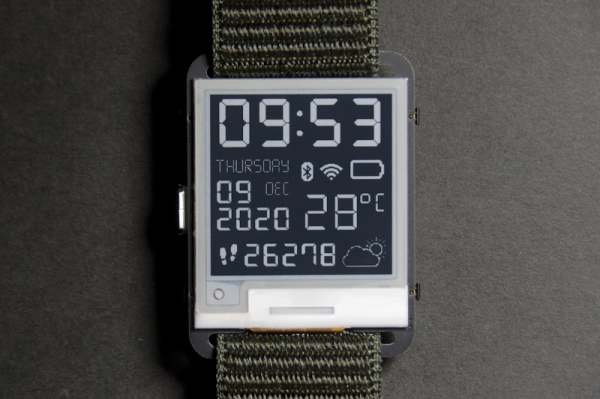
It used to be that building your own watch was either a big project or it meant that you didn’t really care about how something looked on your wrist. But now with modern parts and construction techniques, a good-looking smart watch isn’t out of reach of the home shop. But if you don’t want to totally do it yourself, you can turn to a kit and that’s what [Stephen Cass] did. Writing in IEEE Spectrum, he took a kit called a Watchy and put it through its paces for you.
Watchy is an open source product that uses an ESP32, an E-ink display, and costs about $50. The display is 1.5 inches — good enough for a watch — and it has a real time clock, a vibration motor, an accelerometer, and four buttons. The whole thing runs on a 200 mAh lithium polymer battery. The charger is microUSB and you can also upload software to it using the usual Arduino tools.
However, [Stephen] found that none of the examples he tried would work at first. He found problems with the Mac software, but he also had problems under Windows. The answer? Switching to a Raspberry Pi seemed to work and once the watch was wiped clean, the Mac tools would work, too. It sounds like this isn’t a common problem, but he has to erase the watch with the Pi before each programming cycle.
Unlike a normal Arduino program, all the work in a typical Watchy program happens in setup() so the watch can mostly sleep and it updates the 200×200 typically just once a minute. As an example, [Stephan] wrote a watch face that uses an old Irish alphabet to tell time. He plans to add code to grab online data, too, and the phone has support for connecting wirelessly and parsing JSON to make tasks like that easier.
We always thought the EZ430-Chronos was a good-looking watch, but its screen is dated now. You can also pick up a lot of cheap import watches that can be hacked.
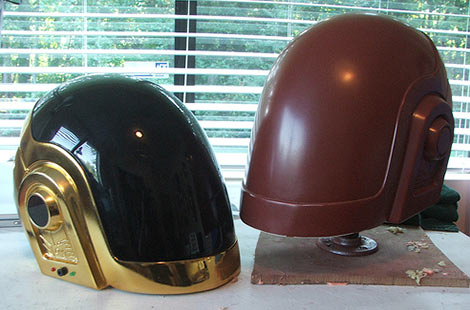
It’s with sadness that we note the end to an end. The French dance music duo Daft Punk have split up, announced in a video that’s has already clocked 22 million views.The band have inspired hardware geeks across the world not just with their music but the way they present themselves. A perennial project has been to replicate in some way their iconic robot helmets.
Harrison Krix’s 2009 take on Guy-Manuel de Homem-Christo’s helmet.
The artists themselves have been reticent about the exact technology that powers their headgear, but while this is a source of endless mystery and speculation to the music press it’s safe to assume from our perspective that their designers have the same parts at their disposal as we have. Microcontrollers, EL wire, and LEDs are universal, so the challenge lies in artistic expression with the helmet design rather than in making the effects themselves. We’ve reached into the archives for a bit of Daft Punk helmet nostalgia, so stick on Harder Better Faster and lets take a look at them, er, one more time.

 You know, not every solution needs to be complicated to be absolutely awesome. Take the humble clothespin, for example, two pieces of cleverly carved wood (or plastic; we won’t judge) and a spring. And yet, the service it provides is useful for many applications.