Finally Your Air Drumming Has An Outlet

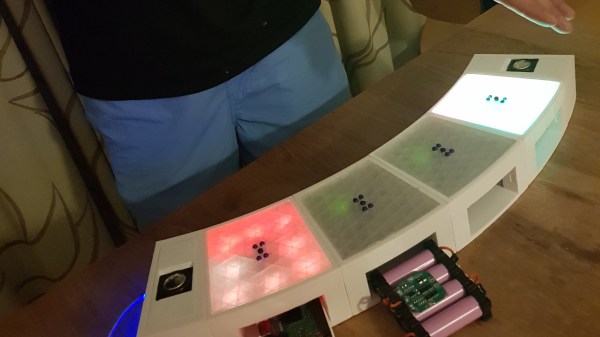
Two engineering students are hard at work on this air drum which they hope will help disabled people and people in nursing homes. Though, we think it just looks fun!

Each board is its own module consisting of the electronics and 3D printed cases. The modules each contain an arduino mini, IR sensor, and LEDs. They share power, audio, and communicate with an i2c bus. Two modules are special, one holds the power system and the other a Raspberry Pi. The units can be put together in different configurations. Finally, they are capped with speaker units.

The demo shown in the video, which you can see after the break, looks fun. The response time is pretty fast and it looks like you can measure all sorts of parameters. This can then be translated into different velocities, pitches, and instruments. It’s somewhere between a theremin and a drum kit, very cool.

Continue reading “Finally Your Air Drumming Has An Outlet”

Detecting Water Before It’s Too Late

[mcu_nerd] is like any engineer, which is why his problem of an occasionally leaky water heater sure looks like a research project with no end in sight. Sure there’s probably a commercial product out there that can be had for half the cost and a few clicks of the mouse, but what’s the point in actually solving the problem?

His log starts with research into detecting low battery voltages. Then it was a quick exploration in designing low-power circuits. When the Flexible PCB contest came along, he realized that there was a chance to design a better electrode, and he ended up winning one of the vouchers; which is where he’s at now.

It’s definitely a work in progress, and if anything it’s just a quick five minute read and an opportunity to commiserate with another wayward soul. We do like his clever use of a tealite candle tin as both the second electrode and case for his water detection circuit. There are also some KiCad files and code.

An Open Source Toolbox For Studying The Earth

Fully understanding the planet’s complex ecosystem takes data, and lots of it. Unfortunately, the ability to collect detailed environmental data on a large scale with any sort of accuracy has traditionally been something that only the government or well-funded institutions have been capable of. Building and deploying the sensors necessary to cover large areas or remote locations simply wasn’t something the individual could realistically do.

But by leveraging modular hardware and open source software, the FieldKit from [Conservify] hopes to even the scales a bit. With an array of standardized sensors and easy to use software tools for collating and visualizing collected data, the project aims to empower independent environmental monitoring systems that can scale from a handful of nodes up to several hundred.
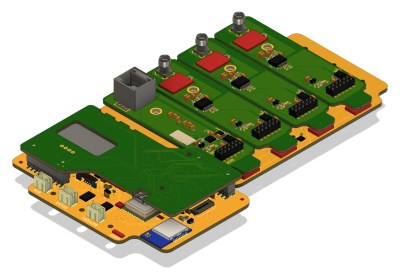
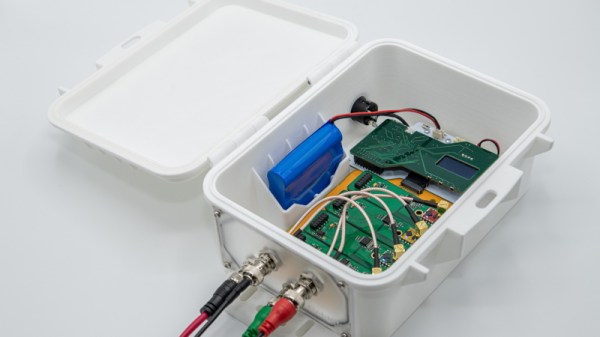
We’ve all seen more than enough DIY environmental monitoring projects to know there’s nothing particularly new or exciting about stuffing a few cheap sensors into a plastic container. But putting high quality, reliable hardware into large scale production is another thing entirely. Especially when your target user may have limited technical knowledge.

That’s why FieldKit is designed around a common backplane with modular sensors and add-on boards that can be plugged in and easily configured with a smartphone application. Whether the node is going to be mounted to a pole and powered by a solar panel, or attached to a buoy, most of the hardware stays the same.

While the electronics and the software interface are naturally the stars of the show here, we can’t help but also be impressed with the enclosure for the FieldKit. It seems a minor thing, but as we’ve seen from the projects that have come our way over the years, finding a box to put your hardware in that’s affordable, adaptable, and weatherproof is often a considerable challenge in itself. Rather than using something commercially available, [Conservify] has designed their own enclosure that’s inspired by the heavy duty (but prohibitively expensive) cases from Pelican. It features a replaceable panel on one side where the user can pop whatever holes will be necessary to wire up their particular project without compromising the case itself; just get a new panel when you want to reconfigure the FieldKit for some other task. Prototypes have already been 3D printed, and the team will be moving to injection molded versions in the near future.

As a finalist in the 2019 Hackaday Prize, FieldKit exemplifies everything we’re looking for this year: a clear forward progression from prototype to final hardware, an obvious need for mass production, and the documentation necessary to show why this project is deserving of the $125,000 grand prize up for grabs.

Continue reading “An Open Source Toolbox For Studying The Earth”

The Ifs Make Learning To Code Child’s Play

Anyone who has done the slightest bit of programming knows about the “Hello, World!” program. It’s the archetypal program that one enters to get a feel for a new language or a new architecture; if you can get a machine to print “Hello, World!” back to you, the rest is just details. But what about teaching kids to program? How does one get toddlers thinking in logical, procedural ways? More particularly, what’s a “Hello, World!” program look like for the pre-literate set?

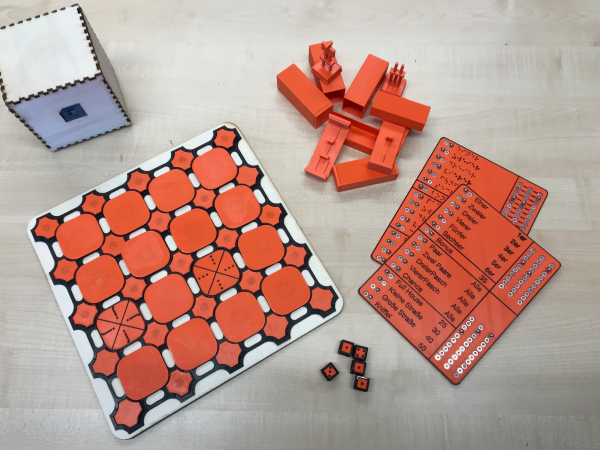
Those are the sort of questions that led to The Ifs by [Makeroni Labs]. The Ifs are educational toys for teaching kids as young as three the basics of coding. Each If is a colorful plastic cube with a cartoon face and a “personality” that reflects what the block does – some blocks have actuators, some have sensors. The blocks are programmed by placing magnetic tabs on the top representing conditions and actions. A kid might choose to program a block to detect when it’s being shaken, or when the lights come on, and then respond by playing a sound or vibrating. The blocks can communicate with each other too, so that when the condition for one block is satisfied, something happens on another block.

The Ifs look like a lot of fun, and they’re a great jumpstart on the logical thinking skills needed for coders and non-coders alike. We’re not alone in thinking this is a pretty keen project – the judges for this year’s Hackaday Prize selected The Ifs as one of the twenty finalists. Will it win? We’ll find out next week at the 2019 Hackaday Superconference. If you won’t be in Pasadena with us, make sure you tune in to the livestream to watch the announcement.

Watch A 3D Printer Get Designed From The Ground Up

Too often when you see a build video, you only get to see the final product. Even if there’s footage of the build itself, it’s usually only the highlights as a major component is completed. But thankfully that’s not the case with the “V-Baby” CoreXY 3D printer that [Roy Berntsen] has been working on.

Watching through his playlist of videos, you’re able to see him tackle his various design goals. For example he’d like the final design to be both machinable and printable, which is possible, but it certainly adds complexity and time. He also transitions from a triangular base to a rectangular one at some point. These decisions, and the reasons behind them, are all documented and discussed.

Towards the end of the series we can see the final testing and torturing process as he ramps up to a final design release. This should definitely demystify the process for anyone attempting their first 3D printer design from scratch.

Use Your Earbud’s Media Controls On Your Laptop With This Useful Dongle

[David] sends in his very nicely designed “Thumpware Media Controller” that lets your mobile phone headphones control the media playback on your PC.

We realize that some PCs have support for the extra pins on cellphone earbuds, but at least some of us have experienced the frustration (however small) of habitually reaching up to touch the media controls on our earbuds only to hear the forlorn click of an inactive-button. This solves that, assuming you’re still holding on to those 3.5mm headphones, at least.

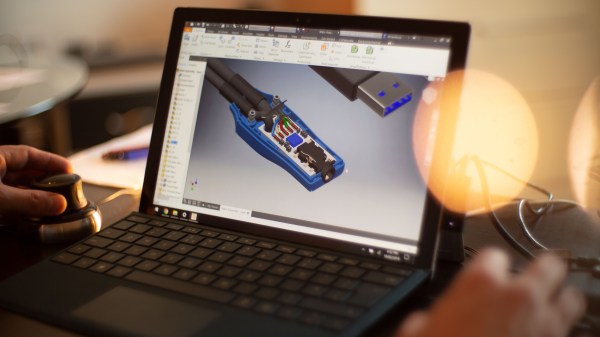
The media controls are intercepted by a PIC16 and a small board splits and interprets the signals into a male 3.5mm and a USB port. What really impressed us is the professional-looking design and enclosure. A lot of care was taken to plan out the wiring, assembly, and strain relief. Overall it’s a pleasure to look at.

All the files are available, so with a bit of soldering, hacking, and careful sanding someone could put together a professional looking dongle for their own set-up.