The great thing about word clocks is that while they all follow the same principle of spelling out the time for you, they come in so many shapes, sizes, and other variations, you have plenty of options to build one yourself. No matter if your craft of choice involves woodworking, laser cutting, PCB design, or nothing physical at all. For [Yasa], it was learning 3D modeling combined with a little trip down memory lane that led him to create a fully functional word clock as a rendered animation in Blender.
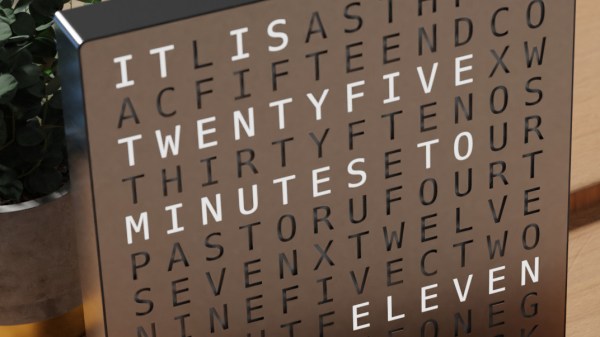
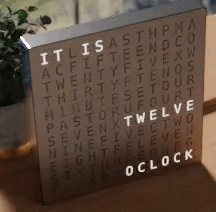 Inspired by the picture of a commercially available word clock, [Yasa] remembered the fun he had back in 2012 when he made a Turkish version for the Pebble watch, and decided to recreate that picture in Blender. But simply copying an image is of course a bit boring, so he turned it into an actual, functioning clock by essentially emulating a matrix of individually addressable LEDs using a custom texture he maps the current time to it. And since the original image had the clock positioned by a window, he figured he should have the sun move along with the time as well, to give it an even more realistic feel.
Of course, having the sun situation in real-time all year round would be a bit difficult to render, so [Yasa] choose to base the scene on the sun during spring equinox in his hometown Stockholm instead. You can see the actual clock showing your local time (or whichever time / time zone you set your device to) on his website, and his write-up is definitely a fun read you should check out if you’re interested in all the details or 3D modeling in general — or just to have a look at a time lapse of the clock itself. As he states, the general concept could be also used to model other word clocks, so who knows, maybe we will see this acrylic version or a PCB version of it in the future.
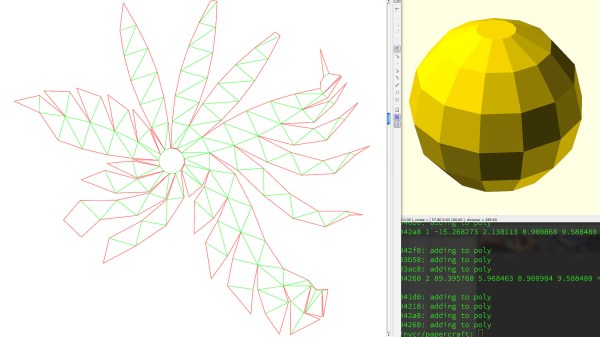
 There are of course other and more full-featured tools for unfolding 3D models: