Gaze Deeply Into These Infinity Mirror Coasters

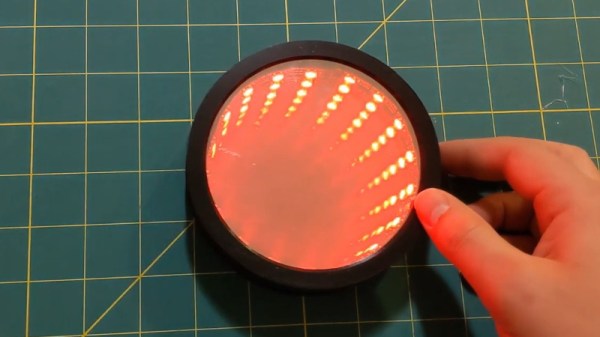
Infinity mirrors have been gaining in popularity recently, thanks in no small part to the availability of low-cost RGB LED strips to line them with. Generally such pieces are limited to wall art, or the occasional table build, which is what makes these infinity mirror drink coasters from [MnMakerMan] so unique.

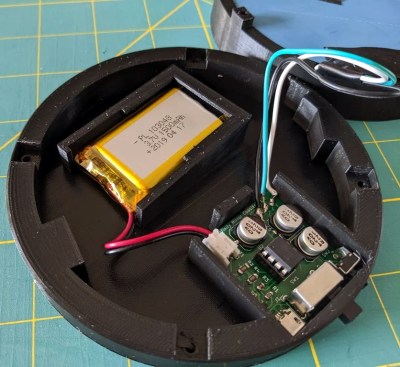
Built from an ATtiny85 and a WS2812B LED strip nestled into a 3D printed enclosure, these coasters are relatively cheap and easy to assemble should you want to run a few off before the holiday party season. [MnMakerMan] mentions the LEDs can consume a decent amount of energy, so he’s included a module to allow recharging of the internal 3.7 V 1500 mAh battery over USB.

Of course, a couple of PLA pieces and a custom PCB doesn’t make an infinity mirror. To achieve the desired effect, he’s created a stack consisting of a 4″ glass mirror, a 1/8″ thick plexiglass disc, and one-way mirror tint film. The WS2812B strip mounted along the circumference lights up the void between the two surfaces, and produces a respectable sense of depth that can be seen in the video after the break.

This isn’t the first high-tech piece of surface protection we’ve seen around these parts, as some very nice wirelessly charged supercapacitor coasters were entered into the 2019 Hackaday Prize. Of course, if you’re of the opinion that coasters should remain as cheap as possible, we’ve seen a number of automated attempts to add some flair to the classic paperboard discs.

Continue reading “Gaze Deeply Into These Infinity Mirror Coasters”

Why Buy Toys When You Can Build Them Instead?

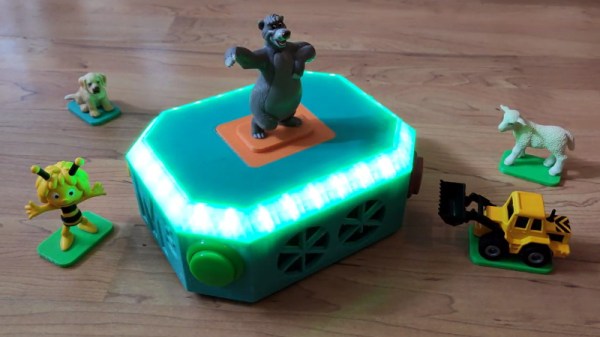
Like many creative individuals who suddenly find themselves parents, [Marta] wanted to make something special for his children to play with. Anybody can just purchase an off-the-shelf electronic toy, but if you’ve got the ability to design one on your own terms, why not do it? But even compared to the fairly high standards set by hacker parents, we have to admit that the amount of time, thought, and effort that was put into the “Marta Musik Maschine” is absolutely phenomenal.

[Marta] was inspired by the various commercial offerings which use RFID and other technologies to identify which characters the child is playing with and respond accordingly. But since he didn’t want to get locked into one particular company’s ecosystem and tinkering with the toys seemed frowned upon by their creators, he decided to just come up with his own version.

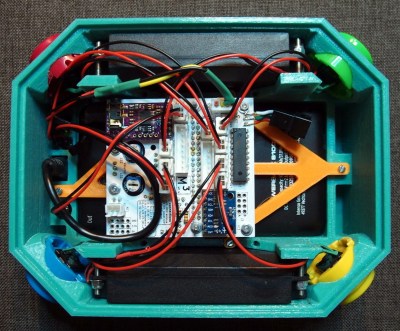
Over the course of many posts on the Musik Maschine’s dedicated website, [Marta] explains his thought process for every design consideration of the toy in absolutely exquisite detail. Each of the writeups, which have helpfully been broken down for each sub-system of the final toy, are arguably detailed and complete enough to stand as their own individual projects. Even if you’re not looking to get into the world of DIY electronic toys, there’s almost certainly an individual post here which you’ll find fascinating. From the finer points of interfacing your Python code with arcade buttons to tips for designing 3D printed enclosures, there’s really something for everyone here.

The children of hackers are often the envy of the neighborhood thanks to the one-of-a-kind playthings provided by their parents, and considering the level of commitment [Marta] has put into a toddler toy, we can’t wait to see what he comes up with next.

Continue reading “Why Buy Toys When You Can Build Them Instead?”

An ESP32 Clock With A Transforming LED Matrix

Over the years we’ve seen countless ways of displaying the current time, and judging by how many new clock projects that hit the tip line, it seems as though there’s no end in sight. Not that we’re complaining, of course. The latest entry into the pantheon of unusual timepieces is this ESP32-powered desk clock from [Alejandro Wurts] that features a folding LED matrix display.

The clock uses eight individual 8 x 8 LED arrays contained in a 3D printed enclosure that hinges in the middle. When opened up the clock has a usable resolution of 8 x 64, and when its folded onto itself the resolution becomes 16 x 32.

This variable physical resolution allows for alternate display modes. When the hardware detects that its been folded into the double-height arrangement, it goes into a so-called “Big Clock” mode that makes it easier to see the time from a distance. But while in single-height mode, there’s more horizontal real estate for adding the current temperature or other custom data. Eventually [Alejandro] wants to use MQTT to push messages to the display, but for now it just shows his name as a placeholder.

The key to the whole project is the hinged enclosure and the reed switch used to detect what position it’s currently in. Beyond that, there’s just an ESP32 an some clever code developed with the help of the MD_Parola library written for MAX7219 and MAX7221 LED matrix controllers. [Alejandro] has published the code for his clock, which should be helpful for anyone who’s suddenly decided that they also need a folding LED matrix in their life.

Now if the ESP32 LED matrix project you have in mind requires full color and high refresh rates, don’t worry, we’ve got a solution for that.
Continue reading “An ESP32 Clock With A Transforming LED Matrix”

3D Printing New Cases For The TS100 Soldering Iron

About a year back, [BogdanTheGeek] found himself in need of a new case for this TS100 soldering iron. Unfortunately, while the product is often billed as being open source friendly (at least in the firmware sense), he was surprised to discover that he couldn’t find the detailed dimensions required to 3D print his own replacement case. So he took it upon himself to document the case design and try to kick off a community around custom enclosures for the popular portable iron.

The main goals while designing the replacement case was to make it printable without support, and usable without additional hardware. He also wanted it to be stronger than the original version, and feature a somewhat blockier design that he personally finds more comfortable. The case was designed with PLA in mind, and he says he’s had no problems with the lower-temperature plastic. But if you’re still concerned about the heat, PETG would be an ideal material to print yours in.

It took him many attempts to get the design to where it is today, and still, there are improvements he’d like to make. For one, there’s no protective cover over the iron’s OLED screen. He’d also like to make the switch from SolidWorks over to FreeCAD so the project is a bit more accessible, and says he’d appreciate anyone who wants to chip in. We’re excited to see what develops once the hacking world realizes that there are accurate open source CAD files for the TS100 floating around out there.

Our very own [Jenny List] put the TS100 through its paces not so long ago, and found a decidedly solid little tool. While it won’t replace your high-end soldering station, it’s very convenient for quick repairs and simple tasks, especially if you find yourself away from the workbench proper.

An Optocoupler Doorbell Notifier

Over the years we’ve seen several attempts at adding Internet connectivity to the lowly wired doorbell. Generally, these projects aim to piggyback on the existing wiring, bells, and buttons rather than replace them entirely. Which invariably means at some point the AC wiring is going to need to interface with a DC microcontroller. This is often where things get interesting, as it seems everyone has a different idea on how best to bridge these two systems.

That’s the point where [Ben Brooks] found himself not so long ago. While researching the best way to tap into the 20 VAC pumping through his doorbells, he found a forum post where somebody was experimenting with optocouplers. As is unfortunately so often the case, the forum thread never really had a conclusion, and it wasn’t clear if the original poster ever figured it out.

DIY optocouplers wrapped in electrical tape

[Ben] liked the idea though, so he thought he would give it a shot. But before investing in real optocouplers, he created his own DIY versions to use as a proof of concept. He put a standard LED and photoresistor together with a bit of black tape, and connected the LED to the doorbell line with a resistor. Running the LED on 60 Hz AC meant it was flickering rapidly, but for the purposes of detecting if there was voltage on the line, it worked perfectly.

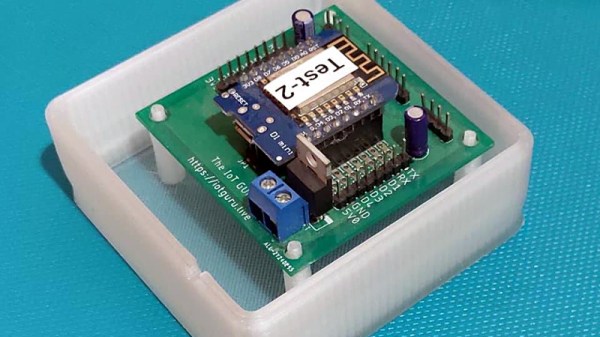
Wanting something slightly more professional for the final product, [Ben] eventually evolved his proof of concept to include a pair of 4N35s, a custom PCB, and a 3D printed enclosure. Powered by a Particle Xenon, the device uses IFTTT to fire off smartphone notifications and blink the lights in the house whenever somebody pushes the bell.

If you’re still wondering why it’s so tricky to connect a microcontroller up to your door bell, a quick look at some of the similar projects we’ve covered should give you a pretty good idea of how annoying these systems can be to modernize.

PVC Pipe Turned Portable Bluetooth Speaker

We’ve always felt that sections of PVC pipe from the home improvement store are a criminally underutilized construction material, and it looks like [Troy Proffitt] feels the same way. Rather than trying to entirely 3D print the enclosure for his recently completed portable Bluetooth speaker, he combined printed parts with a piece of four inch pipe from the Home Depot.

While using PVC pipe naturally means your final hardware will have a distinctly cylindrical look, it does provide compelling advantages over trying to print the entire thing. For one, printing an enclosure this large would have taken hours or potentially even days. But by limiting the printed parts to accessories like the face plate, handle, and caps, [Troy] reduced that time considerably. Of course, even if you’re not in a rush, it’s worth mentioning that a PVC pipe will be far stronger than anything your desktop FDM printer is likely to squirt out.

[Troy] provides links for all the hardware he used, such as the speakers, tweeters, and the Bluetooth audio board itself. The system is powered by an 1800 mAh 3S RC-style battery pack that he says lasts for hours, though he also links to a wall adapter that can be used if you don’t mind being tethered. Unfortunately it doesn’t look like he has any internal shots of the build, but given the relatively short parts list, we imagine it’s all fairly straightforward inside.

While this is certainly a respectable looking build considering it started life in the plumbing aisle, we have to admit that we’ve seen some portable Bluetooth speakers with fully 3D printed enclosures in the past that looked absolutely phenomenal. The tradeoff seems pretty clear: reuse existing materials to save time, print them if you don’t mind reinventing the wheel occasionally.

Meet MutantC: Raspberry Pi Sidekick Complete With Sliding Screen, QWERTY

Over the years we’ve seen the Raspberry Pi crammed into almost any piece of hardware you can think of. Frankly, seeing what kind of unusual consumer gadget you can shoehorn a Pi into has become something of a meme in our circles. But the thing we see considerably less of are custom designed practical enclosures which actually play to the Pi’s strengths. Which is a shame, because as the MutantC created by [rahmanshaber] shows, there’s some incredible untapped potential there.

The MutantC features a QWERTY keyboard and sliding display, and seems more than a little inspired by early smartphone designs. You know, how they were before Apple came in and managed to convince every other manufacturer that there was no future for mobile devices with hardware keyboards. Unfortunately, hacking sessions will need to remain tethered as there’s currently no battery in the device. Though this is something [rahmanshaber] says he’s actively working on.

The custom PCB in the MutantC will work with either the Pi Zero or the full size variant, but [rahmanshaber] warns that the latest and greatest Pi 4 isn’t supported due to concerns about overheating. Beyond the Pi the parts list is pretty short, and mainly boils down to the 3D printed enclosure and the components required for the QWERTY board: 43 tactile switches and a SparkFun Pro Micro. Everything is open source, so you can have your own boards run off, print your case, and you’ll be well on the way to reliving those two-way pager glory days.

We’re excited to see where such a well documented open source project like MutantC goes from here. While the lack of an internal battery might be a show stopper for some applications, we think the overall form factor here is fantastic. Combined with the knowledge [Brian Benchoff] collected in his quest to perfect the small-scale keyboard, you’d have something very close to the mythical mobile Linux device that hackers have been dreaming of.

Continue reading “Meet MutantC: Raspberry Pi Sidekick Complete With Sliding Screen, QWERTY”