3D Printed Diffusers Make More Natural Light

A strip of LEDs may be a simple and flexible way to add light to a project, but they don’t always look natural.  There is an easy way to make them look better, though: add a diffuser. That’s what [Nate Damen] did using a 3D printer. He created a diffuser using PETG giving a standard string of LEDs a softer and more natural look that makes them look more like older light sources such as fluorescent strips or EL wire, but with the flexible colors of LEDs. The PETG material he used has a naturally somewhat cloudy look, so it acts as a diffuser without needing any extra treatment.

Continue reading “3D Printed Diffusers Make More Natural Light”

A 3D Printer To PCB Miller Conversion

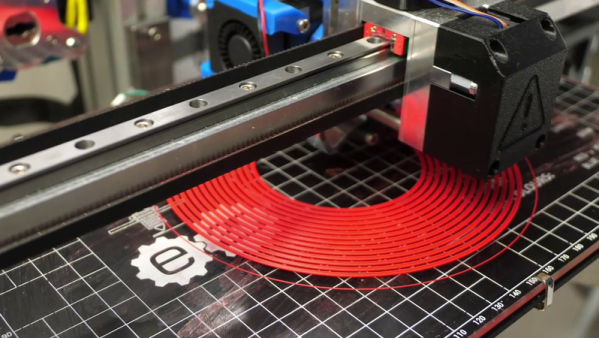
Got a 3D printer? With a bit of work, you may also have a PCB miller. That’s the basis of this neat hack by [Gosse Adema], who converted an Anet A8 3D printer into a PCB miller by building a holder for a Dremel rotary tool and adapting the GCode. This approach means that the adaptations to the printer are minimal: the only hardware is a 3D-printed holder for the Dremel that replaces the print head. The result is an impressive PCB milling machine that can do double-sided PCBs and make through holes.

The excellent write-up that [Gosse] did on this hack describes how he converted the printer, and how he took an EagleCAD design and converted it into four GCode files. That’s one for each side of the PCB, one for through holes and one for the final outline of the PCB. These are then fed to the 3D printer and cut in turn with an appropriate milling bit on the Dremel.

We’ve featured a few similar conversions before, such as this vintage conversion of a Makerbot and this cheap engraver conversion, but this one is much more detailed than those, covering the entire process from PCB design to final product.

Supportless Overhangs: Just Reorient Gravity By 90 Degrees

The 3D print by [critsrandom] in the image above may not look like much at first glance, until one realizes that the 90 degree overhang has no supports whatsoever. Never mind the messy bottom surface, and never mind that the part shown might avoid the problem entirely with some simple supports or a different print orientation; the fact that it printed at all is incredible.

[critsrandom] shared the method in a post on Reddit, and it consists simply of laying the 3D printer on its side. When the print head reaches the overhang, the fact that it is printing sideways is what allows that spot to make the leap from “impossible” to merely “messy”. Necessary? Probably not, but a neat trick nevertheless.

Tilted 3D printers is something that we’ve seen in the past, but for different reasons. When combined with a belt-driven build platform, a tilted printer has a theoretically infinite build volume (in one axis, anyway.)

3D Printed U-M

3D Printing At The Speed Of Light

3D printers now come in all shapes and sizes, and use a range of technologies to take a raw material and turn it into a solid object. We’re most familiar with Additive Manufacturing – where the object is created layer by layer. This approach is quite useful, but has a down side of being time consuming. Two professors at the University of Michigan have figured out a way to speed this process up, big time.

They start off with a VAT additive printing approach. These work by using an ultraviolet laser to harden or cure specific areas in a vat of resin, layer by layer, until the object is complete. The resin is then drained revealing your 3D printed object. Traditionally, VAT printing has been limited to small objects because the resin needs to have a relatively low viscosity.

The clever professors at U-M were able to get around this problem by adding a second laser that keeps the resin in a liquid state. By combining a curing laser with an ‘uncuring’ laser, they’re able to use resins that are more viscous, allowing them to print more durable parts. And do so about 100 times faster than traditional printers!

Thanks to [Baldpower] for the tip!

Sugar As A Bed Adhesive For 3D Printing

3D printers, like most CNC machines, reward careful thought and trial and error. It’s important to use the correct machine settings and to prepare the build environment properly in order to get good results. Fused Filament Fabrication printers rely on melting plastic just so in the production of parts, and have their own set of variables to play with. [Mysimplefix] has been exploring various solutions to bed adhesion and found something that seems to work perfectly, right in the pantry.

That’s right, this solution to the problem of bed adhesion is more commonly stirred into your coffee every morning – it’s sugar. [Mysimplefix] shares their preferred process, consisting of first mixing up a sugar/water solution in the microwave, before applying it to the bed with a paper towel and allowing the water to evaporate off.

Several test prints are then shown, with major overhangs, to show the adhesive capabilities of the sugar. The results are impressive, with parts sticking well while the bed is hot, while being easy to remove once cool. The video deals with PLA, but we’d be interested to see the performance with other materials as well.

It’s a tidy solution, and we’d love to know your thoughts and experiences in the comments. We’ve had a good long think about adhesives ourselves, too.

Continue reading “Sugar As A Bed Adhesive For 3D Printing”

How Not To Design A 3D Printed Belt Clamp

[Mark Rehorst] has been busy with his Ultra MegaMax Dominator (UMMD) design for a 3D printer, and one of the many things he learned in the process was how not to design a 3D printed belt clamp. In the past, we saw how the UMMD ditched the idea of a lead screw in favor of a belt-driven Z axis, but [Mark] discovered something was amiss when the belts were flopping around a little, as though they had lost tension. Re-tensioning them worked, but only for a few days. It turned out that the belt clamp design he had chosen led to an interesting failure.

The belts used were common steel-core polyurethane GT2 belts, and the clamp design uses a short segment of the same belt to lock together both ends, as shown above. It’s a simple and effective design, but one that isn’t sustainable in the longer term.

The problem was that this design led to the plastic portion of the belt stretching out and sliding over the internal steel wires. The stretching of the polyurethane is clear in the image shown here, but any belt would have had the same problem in the clamp as it was designed. [Mark] realized it was a much better idea to use a design in which the belts fold over themselves, so the strain is more evenly distributed.

[Mark] has been sharing his experiences and design process when it comes to building 3D printers, so if you’re interested be sure to check out the UMMD and its monstrous 695 mm of Z travel.

Dexterity Hand Is A Configurable Prosthetic Hand

One of the interesting benefits of the 3D printing revolution is the dramatic increase in availability of prosthetics for people with virtually any need. With a little bit of research, a 3D printer, and some trial and error, virtually anyone can build a prototype prosthetic to fit them specifically rather than spend thousands of dollars for one from a medical professional. [Dominick Scalise] is attempting to flesh out this idea with a prosthetic hand that he hopes will be a useful prosthetic in itself, but also a platform for others to build on or take ideas from.

His hand is explained in great detail in a series of videos on YouTube. The idea that sets this prosthetic apart from others, however, is its impressive configurability while not relying on servos or other electronics to control the device. The wearer would use their other hand to set the dexterity hand up for whatever task they need to perform, and then perform that task. Its versatility is thanks to a unique style of locks and tensioners which allow the hand to be positioned in various ways, and then squeezed to operate the hand. It seems like a skilled user can configure the hand rapidly, although they must have a way to squeeze the hand to operate it, or someone will need to develop an interface of some sort for people without needing to squeeze it.

To that end, the files for making your own hand are available on Thingiverse. [Dominick] hopes that his project will spark some collaboration and development, using this hand as a basis for building other low-cost 3D printed prosthetics. There are many good ideas from this project that could translate well into other areas of prosthetics, and putting it all out there will hopefully spur more growth in this area. We’ve already seen similar-looking hands that have different methods of actuation, and both projects could benefit from sharing ideas with each other.

Thanks to [mmemetea] for the tip!

Continue reading “Dexterity Hand Is A Configurable Prosthetic Hand”