With proper tuning, any 3D printer can create exceptionally detailed physical replicas of digital files. The time it takes for a printer to print an object at very high detail is another matter entirely. The lower the layer height, the more layers must be printed, and the longer a print takes to print.
Thanks to [Steve Kranz] at Autodesk’s Integrated Additive Manufacturing Team, there’s now a solution to the problem of very long, very high-quality prints. It’s called VariSlice, and it slices 3D in a way that’s only high quality where it needs to be.
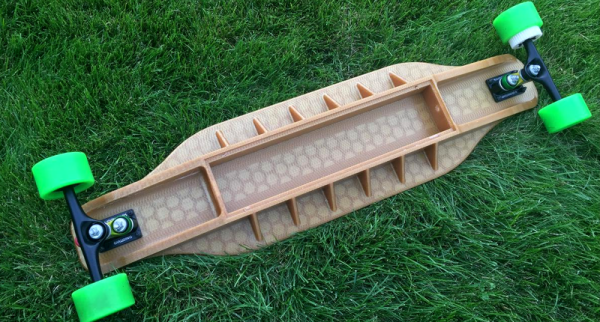
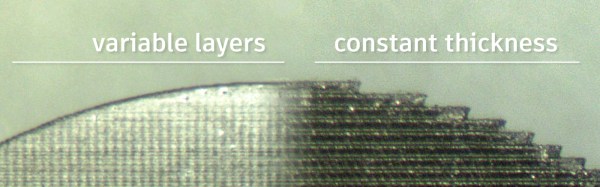
The basic idea behind VariSlice is to print vertical walls at a maximum layer height, while very shallow angles – the top of a sphere, for example – are printed at a very low layer height. That’s simple and obvious; you will never need to print a vertical wall at ten micron resolution, and fine details will always look terrible with a high layer height.
The trick, as in everything with 3D printing, is the implementation. In the Instructable for VariSlice, it appears that the algorithm considers the entire layer of an object at a time, taking the maximum slope over the entire perimeter and refining the layer height if it’s necessary. There’s no weird stair stepping, overlapping layers of different thicknesses, or interleaving here. It’s doing automatically what you’d normally have to do manually.
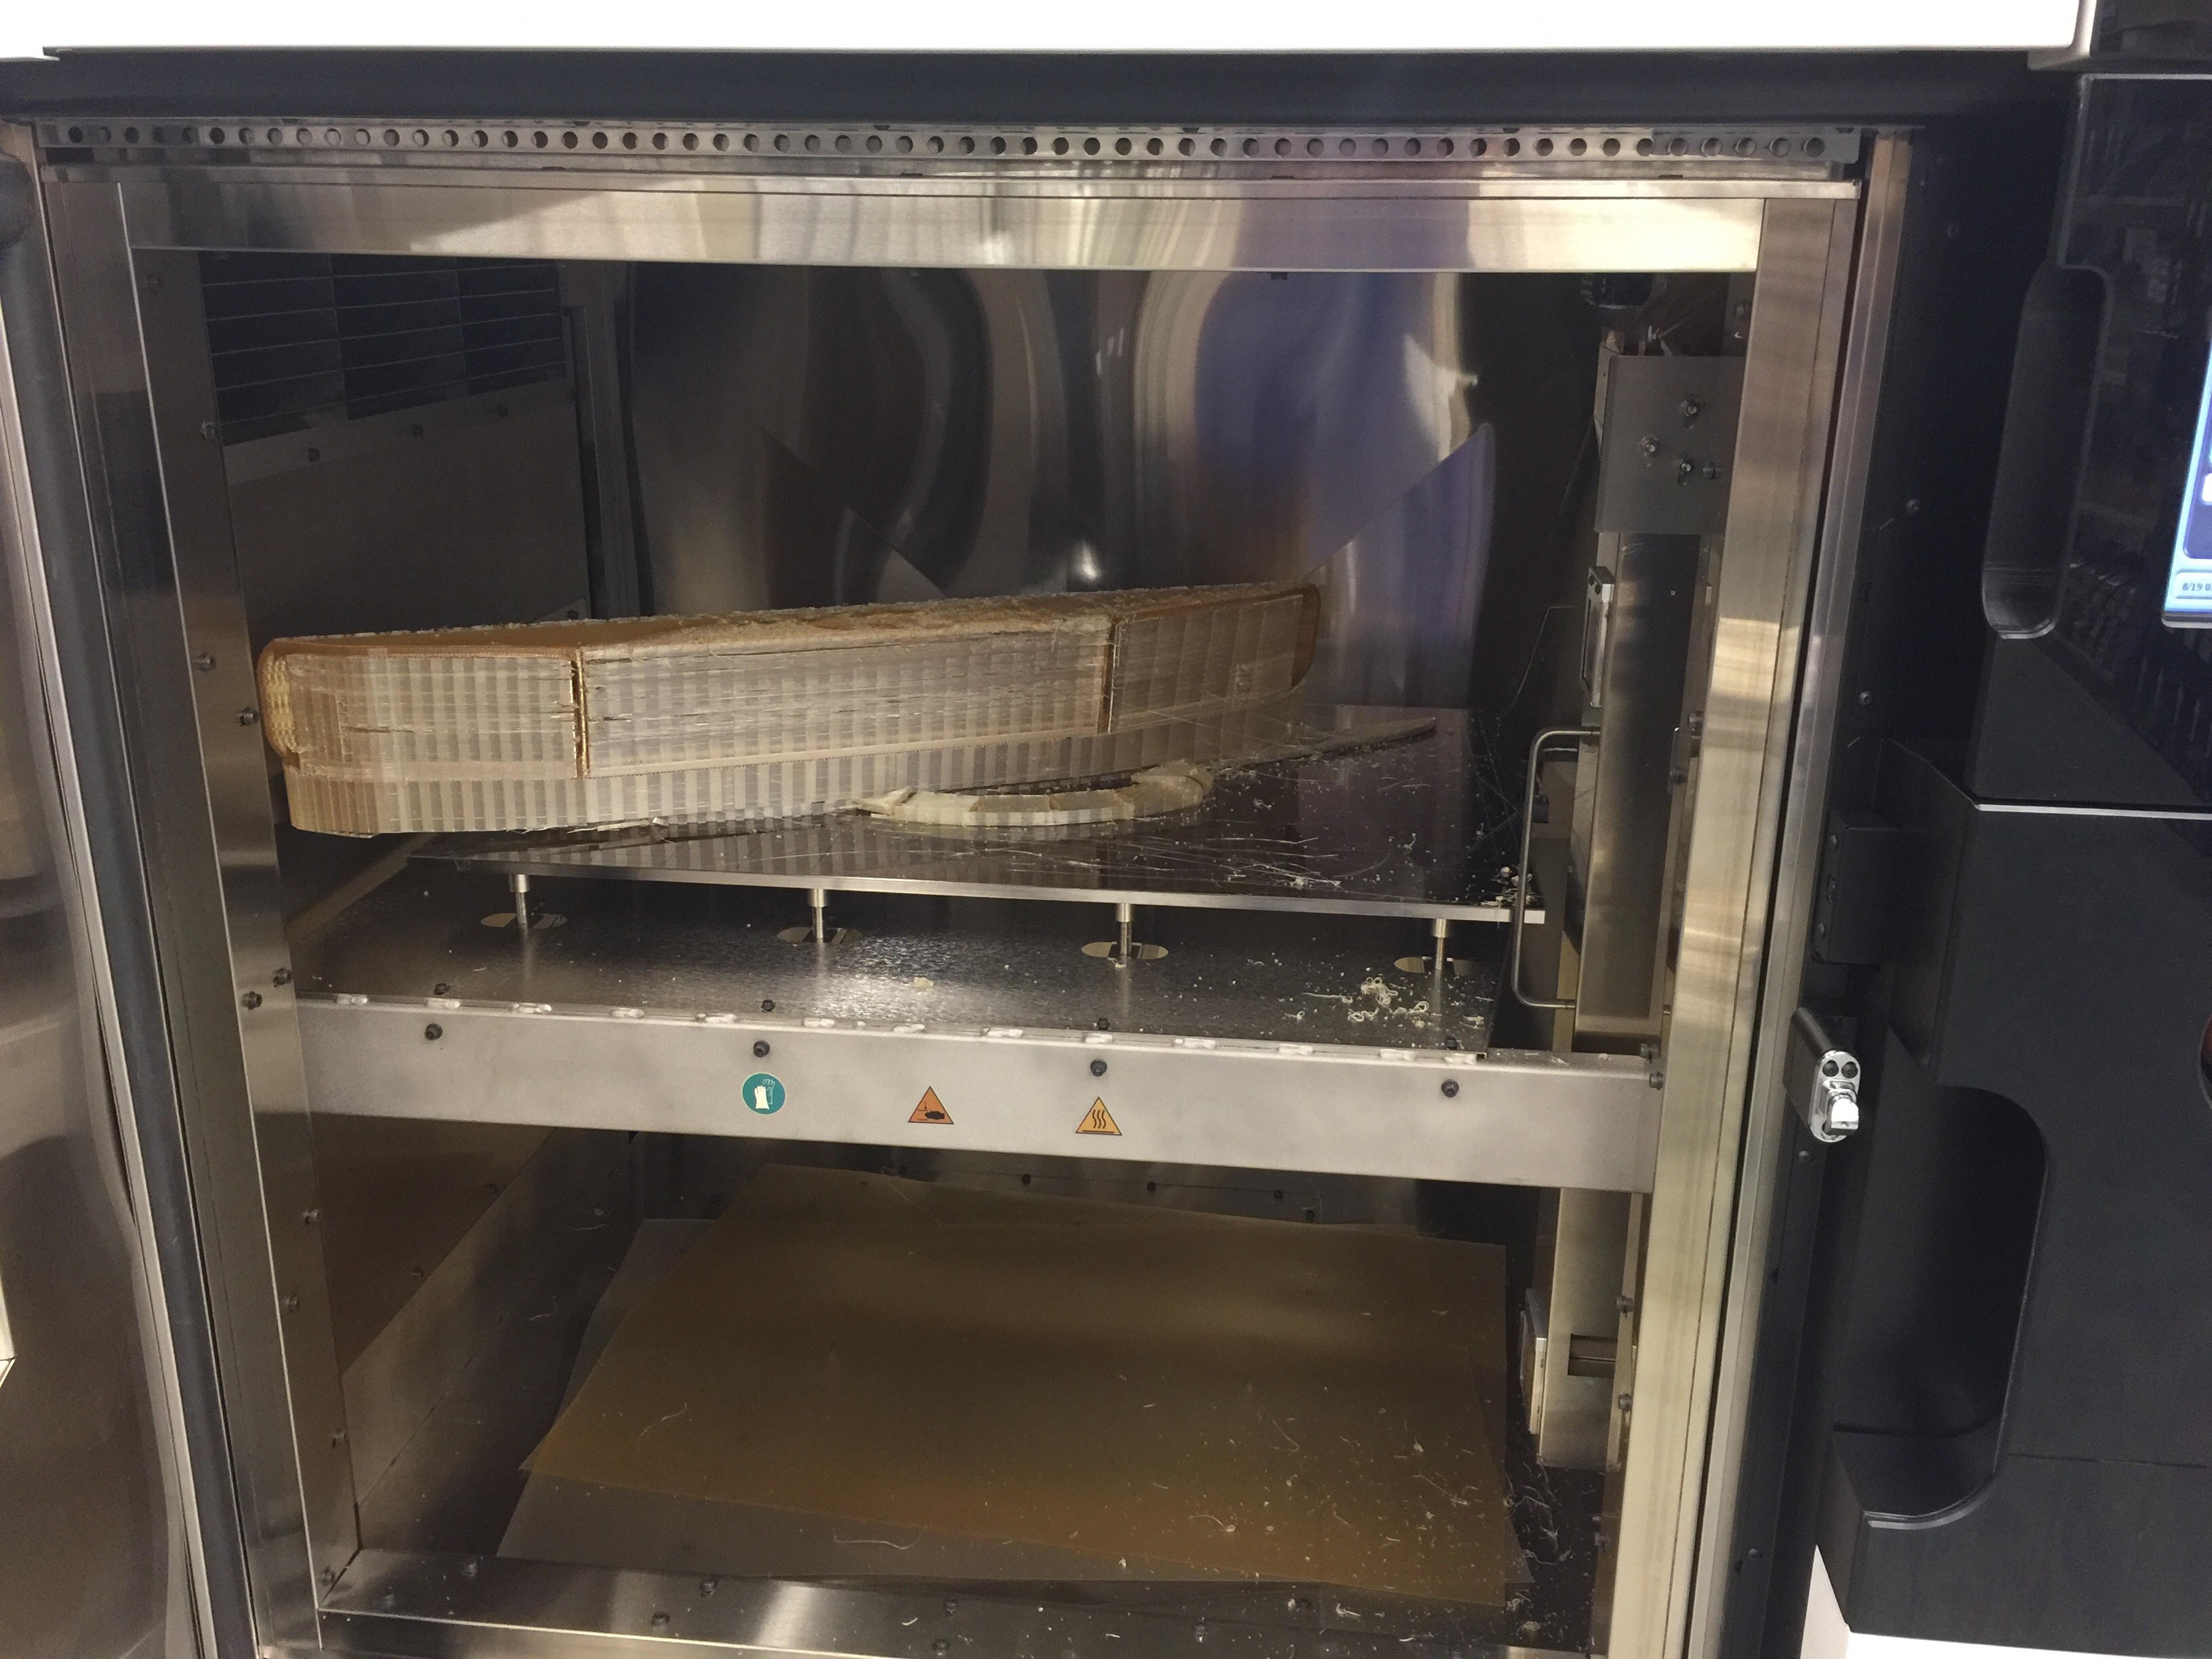
Nevertheless, the VariSlice algorithm is now one of Autodesk’s open source efforts, just like the Ember resin printer used in the example below. The application for this algorithm in filament-based printers is obvious, though. The speed increase for the same level of quality is variable, but the time it takes to print some very specific objects can be up to ten times faster. Whether or not this algorithm can be integrated into Cura or Slic3r is another matter entirely, but we can only hope so.
Continue reading “Variable Thickness Slicing For 3D Printers”