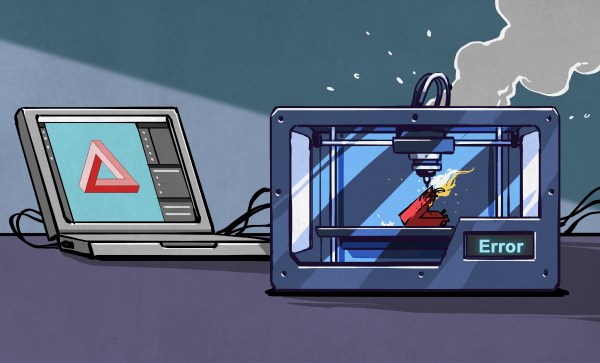
Silencing A 3D Printer With Acoustic Foam Isn’t That Easy

3D printers are supremely useful tools, but their incessant whining and droning can be distracting and tiresome. [Handy Bear] decided to try some simple ways to quieten down their printer using acoustic foam, with mixed results.

The video starts by exploring two different acoustic foams; one black, one white. The latter was found to hold a flame when ignited, making it a poor choice for a 3D printer with many hot components. The black foam, advertised for use in automotive installations, was reluctant to burn at all, and so made a safer choice.

The UP Mini 3 printer is then disassembled to receive its soundproofing treatment. The printer’s various panels all got a healthy lashing of thick sticky insulating foam. This took some work, thanks to the need to cut around various ribs and screw bosses on the panels. Cut appropriately, though, the printed was able to be reassembled neatly with its foam hidden inside.

Unfortunately, the work didn’t have a great effect on the printer’s sound output. That’s perhaps unsurprising, given it still has uninsulated panels like the front window which are still free to radiate sound. The foam did help cut down on fan noise and high-pitch sounds from the printer, but the annoying medium and low pitched noises from the printer’s motors were still very audible.

Using an enclosure or a quieter stepper driver are probably more effective DIY methods to quiet a noisy printer; share your own ideas in the comments. Video after the break.

Continue reading “Silencing A 3D Printer With Acoustic Foam Isn’t That Easy”

IKEA’s Billy Bookshelf Is A Useful 3D Printing Enclosure

The results from your 3D printer may be improved if you use a dedicated enclosure for the job. This is particularly helpful for printing certain materials which are more sensitive to cold drafts or other thermal disruptions to the working area.  If you want an elegant solution to the problem, consider getting yourself an IKEA Billy bookshelf, says [wavlew].

The Billy makes a remarkably elegant 3D printing workstation, overall. It’s got a nifty slide-out drawer that makes a perfect mounting point for a 3D printer. It lets you slide out the printer for maintenance, using the controls, or extracting finished prints. It also naturally features plenty of storage for your filament, tools, and other accoutrements. When it comes to the business of actually printing though, you just slide the printer inside and shut the door. Its thermal and noise isolating performance can also be further improved by adding a silicone door seal.

We love this idea. Too often, 3D printers are left chugging away on messy desks, where they’re subject to blasts from AC vents and other disruptions. Having everything tidily tucked away in a cupboard neatens things significantly, and could also prove helpful if you pursue fume extraction, too.

If you’ve identified any other nifty maker applications for IKEA furniture, be sure to let us know!

Checking Belt Tension Gets Easier For (Some) Prusa 3D Printers

Belts on a 3D printer should be tight enough, but not too tight. That can be an iffy thing to get right for someone who lacks familiarity with CNC platforms. Prusa Research aims to make it a bit easier with a web app that can measure tension via your mobile phone’s microphone and diagnose belt tightness, at least for their MK4 and XL printers.

Using different tools to analyze belt tightness (including belt acoustics) have been tried in the past with mixed results, but this is a pretty focused approach that aims to give exact guidance for specific printer models. It’s pretty useful to provide someone with a reliable go/no-go number, after all.

What happens to a printer if a belt’s tension is not right? Well, there’s actually a pretty forgiving range within which the printer will mostly work fine, but not as well as it could be. Loose belts can have novices chasing other problems, and overly-tightened belts definitely put extra strain on parts. It’s one of those things that’s worth a little extra work to get right.

3D printable tension meter is a different option for Prusa MK3 and Mini printers, if one has some Prusament PETG to print it in.

Everything about belt tension for Prusa printers is covered in their documentation, but did you know there’s also neat 3D printable tension meter for Prusa MK3 and Mini printers? It’s meant to be printed in Prusament PETG (printing in other materials may have different results) but it’s a pretty neat idea for a tool.

If you have a Prusa MK4 or XL and want to try their new method, go here and allow access to your device’s microphone. Then select a printer model and an axis to test. Gently strum the upper part of the belt (avoid touching the bottom belt in the process) and watch live results telling you whether the belt is too tight, too loose, or just right. Prusa have a video demonstrating the process, also embedded below.

Continue reading “Checking Belt Tension Gets Easier For (Some) Prusa 3D Printers”

Tensioning 3D Prints For Lightweight, Strong Parts

Desktop 3D printers have come a long way over the past decade. They’re now affordable for almost anyone, capable of printing in many diverse materials, and offer a level of rapid prototyping and development not feasible with other methods. That said, the fact that they are largely limited to printing different formulations of plastic means there are inherent physical limitations to what the machines are capable of, largely because they print almost exclusively in plastic. But augmenting prints with other building techniques, like this method for adding tensioning systems to 3D printed trusses can save weight and make otherwise unremarkable prints incredibly strong.

The build from [Jón Schone] of Proper Printing consists of printed modular sections of truss which can be connected together to make structural components of arbitrary length. To add strength to them without weight, a series of Kevlar threads are strung from one end of the truss to the other on the interior, and then tensioned by twisting the threads at one end. Similar to building with prestressed concrete, this method allows for stronger parts, longer spans, less building material, and lighter weight components. The latter of which is especially important here, because this method is planned for use to eventually build a 3D printer where the components need to be light and strong. In this build it’s being used to make a desk lamp with a hinged joint.

For other innovative 3D printer builds, [Jón] has plenty of interesting designs ranging from this dual extrusion system to this 3D printed wheel for a full-size passenger vehicle. There’s all kinds of interesting stuff going on at that channel and we’ll be on the edge of our seats waiting to see the 3D printer he builds using this tensioned truss system.

Continue reading “Tensioning 3D Prints For Lightweight, Strong Parts”

A Nifty 3D Printed RC Car

Once upon a time, a remote controlled (RC) car was something you’d buy at Radio Shack or your local hobby store. These days, you can print your own, complete with suspension, right at home, as this project from [Logan57] demonstrates.

The design uses standard off-the-shelf hobby-grade components, with a brushed motor and controller for propulsion, and small metal gear servo for steering. The latter is a smart choice given there’s no servo saver in the design. Save for the fasteners and bearings, all the other parts are 3D printed. The hard components are produced in PETG or PLA, while flexible TPU is used for both the tires and the spring elements in the suspension system. It’s a double-wishbone design, and should serve as a good education should you later find yourself working on a Mazda Miata.

Building your own RC car isn’t just fun, it opens up a whole realm of possibilities. Sick of boring monster trucks and race cars? Why not build a 10×10 wheeler or some kind of wacky amphibious design? When you do, we’ll be waiting by the tipsline to hear all about it. Video after the break.

Continue reading “A Nifty 3D Printed RC Car”

Giant 3D Printer Can Print Life-Sized Human Statues

We’ve seen a few makers 3D scan themselves, and use those to print their own action figures or statuettes. Some have gone so far as building life-sized statues composed of many 3D printed parts. [Ivan Miranda] is no regular maker though, and his custom 3D printer is big enough that he can print himself a life-sized statue in one go.

The printer is a gargantuan thing, using an aluminium frame and a familiar Cartesian layout. It boasts a build volume of 1110 mm x 1110 mm x 2005 mm, making it more than big enough to print human-sized statues. Dogs, cats, and some great apes may be possible, too.

Many of the components are 3D printed, including the various braces and adapters that hold the frame together. The build uses NEMA 23 stepper motors, with Duet3D hardware running the show. Notably, it uses V-wheels for the Z-axis, as linear rails would be prohibitively expensive at the sizes required.

[Ivan] shows off the printer by having it produce a statue of his body at 1:1 scale. It’s not a perfect print, with some layer shifts and an awkward moments where the filament supply was interrupted. It took 108 hours in total, with 76 hours of that being actual print time, and is made up of 4375 layers. Despite its flaws, its an incredibly impressive way to demonstrate the capabilities of the machine.

Eager to build such a printer for yourself? [Ivan] will sell you the design files for a reasonable fee.

[Ivan]’s giant printer was once a large tabletop affair; just look how far it’s come. He’s even come up with a system for using smaller printers to create large-scale construction kits, too. We can’t wait to see what mad project he comes up with next. Video after the break.

Continue reading “Giant 3D Printer Can Print Life-Sized Human Statues”

Sloth Door Greeter Uses Neat Fold-Up Electronics Enclosures

[Alan Reiner] is building a sloth-like door greeter for his house. Sloxel, as he is affectionately known, can move around and even talk, with [Alan] using some nifty tricks in the design process

Sloxel’s job is to vet visitors to [Alan’s] house, before inviting them to knock on the door or to leave their details and go away. There’s still plenty of work to do on that functionality, which [Alan] plans to implement using ChatGPT. In the meantime, though, he’s been working hard on the hardware platform that will power Sloxel. A Raspberry Pi 3B+ is charged with running the show, including talking to the ChatGPT API and handling Sloxel’s motion along a linear rail with a number of stepper motors.

What we really love about this build, though, is the enclosure. [Alan] designed a housing for everything that can be 3D printed as a single part with print-in-place hinges. The four sides of the enclosure can then be folded up and into place with a minimum of fuss. Plus, the enclosure has plenty of nifty features that makes it easy to mount all the required hardware. It’s a neat design that we’d love to repurpose for some of our own projects.

We’ve seen other neat ideas in this area before, like using PCBs themselves as an enclosure. Video after the break.

Continue reading “Sloth Door Greeter Uses Neat Fold-Up Electronics Enclosures”