3D Printing on Earth is soooo last year. Recently, NASA has sent a 3D Printer to the International Space Station in order to test printing capability in space. The agency’s ultimate goal is to have a means to make parts and tools for astronauts that are far away from earth.
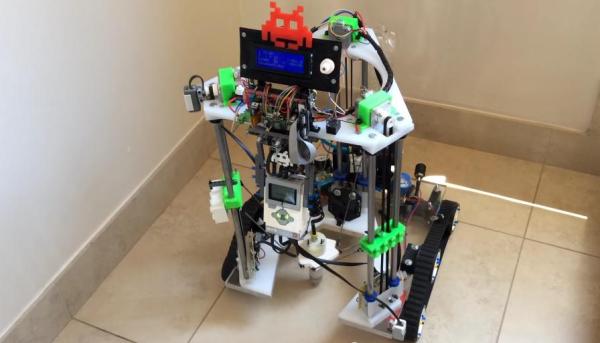
So, why should NASA have all of the extra-terrestrial printing fun? Three 15 year-olds thought that same thing and decided to build their own space printer. It’s goal, however, is a bit different from the one on the ISS. This printer is made to print on other celestial bodies such as the moon or Mars, not in a space station. The students call their project the DELTA 3 and as its name implies, is a delta-style printer and that’s where all similarities with conventional printers end. This printer has tank tracks so that it can maneuver itself around the planet. There is no print bed. The printer prints directly to the surface of which it is resting on. The frame is open at the front of the printer so that it can back up leaving a free-standing print in its wake. It certainly beats the hot-glue versions seen before and we think this is the Automated Build Platform of the future, today!
The DELTA 3’s electronic controls are also quite different from the norm. There is a Lego EV3 controller that is responsible for navigating the printer around obstacles to find a suitable print area. Once a location has been picked out, the EV3 triggers the standard Arduino Mega/RAMPS combo to coordinate the printing.
The young creators brought their DELTA 3 to the World Robot Olympiad just last month. They came in 4th in their division.
[via 3Dprint.com]
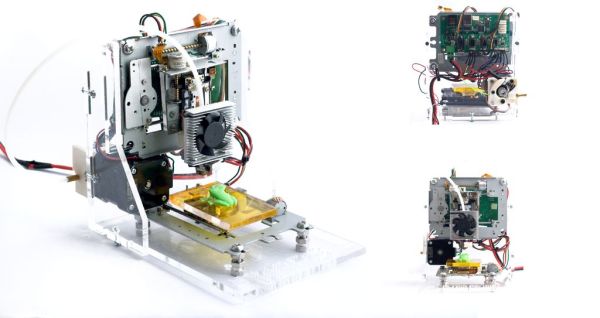
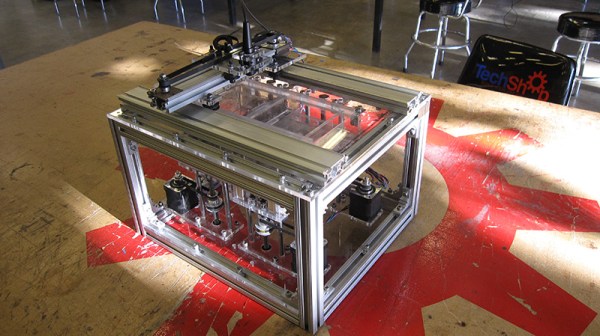
 Luckily [mikelllc] has access to a laser cutter. He made the frame from 5mm acrylic sheet stock. All of the pieces have slots and tabs to ease assembly and keep everything straight and square. The motors and frames from the DVD and floppy drives are mounted to the acrylic frame pieces in strategically pre-planned holes. The Y axis is responsible for moving the print bed back and forth. It is mounted on screws so that it can be adjusted to ensure a level bed.