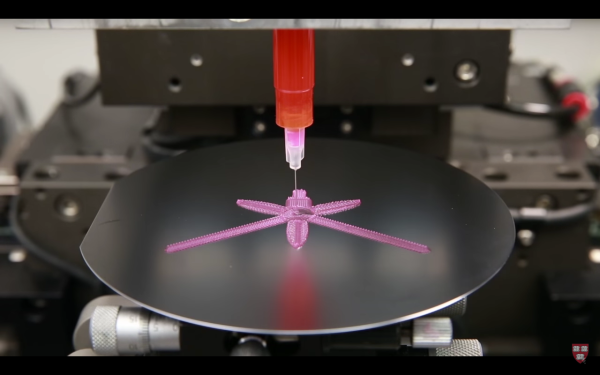
In what is being hailed as the next great advancement in 3D printing, scientists have been able to get a 3D printed shape to change form when it is exposed to water, bringing 3D printing squarely into the realm of the fourth dimension. Although the only examples we’ve seen so far are with relatively flat prints (which arguably subtracts one “D” from the claim) the new procedure is one which is groundbreaking for the technology.
The process uses cellulose fibers which, when aligned in a particular way and exposed to water, swell in order to change shape. This is similar to how a bimetallic strip in a thermostat works, but they really took their inspiration from biological processes in plants that allow them to change shape according to environmental conditions. It’s hard to tell if this new method of printing will forever alter the landscape of 3D printing but, for now, it’s an interesting endeavor that will be worth watching. The video after the break shows a fast-motion print using the technique, followed by a demo of the print submersed in water.
We often see new technological advancements that use biology as a springboard for new ideas, and this one is no different. There have been building structures inspired by pinecones and this Processing hack inspired by squid. Biology is all around us, and any of it could be used for inspiration for your next project!
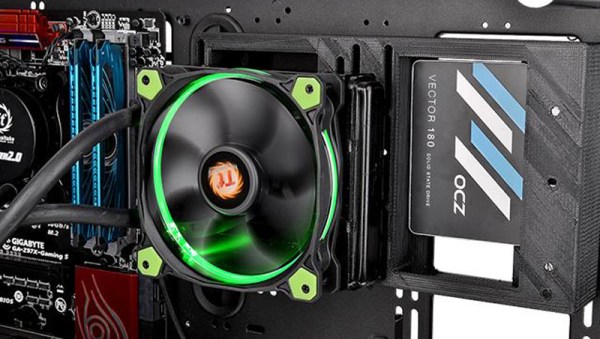
We’re interested by a move from Thermaltake, a manufacturer of computer cases, fans, and power supplies. Thermaltake has released a computer case designed to be modded by those with a 3D printer. They released a set of models that fits the new case. These are all hosted on a service much like Thingiverse. So if you want a single SSD or a whole rack, print the model. Watercooling? There’s a model for that. In concept, it’s very cool.
We’re not certain how to feel about this. Our initial impression was that if Thermaltake is going to launch a case around 3D printing, they should at lease tune their printer and get some nice prints before they take the press photos. On our second pass we became intrigued. Is this a manufacturer cutting costs, crowd-sourcing design and engineering talent for free, or empowering the user? Arguably, a computer case is a great test bed for this kind of interaction.
Despite out skepticism, we’d like to see more manufacturers take this kind of contributing interest in 3d printing. If only to see where it goes. What other products do you think would benefit from this kind of, print the product you actually want model?
It seems that many 3D printer owners just aren’t getting the same buzz they used to off their 3D printers, and are taking steps to procure heavier machines. And making them in their home laboratories with, you guessed it, their 3D printers.
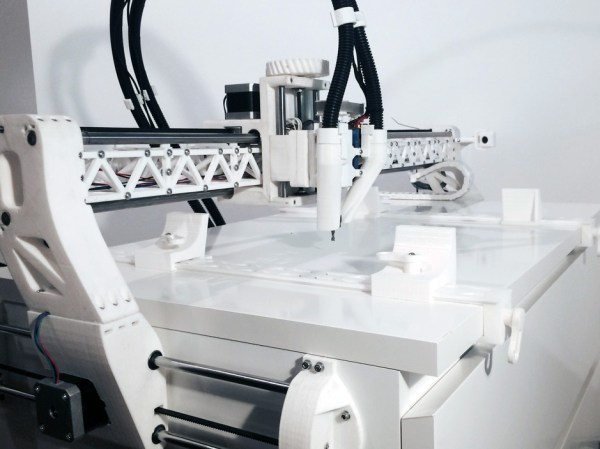
Following the pattern, [Michael Reitter], designed a 3D printable CNC around a IKEA MALM table. In order to span the length of the table for his X axis, he came up with a very cool looking truss assembly. The linear rails rest on top of the truss, and a carriage with the Z axis rides on the assembly. The truss has enough space in the center of it to neatly house some of the wiring. The Y-xis mounts on the side of the table.
Overall the mechanical design looks pretty solid for what it is, with all the rails taking their moments in the right orientation. We also like the work-piece hold downs that slide along the edge of the table. It even has a vacuum attachment that comes in right at the milling bit.
We’re not certain how much plastic this build takes, but it looks to be a lot. Monetarily, it will probably weigh in at a bit more than some other options. As many in the 3D printing world are discovering, sometimes there’s no reason not to leverage more mature industrial processes for lower cost large gains in accuracy and strength. Though, it’s pretty clear that one of the design goals of this project was to see how much one can get away with just a 3D printer, and we certainly can’t deny the appealing aesthetic of this CNC.
A few years back, there were some studies on the chemical and particle emissions coming out of the hotends of 3D printers. Although they galvanized a lot of people in the community, the science wasn’t entirely conclusive — one paper made it sound like you needed a hazmat suit for 3D printing, and the other suggested that cooking a meal in a kitchen was worse for you. That’s because they were measuring different things.
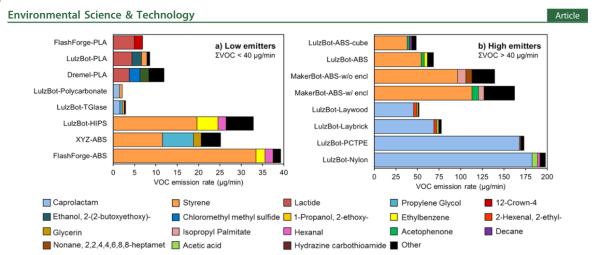
This new research paper on the emissions of 3D printers covers all the bases. They examined a variety of different materials printed in different printers. They also measured both chemical emissions and Ultrafine Particles (UFP) which can be hazardous even when the material itself is not.
We read the paper (PDF) so that you don’t have to. Here’s our takeaways:
There was no significant variation across brands of 3D printers. (Duh?)
ABS and similar materials outgas styrene at levels you should probably be worrying about if you’re running your printer for a few hours a day in an unventilated office.
PLA emitted significantly less overall, and most of it was a non-hazardous chemical, lactide. PLA doesn’t look like a problem.
All of the materials resulted in increased UFP exposure. These levels are above normal household background levels, but lower than certain “microclimates” which (if you follow the references) include principals’ offices with carpet, automobiles, restaurants, and rooms with burning candles or running hair dryers. In short, the UFP exposure doesn’t look like it’s going to be a big deal unless you’re sitting right next to the printer and running it continually.
So what would we do? It now looks like it’s prudent to print ABS only in a well-ventilated room. Or enclose the printer in a box and vent whatever you can outside — which can also help prevent breezes cooling the piece down unevenly and adding to ABS’s warping problems. Or just stick to PLA. It looks essentially harmless.
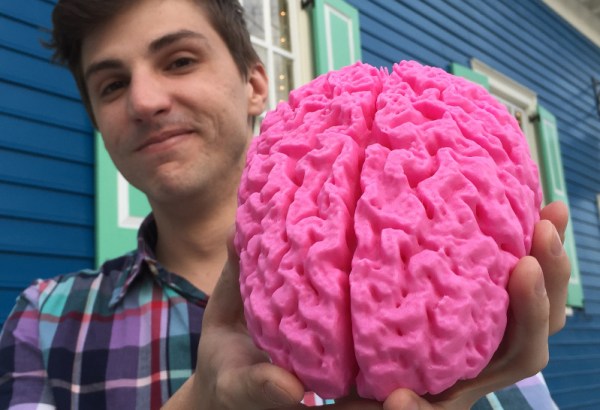
This hack is a strange mixture of awesome and ghoulish. [Andrew Sink] created a 3D printed version of his brain. He received a CD from an MRI session that contained the data obtained by the scan. Not knowing what to do with it he created a model of his brain.
Out of a number of images, some missing various parts of his head, he selected the one that was most complete. This image he brought into OisriX, a Mac program for handling DICOM files. He worked on the image for an hour dissecting away his own eyes, skull, and skin. An STL file containing his brain was brought over to NetFabb to see how it looked. There was still more dissection needed so [Andrew] turned to Blender. More bits and pieces of his skull’s anatomy were dissected to pare it down to just the brain. But there were some lesions at the base of the brain that needed to be filled. With the help of [Cindy Raggio] these were filled in to complete the 3D image.
The usual steps sent it to the 3D printer to be produced at 0.2 mm resolution. It only took 49 hours to print at full-size. This brain was printed for fun, but we’ve seen other 3D printed brain hacks which were used to save lives. How many people do you know that have a spare brain sitting around?
Despite tuning my extruder steps perfectly, and getting good results instantly on larger prints. I was still having a ton of trouble with smaller parts. PLA is the favored printing material for its low odor, low warping, and decent material properties. It also has many downside, but it’s biggest, for the end user, lies in its large glass transition temperature range. Like all thermoplastics, it shrinks when it cools, but because of this large range, it stays expanded and, getting deep into my reserve of technical terms, bendy for a long time. If you don’t cool it, the plastic will pile up in its expanded state and deform.
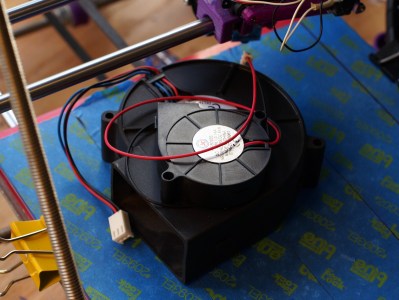
The old cooling fan on my trusty and thoroughly battered Prusa i2.
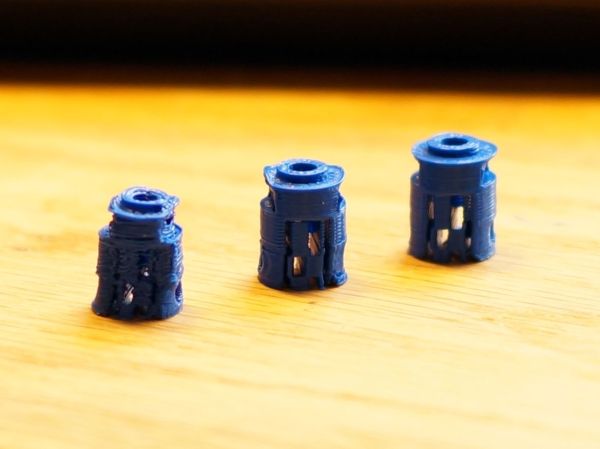
I am working on a project that needs a tiny part, pictured above. The part on the left is what I was getting with my current cooling set-up and temperature settings. It had very little semblance with the CAD file that brought it into this world.
The bond between layers in a 3d print occurs when the plastic has freshly left the nozzle at its melting point. Almost immediately after that, the plastic crosses from the liquid state into a glass state, and like pressing two pieces of glass together, no further bonding occurs. This means that in order to get a strong bond between the print layers, the plastic has to have enough thermal mass to melt the plastic below it. Allowing the polymer chains to get cozy and hold hands. Nozzle geometry can help some, by providing a heat source to press and melt the two layer together, but for the most part, the fusing is done by the liquid plastic. This is why large diameter nozzles produce stronger parts.
What I’m getting at is that I like to run my nozzle temperature a little hotter than is exactly needed or even sensible. This tends to produce a better bond and sometimes helps prevent jamming (with a good extruder design). It also reduces accuracy and adds gloopiness. So, my first attempt to fix the problem was to perhaps consider the possibility that I was not 100% right in running my nozzle so hot, and I dropped the temperature as low as I could push it. This produced a more dimensionally accurate part, but a extraordinarily weak one. I experimented with a range of temperatures, but found that all but the lowest produced goopy parts.
After confirming that I could not get a significant return on quality by fine tuning my temperature, I reduced the speed of the nozzle by a large percentage. By reducing the speed I was able to produce the middle of the three printed parts shown in the opening image. Moving the nozzle very slowly gave the ambient air and my old cooling fan plenty of time to cool the part. However, what was previously a five minute part now took twenty minutes to print. A larger part would be a nightmare.
This will do.
So, if I can’t adjust the temperature to get what I want, and I can adjust the speed; this tells me I just need to cool the part better. The glass state of the plastic is useless to me for two reasons. One, as stated before, no bonding occurs. Two, while the plastic remains expanded and bendy, the new layer being put down is being put down in the wrong place. When the plastic shrinks to its final dimension is when I want to place the next layer. Time to solve this the traditional way: overkill.
A while back my friend gifted me a little squirrel cage fan he had used with success on his 3d printer. Inspired by this, I had also scrounged a 12v, 1.7A fan from a broken Power Mac G5 power supply. When it spins up I have to be careful that it doesn’t throw itself off the table.
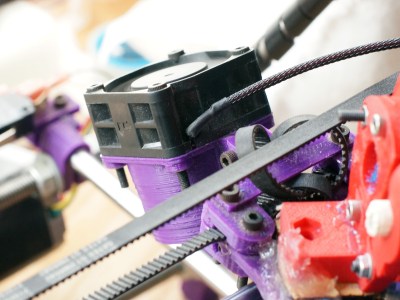
I should have added a rib to this bracket, this fan is heavy!
I printed out mounts for the fans. The big one got attached to the Z axis, and the little one rides behind the extruder. I fired up the gcode from before and started to print, only to find that my nozzle stopped extruding mid way. What? I soon discovered I had so much cooling that my nozzle was dropping below the 160C cold extrusion cut-off point and the firmware was stopping it from damaging itself. My heated bed also could no longer maintain a temperature higher than 59C. At this point I felt I was onto something.
I wrapped my extruder in fiberglass insulation and kapton tape, confidently turned the nozzle temperature up, set the speed to full, and clicked print. With the addition of the overkill cooling I was able to get the part shown to the right in my three example prints. This was full speed and achieved full bond. Not bad! Thus concludes this chapter in my adventures with cooling. I was really impressed by the results. Next I want to try cooling ABS as it prints. Some have reported horrible results, others pretty good ones, I’m interested. I also wonder about cooling the plastic with a liquid at a temperature just below the glass state as it is deposited. Thoughts?
My printer has other issues that I’m still tuning out, but the warping in PLA and excessive surface roughness has all the signs of over extrusion.
I have an old Prusa i2 that, like an old car, has been getting some major part replacements lately after many many hours of service. Recently both the extruder and the extruder motor died. The extruder died of brass fill filament sintering to the inside of the nozzle (always flush your extruder of exotic filaments). The motor died at the wires of constant flexing. Regardless, I replaced the motors and found myself with an issue; the new motor and hotend (junk motor from the junk bin, and an E3D v6, which is fantastic) worked way better and was pushing out too much filament.
The hotend, driver gear, extruder mechanics, back pressure, motor, and plastic type all work together to set how much plastic you can push through the nozzle at once. Even the speed at which the plastic is going through the nozzle can change how much friction that plastic experiences. Most of these effects are somewhat negligible. The printer does, however, have a sort of baseline steps per mm of plastic you can set.
The goal is to have a steps per mm that is exactly matched to how much plastic the printer pushes out. If you say 10mm, 10mm of filament should be eaten by the extruder. This setting is the “steps per mm” in the firmware configuration. This number should be close to perfect. Once it is, you can tune it by setting the “extrusion multiplier” setting in most slicers when you switch materials, or have environmental differences to compensate for.
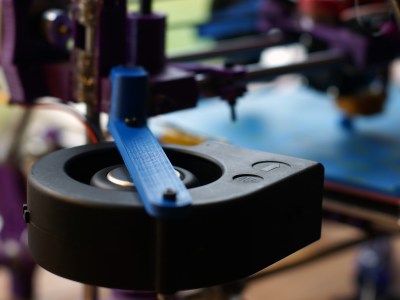
This little guy lets you tune the steps per mm exactly.
The problem comes in measuring the filament that is extruded. Filament comes off a spool and is pulled through an imprecisely held nozzle in an imprecisely made extruder assembly. On top of all that, the filament twists and curves. This makes it difficult to hold against a ruler or caliper and get a trustworthy measurement.
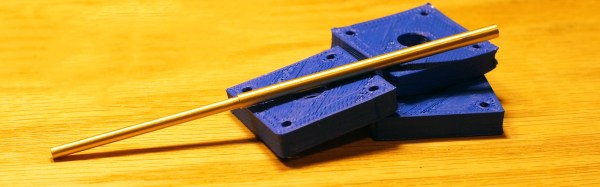
I have come up with a little measuring device you can make with some brass tubing, sandpaper, a saw (or pipe cutter), a pencil torch, solder, and some calipers. To start with, find two pieces of tubing. The first’s ID must fit closely with the filament size you use. The second tube must allow the inside tubing to slide inside of it closely. A close fit is essential.