We’ve seen a few makers 3D scan themselves, and use those to print their own action figures or statuettes. Some have gone so far as building life-sized statues composed of many 3D printed parts. [Ivan Miranda] is no regular maker though, and his custom 3D printer is big enough that he can print himself a life-sized statue in one go.
 The printer is a gargantuan thing, using an aluminium frame and a familiar Cartesian layout. It boasts a build volume of 1110 mm x 1110 mm x 2005 mm, making it more than big enough to print human-sized statues. Dogs, cats, and some great apes may be possible, too.
Many of the components are 3D printed, including the various braces and adapters that hold the frame together. The build uses NEMA 23 stepper motors, with Duet3D hardware running the show. Notably, it uses V-wheels for the Z-axis, as linear rails would be prohibitively expensive at the sizes required.
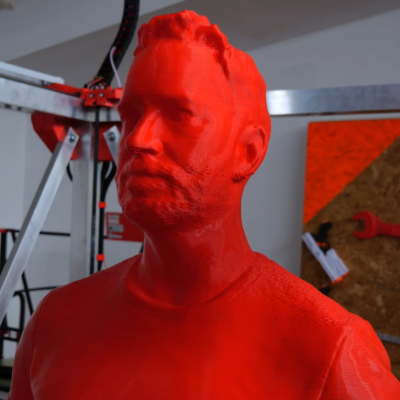
[Ivan] shows off the printer by having it produce a statue of his body at 1:1 scale. It’s not a perfect print, with some layer shifts and an awkward moments where the filament supply was interrupted. It took 108 hours in total, with 76 hours of that being actual print time, and is made up of 4375 layers. Despite its flaws, its an incredibly impressive way to demonstrate the capabilities of the machine.
Eager to build such a printer for yourself? [Ivan] will sell you the design files for a reasonable fee.
[Ivan]’s giant printer was once a large tabletop affair; just look how far it’s come. He’s even come up with a system for using smaller printers to create large-scale construction kits, too. We can’t wait to see what mad project he comes up with next. Video after the break.
Continue reading “Giant 3D Printer Can Print Life-Sized Human Statues”