For the last few years, the must-have feature that companies are competing to show off on their filament deposition 3D printers is multi-material printing. Be it tool swapping or a material-changing system, everyone wants to show they can give you the capability to make multicoloured plastic tchotchkes. So far, that hasn’t really been the case in the world of at-home resin printing — until now. A company called Polysynth, headed by a fellow named [Eric], hopes you’ll pay a premium for the ability to make multimaterial resin prints, and they show some interesting use cases in the video below.
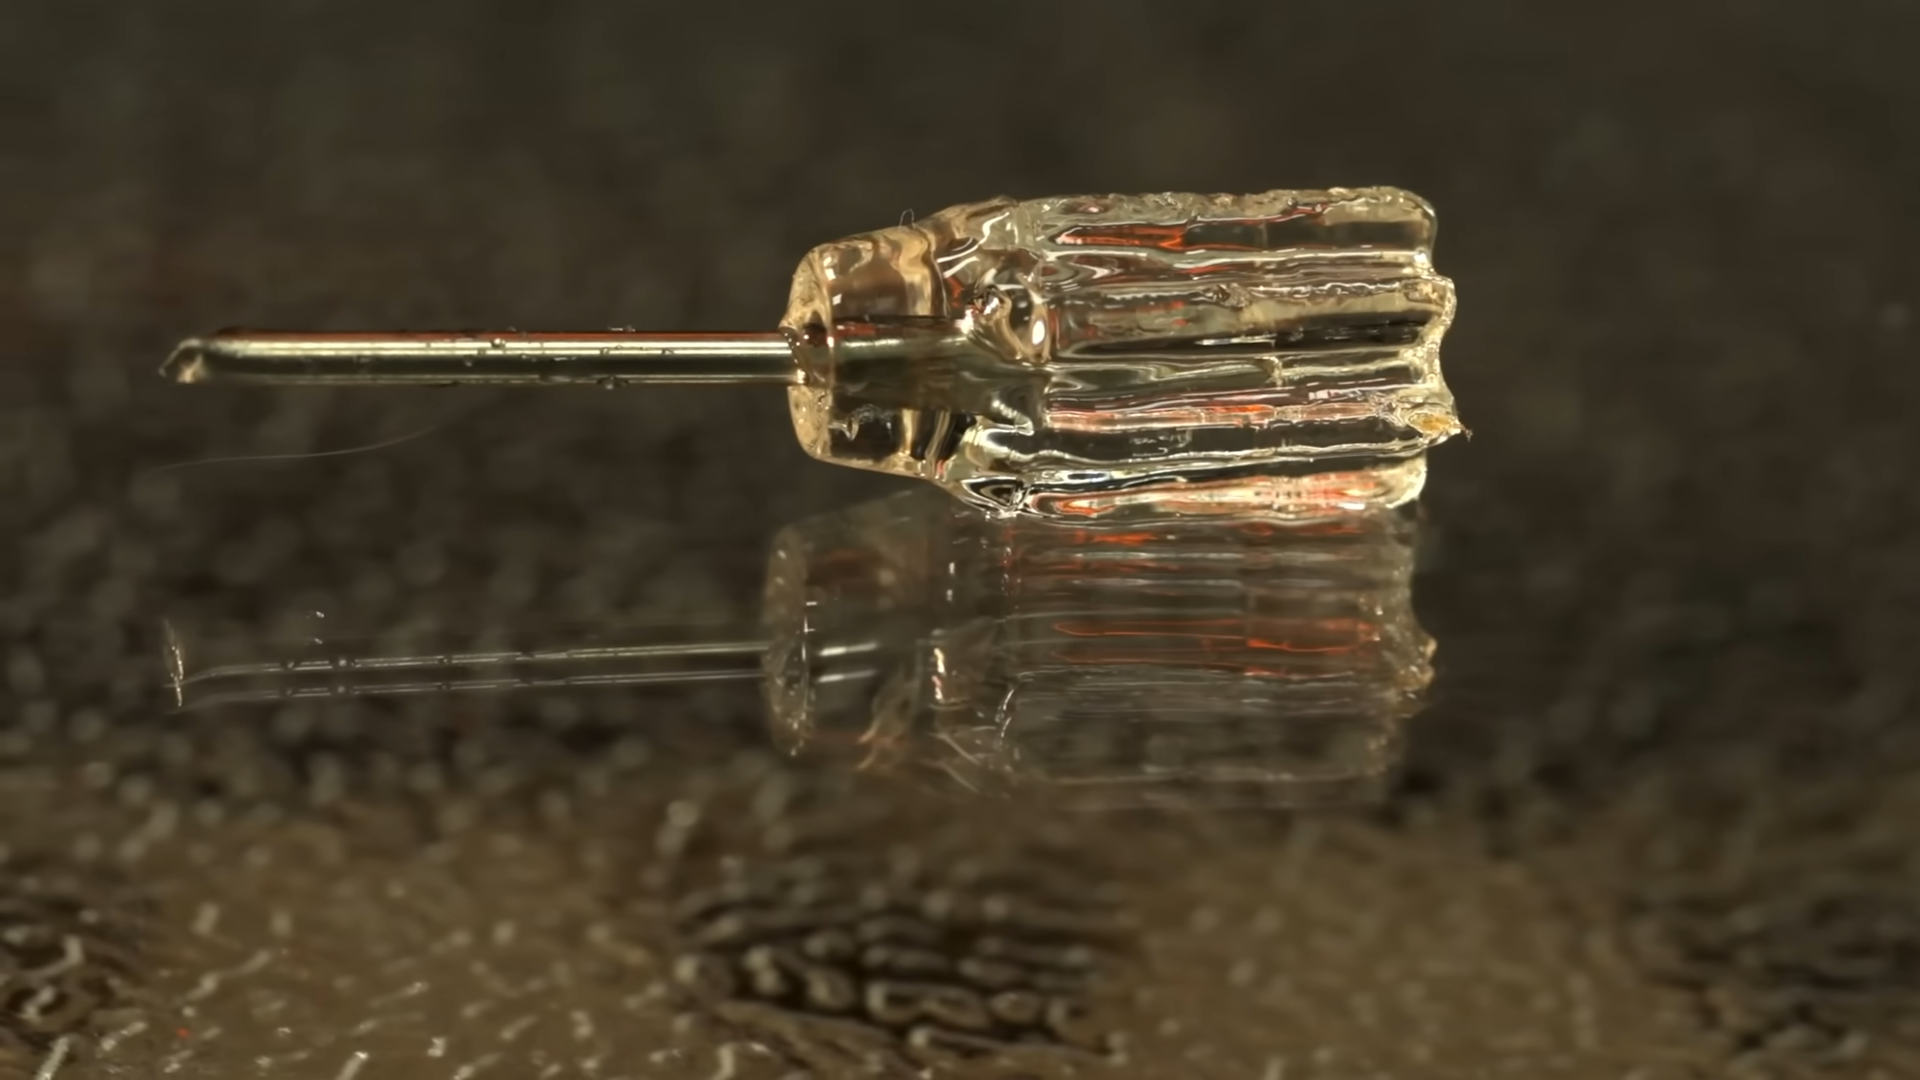
The technique is simple: instead of one resin tank underneath the dipping build plate, [Eric]’s Polysynth printer has a carousel of up to eight small circular tanks. To avoid cross-contamination from uncured resin, the print needs to be cleansed between alternating dips in the different resin vats. Rather than add a wash vat and slow the process down that way, [Eric] and his team decided to use centrifugal force: they just spin the print really, really fast to fling all the uncured resin to the sides of the vat. Yes, really.
Continue reading “Multimaterial SLA Printer Will Make Your Head Spin”