Ice Wrenchers, Wrencher Chocolates, And The Vaquform DT2

What do you do when you find some friends have bought a vacuum forming machine? Make novelty chocolates and ice cubes, of course! This was my response when I had the opportunity to play with a Vaquform DT2 all-in-one vacuum forming machine, so what follows is partly a short review of an exciting machine, and partly an account of my adventures in edible merchandise creation.

The vaquform machine, on a neutral white background
The Vaquform machine in all its glory.

Vacuum forming, the practice of drawing a sheet of heat-softened plastic film over a model to make a plastic shell copy of it, is nothing new in our community. It’s most often found in hackerspaces in the form of home made vacuum forming tables, and usually requires quite a bit of experimentation to get good results. The Vaquform machine I was lucky enough to be able to try is an all in one machine that puts the whole process into a compact desktop machine of similar size to a typical 3D printer. It’s a machine of two parts with a moveable carriage between them for the plastic sheet; a vacuum table on its base, and a heater unit suspended above it. The unique selling point is that it’s an all-in-one computer controlled unit that does as much as possible for you, it simply requires the user to place a sheet in the carriage and follow the instructions.

When I first saw the machine I didn’t really have anything to try it with, so of course I resorted to producing a Wrencher or two. Because what it makes are essentially moulds, it made sense to produce something Wrencher-shaped with them, and thus the chocolate and ice plan formed. The first mould was made with laser-cut Wrenchers in 2mm acrylic, stacked on two more layers of uncut acrylic to make a bar with an inset Wrencher on top, while the second one used a 3D-printed array of larger stand-alone Wrenchers with channels between them. Would my first attempt at vacuum forming make usable moulds or not? Only one way to find out. Continue reading “Ice Wrenchers, Wrencher Chocolates, And The Vaquform DT2”

Celebrating A Decade Of Bootleg Hackaday Merch

A listener of the podcast recently wrote in to tell us that, in the process of trying to purchase a legitimate Hackaday t-shirt, they discovered this 2012 Instructable from [yeltrow] that covers how you can cheaply crank out your own Wrencher shirts via screen printing.

Now historically, as long as you’re not trying to make a buck off of our name, we’ve never felt the need to stop folks from putting our logo on their projects. So we’re not too concerned that somebody was making Wrencher shirts, especially since they were almost certainly for their own personal use. Though the fact that [yeltrow] apparently described the project as a “Hackster-Style shirt” to try and avoid using our name ended up being a prophetic 4D chess meta-joke that you couldn’t make up if you tried. Continue reading “Celebrating A Decade Of Bootleg Hackaday Merch”

front and back of the Jolly Wrencher SAO

Jolly Wrencher SAO, And How KiCad 6 Made It Easy

If you plan to attend Supercon or some other hacker conference, know that you’re going to get a badge with a SAO (Simple Add-On) connector, a 4-pin or 6-pin connector that you can plug an addon board onto. There’s myriads of SAOs to choose from, and if you ever felt like your choice paralysis wasn’t intense enough, now you have the option of getting a Jolly Wrencher SAO board!

This board gives you an SMD prototyping space, with 1.27mm (0.05″ pitch) pads, suitable for many passive components, ICs and even modules like the ESP32 WROOM. Those pads are diagonally interspersed with ground-fill-connected pads – if you want to bodge something on the spot, you don’t need to pull separate GND wires. Given the Supercon badge specifics, the SAO-standard SDA and SCL pins have RX and TX labels as well. For bonus points, the eyes are transparent, with LED footprints behind them – it’s my first time designing a PCB where the LED shines through the FR4, and I hope that the aesthetics work out!

This design is open with gerber files available for download, so if you thought of making a quick PCB order, I’m giving you one more .zip file to add to it. Otherwise, it’s possible that you will find a Wrencher board lying around at Supercon! Now, I’d like to tell you how KiCad 6 made it super easy to design this PCB – after all, there’s never enough SAOs, and it’s quite likely you’ll want to design your own special SAO, too.

Continue reading “Jolly Wrencher SAO, And How KiCad 6 Made It Easy”

A Wrencher On Your Oscilloscope

We like oscilloscope art here at Hackaday, so it was natural to recently feature a Javascript based oscilloscope art generator on these pages, along with its companion clock. Open a web page, scribble on the screen, see it on the ‘scope.

As part of our coverage we laid down the challenge: “If any of you would like to take this further and make a Javascript oscilloscope Wrencher, we’d love to make it famous“. Which of course someone immediately did, and that someone was [Ted] with this JSFiddle. Hook up your soundcard’s left and right to X and Y respectively, press the “logo” button in the bottom right hand pane, fiddle with your voltages and trigger levels for a bit, and you should see a Wrencher on the screen. We’re as good as our word, so here we are making the code famous. Thanks, [Ted]!

It’s not an entirely perfect Wrencher generator, as it has a lot of points to draw in the time available, resulting in a flickery Wrencher. (Update: take a look at the comments below, where he has posted an improved JSFiddle and advice on getting a better screen grab.) Thus the screen shot is an imperfect photograph rather than the usual grab to disk, for some reason the Rigol 1054z doesn’t allow the persistence to be turned up in X-Y mode so each grab only had a small part of the whole. But it draws a Wrencher on the screen, so we’re pretty impressed.

The piece that inspired this Wrencher can be found here. If you think you can draw one with a faster refresh rate, get coding and put it in the comments. We can’t promise individual coverage for each effort though, we’re Hackaday rather than Yet-another-scope-Wrencher-aday.

Hackaday Links: July 3, 2016

This week, Popular Mechanics published cutaway diagrams of ships that will be seen in Star Trek: Beyond, released later this month. This is your cue for spoilers for the remainder of this paragraph. The USS Franklin looks suspiciously like – and was likely built after – the NX-01, the titular ship of Star Trek: Enterprise. The Abrams-verse Franklin was the first Warp 4 ship, yet the prime universe NX-01 was the first Warp 5 ship, with previous ships having trouble reaching Warp 2. We must now consider the Abrams-verse Trek is not a parallel universe to prime-universe Trek and should therefore be considered a completely separate canon (yes, even the destruction of Vulcan. If you see the new Star Trek movie, the NX-01 launched in 2151, and your suggested viewing beforehand is ST:ENT, S02E24, First Flight.

The Mechaduino is a Hackaday Prize entry that turns steppers into closed-loop servos. It’s a phenomenal idea, and now it’s a Kickstarter.

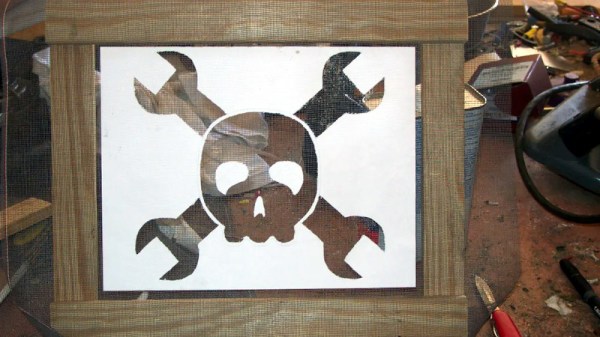
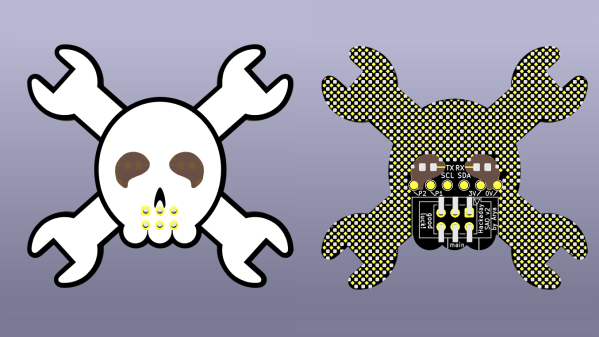
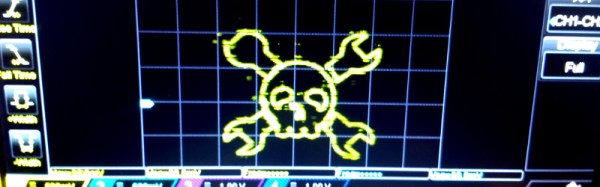
Walk into a dollar store, and you’ll find stupid solar powered electronic flower pots. They’re bits of plastic that shake a plastic flower back and forth when placed in the sun. They’re selling millions, and I have no idea why. [Scott] put a jolly wrencher on one of these flower pots. Really, this is just an exercise in 3D printing, but [Scott] printed the jolly wrencher. We don’t see a lot of that, due to how difficult it is to render the wrencher in OpenSCAD.

In just a few hours, Juno will perform an insertion burn around Jupiter. Does this mean pretty pictures? Not quite yet. This is the closest a spacecraft has ever gotten to Jupiter, and over thirty or forty orbits, Juno will fly between Jupiter’s massive radiation belts. Here’s the NASA trailer.

This video recently caught the Internet’s attention. It’s squares and circles that when put next to a mirror look like circles and squares. Yes, it’s weird. People have 3D printers, so of course these ambiguous objects were quickly reverse engineered and printed. Here’s how they work

It looks like Brexit has caught up to Mouser. Here’s their country select dialog for eu.mouser.com. Thanks [Tom] for the screencap.

The Hackaday Store Lives Again!

Once upon a time there was a store where you could find the most amazing Hackaday shirts and other swag. If you managed to get one of the rare Jolly Wrencher adorned shirts back then, it’s probably about worn out by now. Prepare to rejoice, Hackaday has a completely new store packed with T-shirts, tools, and stuff to help you fill up those waking hours with hardware hacking goodness.

We’ve had a little fun over the last couple of days with posts that hint (maybe a bit too subtly?) that this was coming. We always try to have a little bit of fun for those of you who are really paying attention. Now we’re wondering who will be the first to implement the one-time pad as a dedicated piece of hardware… project ideas need to come from somewhere, right?

Take a look around the general store and you’ll see this time we have more than just stuff you wear. Hackers need tools and we’ve selected a small but inspiring group of must-have’s. The kits and toys we’ve selected are surely a rabbit hole of personal challenges and evolving hacks for you. And the best part is that these choices are one more way for us to promote the virtue of Open Design (it is the way). The only question now is what other open hardware do you want to see added to those ranks?