Analyzing The 6502 With Python And Cheap Dev Boards

The Before Times were full of fancy logic analyzers. Connect the leads on these analyzers to a system, find that super special ROM cartridge, and you could look at the bus of a computer system in real time. We’ve come a long way since then. Now we have fast, cheap bits of hardware that can look at multiple inputs simultaneously, and there are Open Source solutions for displaying and interpreting the ones and zeros on a data bus. [hoglet] has built a very clever 6502 protocol decoder using Sigrok and a cheap 16-channel logic analyzer.

This protocol decoder is capable of looking at the ones and zeros on the data bus of a 6502-based computer. Right now, [hoglet] able to stream two million 6502 cycles directly to memory, so he’s able to capture the entire startup sequence of a BBC Micro. The hardware for this build was at first an Open Bench Logic Sniffer on a Papilio One FPGA board. This hardware was changed to an impressively inexpensive Cypress FX2 development board that was reconfigured to a 16 channel logic analyzer.

The software stack is where this really shines, and here [hoglet] documented most of the build over on the stardot forums. The basic capture is done with Sigrok, the Open Source signal analysis toolchain. This project goes a bit further than simply logging ones and zeros to a file. [hoglet] designed an entire 6502 protocol decoder with Python. Here’s something fantastic: this was [hoglet]’s first major Python project.

To capture the ones and zeros coming out of a 6502, the only connections are the eight pins on the data bus, RnW, Sync, Rdy, and Phy2. That’s only twelve pins, and no connections to the address bus, but the protocol decoder quickly starts to predict what the current program counter should be. This is a really fantastic piece of work, enabling an entire stack trace on any 6502 computer for less than $20 in parts.

This 6502 Computer Project Is A Work Of Art

If you were a home constructor in the 8-bit era, the chances are that if you built a microcomputer system you would have ended up with a bare printed circuit board and a terminal. If you were on a budget you might have had a piece of stripboard as well, or maybe even wire-wrap. Beautiful cases were out of reach, they came with expensive commercial computers that were not the preserve of impoverished hobbyists.

Constructing an 8-bit machine in 2017 is a much easier process, there are many more options at your disposal. There is no need to make a bare PCB when you have a 3D printer, and this is demonstrated perfectly by [Dirk Grappendorf]’s 6502 computer project. He’s built from scratch an entire 6502 system, with a text LCD display, and housed it in a case with a keyboard that would put to shame all but the most expensive commercial machines from back in the day.

But this is more than just a hobby project thrown together that just happens to have a nice case, he’s gone the extra mile to the extent that this is professional enough that it could have been a product. If you’d been offered [Dirk]’s machine in 1980 alongside the competitors from Apple and Commodore, you’d certainly have given it some consideration.

We’ve seen retrocomputers too numerous to mention on these pages over the years, so if they are your thing perhaps it’s time to draw your attention to our VCF West reports, and to our reviews of computer museums in Germany, and Cambridge or Bletchley, UK.

Thanks [Colin] for the tip.

6502 Retrocomputing Goes To The Cloud

In what may be the strangest retrocomputing project we’ve seen lately, you can now access a virtual 6502 via Amazon’s Lambda computing service. We don’t mean there’s a web page with a simulated CPU on it. That’s old hat. This is a web service that takes a block of memory, executes 6502 code that it finds in it, and then returns a block of memory after a BRK opcode or a time out.

You format your request as a JSON-formatted POST request, so anything that can do an HTTP post can probably access it. If you aren’t feeling like writing your own client, the main page has a form you can fill out with some sample values. Just be aware that the memory going in and out is base 64 encoded, so you aren’t going to see instantly gratifying results.

Continue reading “6502 Retrocomputing Goes To The Cloud”

Dis-Integrated 6502 Running Programs; Acting Like Computer

[Eric Schlaepfer] tends to turn up to Maker Faire with projects you simply don’t want to miss. This year is no different. Twelve months ago we delighted in seeing his 6502 processor built from an enormous reel of discrete MOSFETs. At the time it was freshly built and running random code to happily blink the LEDs reflecting activity in the registers. This year he’s given that blinking meaning and is running real programs on his Monster 6502 processor.

Continue reading “Dis-Integrated 6502 Running Programs; Acting Like Computer”

Introducing The MENSCH Microcomputer

A few weeks ago, I was browsing Tindie on one of my daily trawls for something interesting to write about. I came across something I hadn’t seen before. The Mensch Microcomputer is a product from Western Design Center (WDC) that puts a microcontroller based on the 65xx core on a small breakout board.

I’ve played around with some of WDC’s tools and toys before, back when the sent me a few dev boards to review. They’re cool, and I have considered building a little breakout board for this weird cross between a microcontroller and a system on a chip. Life gets in the way, and that project sat on the shelf. The Mensch, however, was cheap and well into impulse purchase territory. After buying one, one of the VPs at WDC asked if I’d be interested in doing another review on their latest bit of hardware. Sure. I got this.

Continue reading “Introducing The MENSCH Microcomputer”

A 6502 Retrocomputer In A Very Tidy Package

One of the designers whose work we see constantly in the world of retrocomputing is [Grant Searle], whose work on minimal chip count microcomputers has spawned a host of implementations across several processor families.

Often a retrocomputer is by necessity quite large, as an inevitable consequence of having integrated circuits in the period-correct dual-in-line packages with 0.1″ spaced pins. Back in the day there were few micros whose PCBs were smaller than a Eurocard (100 mm x 160 mm, 4″ x 6.3″), and many boasted PCBs much larger.

[Mark Feldman] though has taken a [Grant Searle] 6502 design and fitted it into a much smaller footprint through ingenious use of two stacked Perf+ prototyping boards. This is a stripboard product that features horizontal traces on one side and vertical on the other, which lends itself to compactness. Continue reading “A 6502 Retrocomputer In A Very Tidy Package”

An Intel 8085 Microprocessor Trainer

The Intel 8085 microprocessor was introduced 40 years back, and along with its contemporaries — the Z80 and the 6502 — is pretty much a dinosaur in terms of microprocessor history. But that doesn’t stop it from still being included in the syllabus for computer engineering students in many parts of the world. The reason why a 40 year old microprocessor is still covered in computer architecture text books instead of computer history is a bit convoluted. But there’s a whole industry that thrives on the requirements of college laboratories and students requiring “8085 Microprocessor Training Kits”. [TisteAndii] just finished college in Nigeria, where these kits are not locally built and need to be imported, usually costing well over a 100 dollars.

Which is why his final year project was a low cost Intel 8085 Microprocessor Trainer. It’s a minimalist design with some basic read/write memory, program execution and register inspection, with no provision for single stepping or interrupts yet. The monitor program isn’t loaded in an EEPROM. Instead, a PIC18 is used and connected to the 8085 address, data and control pins. This makes it easier to write a monitor program in C instead of assembly. And allows use of a 1.8″ LCD with SPI interface instead of the more usual 7-segment displays used for these kind of kits. [TisteAndii] built a 6×4 keyboard for input, but couldn’t solve debounce issues and finally settled on a 5×4 membrane keypad.

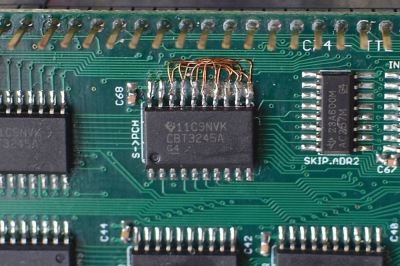
Being a rookie, he ended up with a major flaw in his board layout — he missed connecting the SRAM and the PPI devices to the data bus. A bunch of jumper links seemed to solve the issue, but it wasn’t perfect. This, and a few other problems gave him a lot of grief, but towards the end, it all worked, almost. Most importantly, his BoM cost of about $35 makes it significantly cheaper compared to the commercial units available in Nigeria.

While some hackers may consider this a trivial project, it solves a local problem and we hope the next iteration of the design improves the kit and makes it more accessible.