A modern DRAM board for the Heathkit H8 computer

Versatile DRAM Board Adds Memory To Any Heathkit H8 Variant

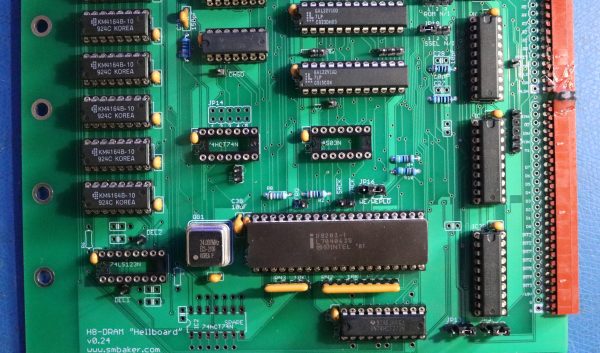
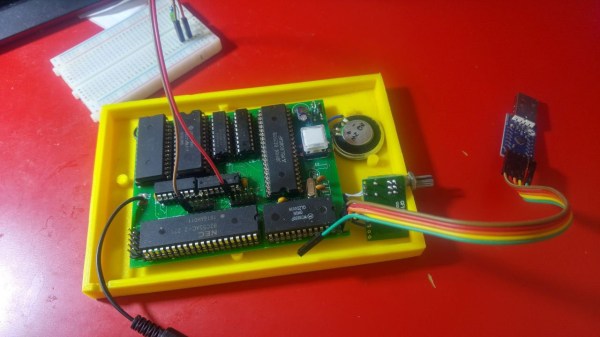
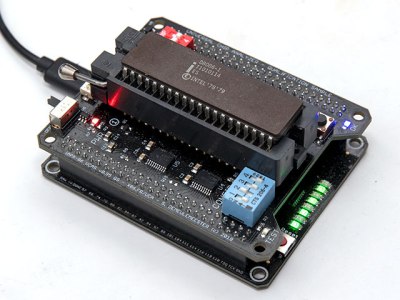
Ask anyone to name a first-generation home computer from the 1970s, and they’ll probably mention the likes of the Altair 8800 and IMSAI 8080. But those iconic machines weren’t the only options available to hobbyists back in the day: Heathkit, famous for its extensive range of electronic devices sold in kit form, jumped on the microcomputer bandwagon with their H8. Though it always remained a bit of an obscure machine, several dedicated enthusiasts kept making H8-compatible hardware and software long after the computer itself went out of production. That tradition continues in 2023, with [Scott M. Baker] producing a brand-new DRAM board that’s compatible with any version of the H8.

Although the Heathkit H8 was designed around the Intel 8080 processor, it could also be equipped with a Z80. [Scott] had built an 8085 based CPU board as well, meaning that any other hardware he developed for the H8 had to support these three processors. For something as timing-critical as a memory board, this turned out to be way harder than he’d expected.

First off, he had already made things difficult for himself by choosing DRAM rather than the simpler SRAM. Whereas SRAM chips can be more or less directly hooked up to the CPU’s address and data buses, a DRAM setup needs refresh circuitry to ensure the data doesn’t leak out of the chips’ internal capacitors. [Scott] decided to use the classic D8203 DRAM controller to do that for him — a solution that was pretty common back in the day.

Getting the timing right for all signals between the CPU and the DRAM controller was not at all trivial, however. The main problem was with two signals, called /SACK and /XACK, which were used to pause memory access during refresh cycles. Depending on which CPU was on the other side, these signals apparently had to be combined with other signals, stored in a flip-flop or delayed by a cycle or two in order to align with the processor’s internal logic. None of this seemed to work reliably, so [Scott] looked elsewhere for inspiration.
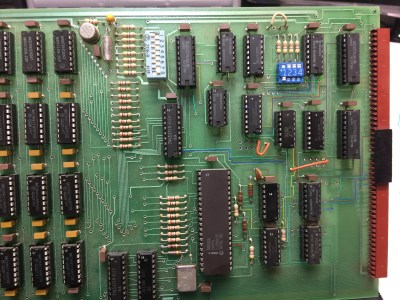
A vintage DRAM board for the Heathkit H8 computer
Luckily, traces are easy to follow on a two-layer board.

He found this on eBay, where a few vintage H8-compatible DRAM boards were for sale. Although [Scott] didn’t manage to win the auction, the eventual buyer was kind enough to snap some high-resolution pictures of the board which enabled him to reverse-engineer the circuit. The board used the similar D8202 DRAM controller and came with logic that generated the proper signals to interface with the 8080 and 8085 CPUs. For the Z80, [Scott] dived into the documentation for Heathkit’s Z80 option and found a schematic with a few logic gates that would satisfy the Zilog chip as well.

[Scott] combined both of these solutions on a beautiful 1980s-style printed circuit board, with a bunch of 7400 series logic gates and even two GAL22V10 programmable logic devices. With full documentation and Gerber files available on the project’s GitHub page, Heathkit H8 owners can now get their own brand-new memory board — in kit form, as a Heathkit should be.

There are several enthusiasts keeping the various Heathkit computer models up and running, and even producing completely new ones. The Heath Company also still exists, selling electronic kits to this day.

Thanks for the tip, [Adrian]!

Re-reclaimed From Nature: Resurrecting A DT80 Terminal

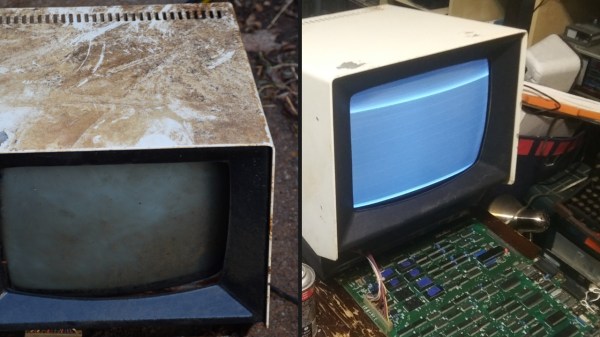
When Datamedia announced their new DT80 terminal as a VT100 killer back in 1979, they were so confident of its reliability, they threw in a full one-year warranty. Now, decades later, that confidence is once more put to the touch after [RingingResonance] fished one such terminal out of a creek by an old illegal dumping site. Not knowing what to expect from the muck-ridden artifact, his journey of slowly breathing life back into the device began.

Brings new meaning to the term “rooted”

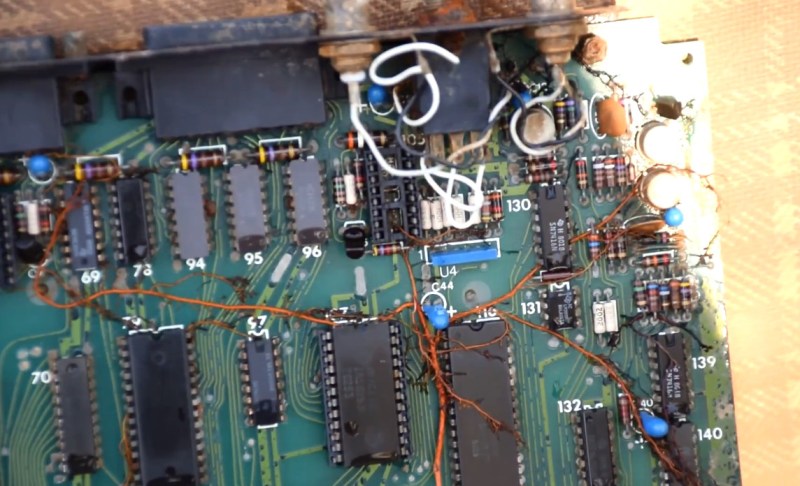
Considering the layers of mud and roots already growing all over the main board, one can only assume how long the terminal has actually been in there. But cleaning it from all that was only the beginning: some components were missing, others turned out to be broken, including some of the ROMs, which [RingingResonance] speculates may have been caused by lightning which determined the DT80’s fate in the first place.

That’s when the adventure really started though, digging deep into the terminal’s inner life, eventually writing a debugger and own firmware for it. That code, along with all other research, notes, and links to plenty more pictures can be found in the GitHub repository, and is definitely worth checking out if you’re into the technologies of yesteryear.

Despite the DT80’s claimed superiority, the VT100 prevailed and is the terminal that history remembers — and emulates, whether as tiny wearable or a full look-alike. But this fall into oblivion was also part of [RingingResonance]’s motivation to keep going forward restoring the DT80. Someone had to. So if you happen to have anything to contribute to his endeavours or share with him, we’re sure he will appreciate you reaching out to him.

Continue reading “Re-reclaimed From Nature: Resurrecting A DT80 Terminal”

An 8085 Retrocomputer From The Heart

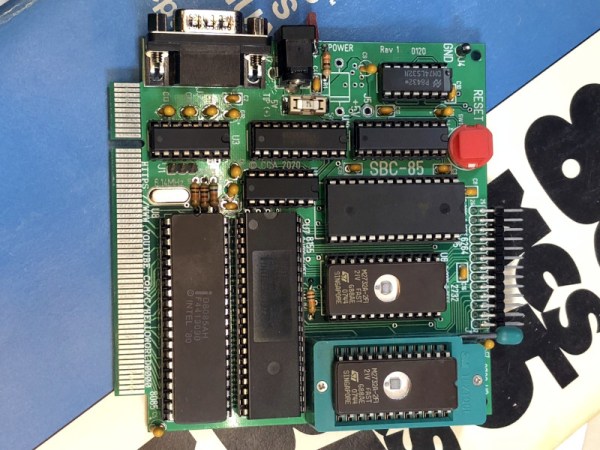
The world of 8-bit retrocomputing splits easily into tribes classified by their choice of processor. There are 6809 enthusiasts, 6502 diehards, and Z80 lovers, each sharing a bond to their particular platform that often threads back through time to whatever was the first microcomputer they worked with. Here it’s the Z80 as found in the Sinclair ZX81, but for you it might be the 6502 from an Apple ][. For [Craig Andrews] it’s the 8085, and after many years away from the processor he’s finally been able to return to it and recreate his first ever design using it. The SBC-85 is not wire-wrapped as the original was, instead he’s well on the way to creating an entire ecosystem based around an edge-connector backplane.

The CPU board is an entire computer in its own right as can be seen in the video below the break, and pairs the 8085 with 8k of RAM, a couple of 2732 4k EPROMs, and an 8155 interface chip. This last component is especially versatile, providing an address latch, timer, I/O ports, and even an extra 256 bytes of RAM. Finally there is some glue logic and a MAX232 level shifter for a serial port, with no UART needed since the 8085 has one built-in. The minimal computer capable with this board can thus be slimmed down significantly, something that competing processors of the mid 1970s often struggled with.

Craig’s web site is shaping up to be a fascinating resource for 8085 enthusiasts, and so far the system sports that backplane and a bus monitor card. We don’t see much of the 8085 here at Hackaday, perhaps because it wasn’t the driver for any of the popular 8-bit home computers. But it’s an architecture that many readers will find familiar due to its 8080 heritage, and could certainly be found in many control applications before the widespread adoption of dedicated microcontrollers. It would be interesting to see where Craig takes this next, with more cards, and perhaps making a rival to the RC2014 over in Z80 country.

Continue reading “An 8085 Retrocomputer From The Heart”

8085-based single board computer

OMEN Alpha: A DIY 8085-Based Computer

[Martin Malý] has put together a sweet little 8085-based single board computer called OMEN. He needed a simple one for educational purposes, and judging by the schematic we think he’s succeeded.

Now in its fourth iteration, it has a 32K EEPROM, 32K of memory, one serial and three parallel ports. In the ROM he’s put Tiny BASIC and Dave Dunfield’s MON85 Serial Monitor with Roman Borik’s improvements. His early demos include the obligatory blinking LED, playing 8-bit music to a speaker, and also a 7-segment LED display with a hexadecimal keyboard. There is also a system connector which allows you to connect a keyboard, a display, and other peripherals. Of course, you can connect serially at up to 115200 baud, making it very easy to compile some assembly on a PC and use the monitor to paste the hex into the board’s memory and run it. Or you can just jump into the Tiny BASIC interpreter and have some nostalgic fun. He demos all this in the video below.

He’s given enough detail for you to make your own and he also has the boards available in kit form on Tindie for a very reasonable price. With some minimal soldering skills, you can be back in the ’80s in no time.

Continue reading “OMEN Alpha: A DIY 8085-Based Computer”

Universal Chip Analyzer: Test Old CPUs In Seconds

Collecting old CPUs and firing them up again is all the rage these days, but how do you know if they will work? For many of these ICs, which ceased production decades ago, sorting the good stuff from the defective and counterfeit is a minefield.

Testing old chips is a challenge in itself. Even if you can find the right motherboard, the slim chances of escaping the effect of time on the components (in particular, capacitor and EEPROM degradation) make a reliable test setup hard to come by.

Enter [Samuel], and the Universal Chip Analyzer (UCA). Using an FPGA to emulate the motherboard, it means the experience of testing an IC takes just a matter of seconds. Why an FPGA? Microcontrollers are simply too slow to get a full speed interface to the CPU, even one from the ’80s.

So, how does it actually test? Synthesized inside the FPGA is everything the CPU needs from the motherboard to make it tick, including ROM, RAM, bus controllers, clock generation and interrupt handling. Many testing frequencies are supported (which is helpful for spotting fakes), and if connected to a computer via USB, the UCA can check power consumption, and even benchmark the chip. We can’t begin to detail the amount of thought that’s gone into the design here, from auto-detecting data bus width to the sheer amount of models supported, but you can read more technical details here.

The Mojo v3 FPGA development board was chosen as the heart of the project, featuring an ATmega32U4 and Xilinx Spartan 6 FPGA. The wily among you will have already spotted a problem – the voltage levels used by early CPUs vary greatly (as high as 15V for an Intel 4004). [Samuel]’s ingenious solution to keep the cost down is a shield for each IC family – each with its own voltage converter.

Continue reading “Universal Chip Analyzer: Test Old CPUs In Seconds”

An Intel 8085 Microprocessor Trainer

The Intel 8085 microprocessor was introduced 40 years back, and along with its contemporaries — the Z80 and the 6502 — is pretty much a dinosaur in terms of microprocessor history. But that doesn’t stop it from still being included in the syllabus for computer engineering students in many parts of the world. The reason why a 40 year old microprocessor is still covered in computer architecture text books instead of computer history is a bit convoluted. But there’s a whole industry that thrives on the requirements of college laboratories and students requiring “8085 Microprocessor Training Kits”. [TisteAndii] just finished college in Nigeria, where these kits are not locally built and need to be imported, usually costing well over a 100 dollars.

Which is why his final year project was a low cost Intel 8085 Microprocessor Trainer. It’s a minimalist design with some basic read/write memory, program execution and register inspection, with no provision for single stepping or interrupts yet. The monitor program isn’t loaded in an EEPROM. Instead, a PIC18 is used and connected to the 8085 address, data and control pins. This makes it easier to write a monitor program in C instead of assembly. And allows use of a 1.8″ LCD with SPI interface instead of the more usual 7-segment displays used for these kind of kits. [TisteAndii] built a 6×4 keyboard for input, but couldn’t solve debounce issues and finally settled on a 5×4 membrane keypad.

Being a rookie, he ended up with a major flaw in his board layout — he missed connecting the SRAM and the PPI devices to the data bus. A bunch of jumper links seemed to solve the issue, but it wasn’t perfect. This, and a few other problems gave him a lot of grief, but towards the end, it all worked, almost. Most importantly, his BoM cost of about $35 makes it significantly cheaper compared to the commercial units available in Nigeria.

While some hackers may consider this a trivial project, it solves a local problem and we hope the next iteration of the design improves the kit and makes it more accessible.

Hack An 8085 Like It’s 1985

If you have been building electronic hardware for several decades, do you still have any projects from your distant past? Do they work? An audio amplifier perhaps, or a bench power supply.

[Just4Fun] made a rather special computer in the 1980s, and it definitely still works. Describing it as “An 8085 single board computer with an EPROM emulator” though, does not convey just how special it is. This is not the modern sense of a single board computer with an SoC and a few support components. Instead it is a full system in the manner of the day in which processor, memory and peripherals are all separate components surrounded by 74 series glue logic. The whole system is wire-wrapped on a piece of perfboard and mounted very neatly in a rack. The EPROM emulator is a separate unit in a console case with hexadecimal keyboard and 7-segment display.

As the video below the break of an LED flashing demo shows, the EPROM emulator allows 8085 machine code to be entered byte by byte instead of having to be burned into a real EPROM.

[Just4Fun] leaves us with plans to replace the period EPROM emulator with a modern alternative, an EEPROM on a PCB designed to fit in the original bank of EPROM sockets. In this he suggests he might fit a bootloader and a BASIC interpreter, something entirely possible back in the day with conventional EPROMs, but probably not as cheaply.

Continue reading “Hack An 8085 Like It’s 1985”