Sometimes you need to display a number nice and large, making it easily readable at a good distance. [Lewis] has just the thing for that: a big expandable 7-segment display.
The build is modular, allowing it to be extended from 2 to 10 digits and beyond. The digits themselves are made of 3D-printed parts assembled onto acrylic. These can then be ganged up in a wooden frame for displaying larger numbers with more digits. Individual elements are lit by addressable LEDs, and the project can be built using an Arduino Nano or an ESP8266 for control. The latter opens up possibilities for controlling the screen over WiFi, which could prove useful.
[Lewis] has built his own version for a local swim club, where it will be used as a laptimer. Other applications could be as a scoreboard in various sports, or to confuse your neighbours by displaying random numbers in your front yard.
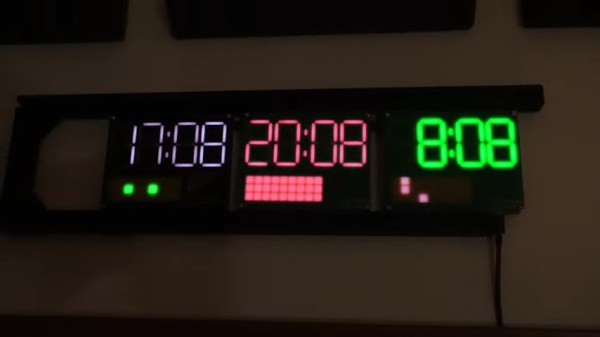
While 7-segment displays are all well and good, they’re considered a bit old hat these days. This project from [Matt Deeds] brings them screaming into the future, though, sporting every color under the rainbow.
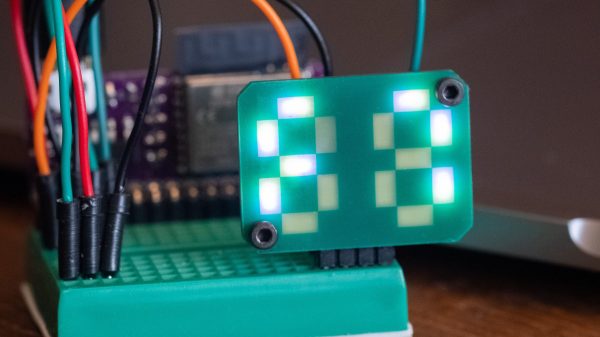
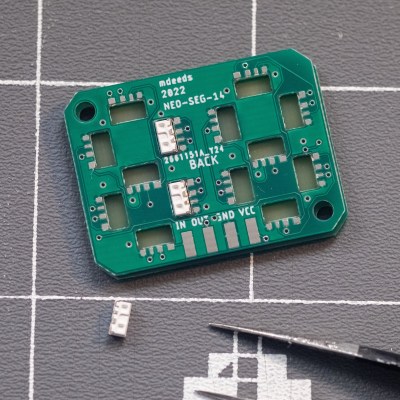
[Matt’s] build consists of a PCB filled with SK6812 side-mount LEDs, laid out in a typical 7-segment pattern. Each PCB features two 7-segment digits. The SK6812 LEDs can be driven in the same way as the famous WS2812B addressable LEDs, though they have the benefit of being more stable in color and brightness over a range of supply voltages.
With the LEDs installed, and a second PCB used solely as a diffuser by leaving out sections of solder mask, it’s a compact 7-segment solution at just 2.7 mm thick. The bonus is that each segment can be set to a different color thanks to the nature of the addressable RGB LEDs. Going too ham in this regard will make the displays difficult to read, but it can be used to easily display green, red, or yellow numbers, for example, to create a visual guide to a numerical range.
It’s a great build, and we love to see 7-segment displays re-imagined in different ways – even mechanically! It also takes fewer pins to drive compared to the old way of doing things in the non-addressable LED era. If you’ve got your own neat 7-segment projects under development, please do let us know!
Utter the words “7-segment display” amongst hackers and you’ll typically get people envisaging the usual LED and LCD versions that we all come across in our daily lives. However, mechanical versions do exist, and [ord] has assembled a couple of designs of their very own.
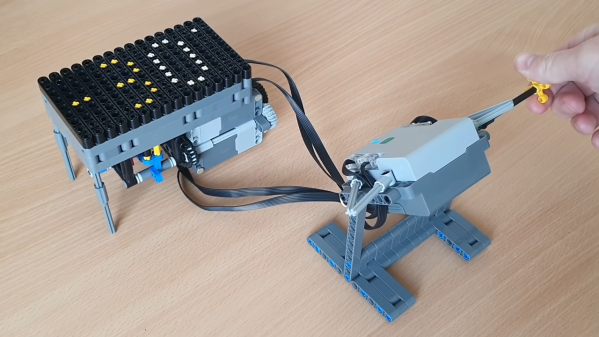
The first uses what appears to be two LEGO motors to drive individual segments of the display. Each segment consists of a pair of yellow axles thrust up through a black grid to represent parts of the number, as well as a minus sign as needed. [ord] demonstrates it by using it to display angle data from a tilt sensor inside a LEGO Powered Up controller brick. Further photos on Flickr show the drive system from underneath.
The second design relies upon a drum-like mechanism that seems to only be capable of displaying numbers sequentially. It works in a manner not dissimilar to that of a player piano. The required movements to display each number are programmed into sequences with Technic pins sticking out of beams in a drum assembly driven by either a hand crank or motor. It’s again demonstrated by [ord] using it to display angular data.
While it’s unlikely we’ll see LEGO displays used as angle of attack meters in light aircraft, you could do so if you wanted a cheap and unreliable device that is likely to fall to pieces if unduly jostled. In any case, it’s not the first time we’ve seen LEGO 7-segment displays, but it’s always great to see a new creative take on an existing concept. We’d love to see such a design implemented into a fancy clock, or perhaps even a news ticker running on a 16-segment version. Video after the break.
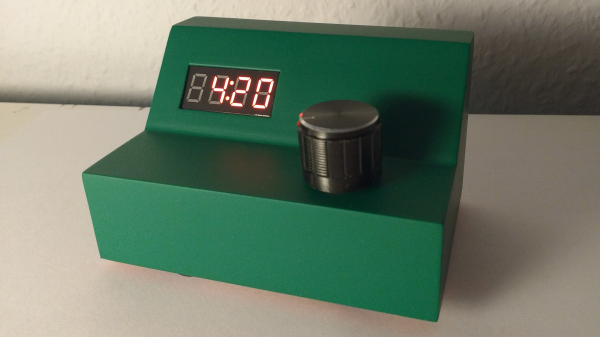
Student and hacker [prusteen] recently fell in love with the Pomodoro method of time management. That’s where you concentrate on your task for 25 minutes, then take a five-minute break, and repeat this four times with a longer break at the end. Initially, [prusteen] was keeping track on their phone, but hated having to change the timer value between Pomodoros and break times. In order to keep the flow mode engaged, [prusteen] came up with this darling little study buddy that does it all with the push of a button.
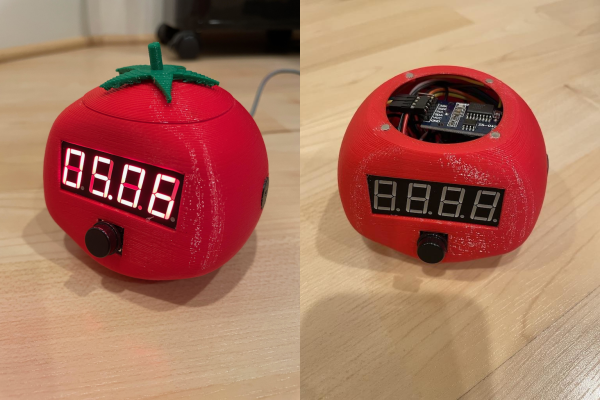
By default, this tomato shows the current time, which we think is a handy and often-overlooked feature of Pomodoro timer builds. Press that momentary switch on the front, and it starts counting upward to 25 minutes. Then it beeps in stereo through a pair of buzzers when the time is up, and automatically starts a five-minute break timer. Press it again and the display goes back to clock mode, although judging by the code, doing this will cancel the timer.
Inside the juicy enclosure is an Arduino Nano, an RTC, and a 7-segment display. We love the attention to detail here, from the little green leaves on top to the anatomically-correct dimple on the underside. And we always like to see lids that snap on with magnets. So satisfying. Check out the brief demo after the break, which unfortunately does not include any lid-snapping action.
If you look around your desk right now, odds are you’ll see a 7-segment display or two showing you some vital information like the time or today’s weather. But think of how much information you could see with over 1,100 digits, like with [Chris Combs’] 7200-segment display.
For [Chris], this project started the same way that many of our projects start; finding components that were too good of a deal to pass up on. For just “a song or two plus shipping”, he was the proud owner of two boxes of 18:88 7-segment displays, 500 modules in total. Rather than sitting and using up precious shelf space, [Chris] decided to turn them into something fancy he could hang on the wall.
The first challenge was trying to somehow get a signal to all of the individual segments. Solutions exist for running a handful of displays in one device, but there are certainly no off-the-shelf solutions for this many. Even the possible 16 addresses of the IS31FL3733 driver IC [Chris] chose for this project were not enough, so he had to get creative. Fearing potential capacitance issues with simply using an i2C multiplexer, he instead opted to run 3 different i2C busses off of a Raspberry Pi 4, to interface with all 48 controllers.
The second challenge was how to actually wire everything up. The finished display comes out to 26 inches across by 20.5 inches tall, much too large for a single PCB. Instead, [Chris] opted to design a series of self-contained panels, each with 6 of the display modules and an IS31FL3733 to drive them. While the multiplexing arrangement did leave space for more segments on each panel, he opted to go for this arrangement as it resulted in a nice, clean, 4:3 aspect ratio for the final display.
The end result was a unique and beautiful piece, which Chris titled “One-to-Many”. He uses it to display imagery and art related to the inevitability of automation, machines replacing humans, and other “nice heartwarming stuff like that”, as he puts it. There’a video after the break, but if you are interested in seeing the display for yourself, it will be on display at the VisArt’s Concourse Gallery in Rockville, MD from September 3 to October 17, 2021. More info on [Chris’s] website.
Over the years we’ve seen many takes on the 7-segment display. Among the most interesting are the mechanical versions of what is most often an LED-based item. This week’s offering is from [John Burd], who published a very odd video showing off the clock he made. But look beyond YouTuber antics and you’ll see the stepper motors he used to turn the segments are dripping with graceful beauty. (Video, embedded below.)
Okay if you want to hear [Charlie Sheen] say “Raspberry P-eye”, this is the video for you. [John] used Cameo to get the (former?) star to talk about what was used to build the clock. Like we said, the video is weird. Let’s embrace that right away and then never talk about it again.
The thing is, the build is such a good idea. [John] went with some stepper motors you can source relatively cheaply from Ali Express and the like. Typically they’re around a buck or two each and have a couple of wings for screw mounting brackets. This builds on the segment displays we’ve seen that use hobby servos by allowing you finer control of how the segments move. Sure, the 90° rotation isn’t all that much to work with, but it will be much smoother and you can get fancy with the kinematics you choose. The only place we see room for improvement is the alignment of the segments when they are turned “off” as you can see the center segment in the video thumbnail below is not quite level. Maybe a linkage mechanism would allow for a hing mechanism that aligns more accurately while hiding the servos themselves behind the mounting plate? It’s in your hands now!
In the demo video you’ll also find some interesting test rigs built to proof out the project. One just endurance tests the mechanism, but the other two envision water-actuated segments. One pumps a hollow, transparent segment with colored liquid. The other tried to use water droplets sprayed in the air to illuminate laser segments. Both are cool and we’d like to see more of the oddball approaches which remind us of the ferrofluid clock.
When we think of 7-segment displays as the ubiquitous LED devices that sprung into popularity in the 1970s. However, numbers have existed for a lot longer than that, and people have wanted to know what the numbers are for quite some time, too. Thus, a variety of technologies were used prior to the LED – such as these magnificent incandescent 7-segment displays shown off by [Fran Blanche].
The displays are basic in concept, but we imagine a little frustrating in execution. Electronics was tougher back in the days when valves needed huge voltages and even a basic numerical display drew a load of current. Built to industrial-grade specifications, they’re complete with a big heatsinking enclosure and rugged gold-plated connectors. [Fran] surmises that due to the likely military applications of such hardware, the filaments in the bulbs were likely built in such a way as to essentially last indefinitely. The glow of the individual segments has a unique look versus their LED siblings; free of hotspots and the usual tapered shape on each segment. Instead, the numerals are pleasingly slab-sided for a familiar-but-not-quite aesthetic.
[Fran] demonstrates the display running with a CD4511B BCD-to-7-segment decoder, hooked up with a bunch of 3904 power transistors to get the chip working with filament bulbs instead of LEDs. It’s a little fussy, but the displays run great with the hardware sorted.