Using An Old Smartphone In Place Of A Raspberry Pi

The Raspberry Pi was a fairly revolutionary computing device when it came on the scene around a decade ago. Enough processing power to run a full Linux desktop and plenty of GPIO meant almost certain success. In the past year, though, they’ve run into some issues with their chip supplier and it’s been difficult to find new Pis, which has led to some looking for alternatives to these handy devices. [David] was hoping to build a music streaming server and built it on an old smartphone instead of the ubiquitous single-board computer.

Most smartphones are single-board computers though, and at least the Android devices are fully capable of running Linux just like the Pi. The only problem tends to be getting around the carrier or manufacturer restrictions like a locked bootloader or lack of root access. For [David]’s first try getting this to work, he tried to install Navidrome on a Samsung phone but had difficulties with the lack of memory and had to build the software somewhere else and then load it on the phone. It did work, but the stock operating system kept killing the process for consuming too much memory.

Without root access, [David] decided to try LineageOS, a version of Android which, among other benefits, is typically much more configurable than the stock version of Android that is shipped with smartphones. This allowed him to disable or uninstall anything not needed for his music server to free up enough memory. After some issues with transcoding the actual music files he planned on streaming, his music server was successfully up and running on a phone that would have otherwise been relegated to the junk drawer. The specific steps he took to get this working can be found on his GitHub page as well.

[David] also mentioned looking at PostmarketOS for this job which is certainly a viable option for some, but the Linux distribution for phones is only supported on a few devices. Another viable alternative for a project like this if no Raspberry Pis are available might be any of a number of Pine64 devices that might also be sitting around gathering dust, like the versatile Linux-based Pinephone.

El Caracol observatory at Chichen Itza.

Solving The Mystery Of The Mayan Calendar’s 819-Count Cycle

Mayan Calendar Round. (Source: Chichen Itza)

Despite the mysticism that often clouds the Mayan calendar in popular culture, fact remains that the calendar system in use by the Mayans was based on a system used throughout the pre-Columbian Mesoamerican societies, dating back to at least the 5th century BCE. Characteristic of this system is the cyclical nature, with the Mayan calendar featuring three common cycles: the Long Count, Tzolk’in (260-day) and the 365-day, solar-based Haab’. Combined, these three cycles formed what is known as the Calendar Round and which lasts for 52 haab’ (years).

What was less obvious here was the somewhat obscure 819-day count that was found in certain locations in Mayan constructions. Now researchers John H. Linden and Victoria R. Bricker figure that they have discovered how this new cycle matches up with the previously known Calendar Round. In previous reports by e.g. Barbara McLeod and Hutch Kinsman in 2012, they noted the ongoing debate on this 819-day count and its potential purpose. The new insight by Linden and Bricker is that by increasing the calendar length to 20 periods of 819 days, it matches up with all synodic periods of the visible planets, explaining it as a planetary astronomical cycle.

What is interesting here is that the Mayan counting system is base-20 (vigesimal). Whether coincidence or not when it comes to this part of the Mayan calendar, it is good to see that more secrets of the Classical Mayan society are being recovered. With modern day Maya still living where their ancestors once did, these discoveries help them to recover and reconnect to the parts of their history that were so brutally destroyed by the invading Europeans.

(Heading image: El Caracol observatory at Chichen Itza, Mexico)

Cheap Deburring Tool Is Game Changer For 3D Printing

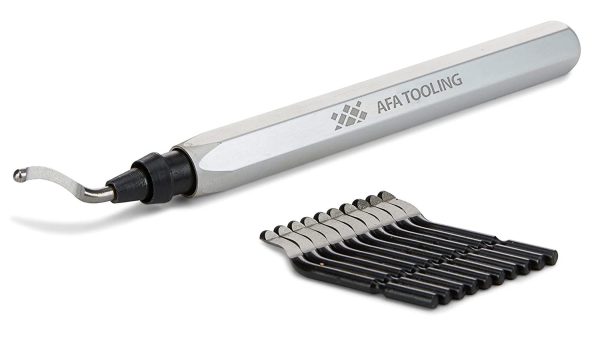
3D printing’s real value is that you can whip up objects in all kinds of whacky geometries with a minimum of fuss. However, there’s almost always some post-processing to do. Like many manufactured plastic objects, there are burrs, strings, and rough edges to deal with. Fussing around with a knife to remove them is a poor way to go. As explained by [Adrian Kingsley-Hughes] on ZDNet, a deburring tool is the cheap and easy solution to the problem.

If you haven’t used one before, a deburring tool simply consists of a curved metal blade that swivels relative to its straight handle. You can drag the curved blade over the edge of a metal, wooden, or plastic object, and it neatly pulls away the burrs. There’s minimal risk of injury, unlike when pulling a regular blade towards yourself. The curved, swiveling blade is much less liable to slip or jump, and if it does, it’s far less likely to cut you.

For plastic use, just about any old deburring tool will do. They last a long time with minimal maintenance. They will wear out faster when used on metals, but you can get replacement blades cheap if you happen to need them. It’s a tool every workshop should have, particularly given they generally cost less than $20.

Given the ugly edges and rafts we’re always having to remove from our 3D prints, it’s almost egregious that printers don’t come with them bundled in the box. They’re just a bit obscure when it comes to tools; this may in fact be the first time Hackaday’s ever covered one. If you’ve got your own quality-of-life hacks for 3D printing, sound off below, or share them on the tipsline! We have able staff waiting for your email.

Smooth Animations, Slick Bar Graphs, But No Custom Characters On This 16×2 OLED

Sometimes, finding new ways to use old hardware requires awesome feats of reverse engineering, software sleight of hand, and a healthy dose of good fortune. Other times, though, it’s just as simple as reading the data sheet and paying attention to details.

Not that we’re knocking [upir]’s accomplishment with these tricked-out 16×2 OLED displays. Far from it, in fact — the smoothly animated bar graph displays alphanumerics look fantastic. What’s cool about this is that he accomplished all this without resorting to custom characters. We’ve seen him use this approach before; this time around, the hack involves carefully shopping for a 16×2 OLED display with the right driver chip — a US2066 chip. You’ll still need a few tricks to get things working, like extra pull-up resistors to get the I2C display talking to an Arduino, plus a little luck that you got a display with the right character ROM.

Once all that is taken care of, getting the display to do what you want is mainly a matter of coding. In the video below, [upir] does a great job of walking through the finer points, and the results look great. The bar graphs in particular look fantastic, with silky-smooth animations.

Continue reading “Smooth Animations, Slick Bar Graphs, But No Custom Characters On This 16×2 OLED”

Op Amp Challenge: What’s Your Monitor’s Delay?

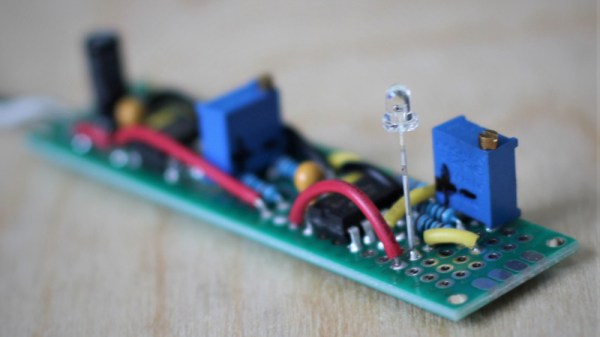
In the days of CRT displays, the precise synchronization between source and display meant that the time between a video line appearing at the input and the dot writing it to the screen was constant, and very small. Today’s display technologies deliver unimaginable resolutions compared to the TV your family had in the 1970s, but they do so at the expense of all their signal processing imposing a much longer delay before a frame is displayed. This can become an issue for gamers, but also with normal viewing, because in some circumstances the delay can be long enough for it to be audible in a disconnect between film and soundtrack. It’s something [Mike Kibbel] has addressed with his video input delay meter, and it makes for a very interesting project.

At its heart is an FPGA, and in the video below the break he goes into great detail about its programming. It both generates a DVI output to drive the monitor and performs the measurement. The analog to digital converter side of the circuit is interesting, he has a photodiode and an op-amp driving a comparator to form a simple 1-bit converter. He takes us through the design process in detail, with such useful little gems as the small amount of hysteresis applied to the comparator.

There are probably many ways this project could have been implemented, but this one is both technically elegant and extremely well documented. Definitely worth a look!

Continue reading “Op Amp Challenge: What’s Your Monitor’s Delay?”

Making Hydrogen With Solar Energy, With Oxygen And Heat A Bonus

Hydrogen is a useful gas. Whether you want to float an airship, fuel a truck, or heat an industrial process, hydrogen can do the job. However, producing it is currently a fraught issue. While it can be produced cleanly using renewable energy, it’s often much cheaper to split it out of hydrocarbon fuels using processes that generate significant pollution.

There are methods to generate hydrogen more efficiently, though, in a clean and sustainable process. that also produces useful heat and oxygen as byproducts. The key to the process? Concentrated sunshine.
Continue reading “Making Hydrogen With Solar Energy, With Oxygen And Heat A Bonus”

Compressed Air Keeps Screws Moving Through Modular Production System

If there’s an unsung hero of manufacturing, it’s the engineer who figures out how to handle huge numbers of small parts. It’s one thing to manually assemble something, picking each nut, bolt, and washer by hand. It’s another thing to build a machine that can do the same thing, but thousands of times in a row, ideally without making mistakes.

Most of us don’t need that level of automation in our processes, but when you do, it results in some interesting challenges. Take this pneumatic screw accelerator that [Christopher Helmke] designed for his modular production system. One of the custom machines in his system is a screw counter, which uses a magnetic wheel to feed screws — or nuts or washers — from a hopper, orient them correctly, and drop them into an output chute. While the counting bit worked quite well, parts would only go so far under the force of gravity in the clear vinyl tube used to connect the counter to the next process.

[Christopher]’s solution was simple but effective. His first prototype simply injects compressed air into the parts feed tube, which pushes the screws through the tubing. It works surprisingly well, propelling the parts through quite a long length of tubing, handling twisting paths easily and even working against gravity. Version 2 integrated the accelerator and a re-orienting fixture into a single part, which mates with a magazine that holds a large number of screws.

There are a lot of interesting features [Christoper] built into these simple parts that are worth keeping in mind. Our favorite is printing channels to guide small cable ties around the tubing to clamp it into the accelerator. We’ll be keeping that trick in mind.

Continue reading “Compressed Air Keeps Screws Moving Through Modular Production System”