2.5 Mm Jack Adapter For The Xbox One Headset

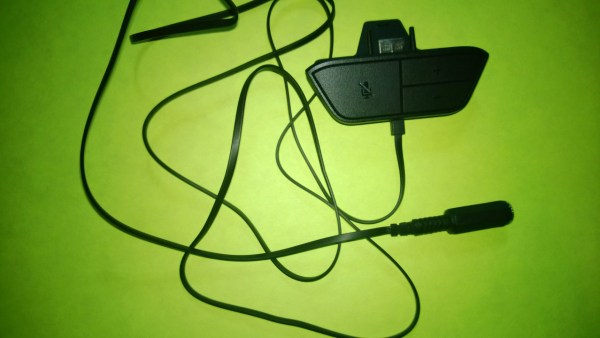
As most everyone knows the Xbox One came out last week and if you were one of the lucky few to get one you might have noticed the headset is quite uncomfortable and covers only one ear. [octanechicken] has a possible adapter solution that lets you plug-in an older more comfortable chat headset like a Turtle Beach. It is being reported as a functional hack by others in the comments; however it may still be questionable. We say questionable because the first release of this Instructable clearly had a flaw in the wiring, but updated text seems to have fixed that problem. Using a female 2.5 mm stereo inline jack [octanechicken] was able to get the Xbox One headset controller to work with older Xbox 360 chat headsets having a male 2.5 mm plug.

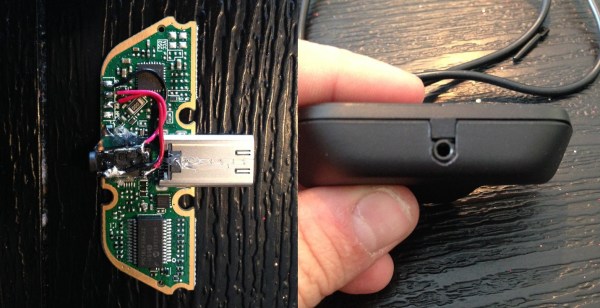
The photos on the instructable are still incorrect so following the text instructions one simply unsolders the wires from within the ear piece and then solders the white wire to the tip connector, blue wire to the middle ring connector and the bare wire to the rear sleeve connector of the female 2.5 mm stereo inline jack. Remember to leave the black wire disconnected and covered with a bit of tape. If you cut the wires instead of unsoldering them, remember to scrape any varnish off before soldering. But what about that black wire?

Continue reading “2.5 Mm Jack Adapter For The Xbox One Headset”

Fail Of The Week: How A Cheap USB AC Adapter Might Indirectly Burn Your House Down

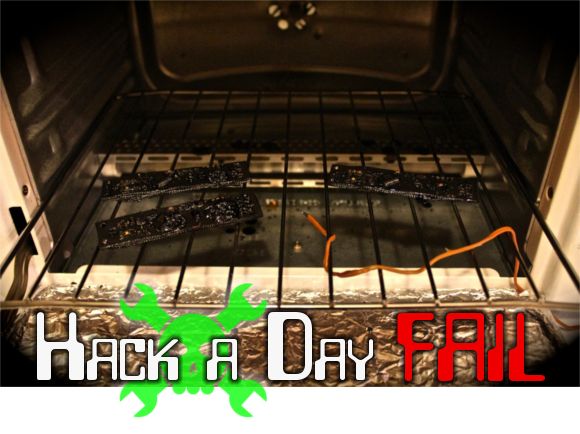
This Fail of the Week will remind our readers that every project they make, no matter how small they might be, may have big consequences if something goes wrong. Shown in the picture above is an oven that [Kevin] tweaked to perform reflow soldering. The story is he had just moved into a new place a few weeks ago and needed to make a new batch of boards. As he had cycled this oven many times, he was confident enough to leave the room to answer a few emails. A few minutes later, he had the unfortunate experience of smelling something burning as well as discovering white smoke invading his place.

Continue reading “Fail Of The Week: How A Cheap USB AC Adapter Might Indirectly Burn Your House Down”

Raspberry Pi Foundation Looks At Counterfeit Apple Power Supplies

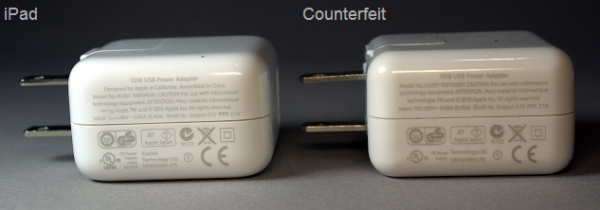
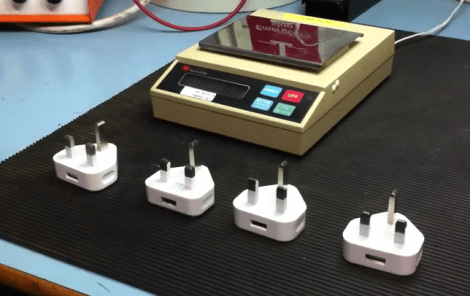
The Raspberry Pi foundation is in a somewhat unique position. They always test the units that get returned to them in hopes that they can improve the design. They often request that the power supply also be sent back with the RPi unit, as we know the board will not work well if the PSU can’t source enough current. And so they’ve been able to get a look at several counterfeit iPhone chargers. This is not one of the recommended ways to power the RPi, but their ability to collect failed hardware means that they have identified three different fakes on the market.

Seen here is a genuine Apple product on the left. The others are fake, with the easiest way of spotting them being the shiny chrome plug connectors. The genuine part has a matte finish on the connectors. There is also a difference in the chamfering, and even a variation on the orientation of the USB port on some of them. Unfortunately we don’t get a look inside, which is what we really wanted. But you can see in the video after the break that weighing the adapter will also give it away as a fake, showing that the components within probably vary quite a bit. This reminds us of some other fake PSUs that have been exposed.

Continue reading “Raspberry Pi Foundation Looks At Counterfeit Apple Power Supplies”

Lens Adapter From A Plastic Soda Bottle

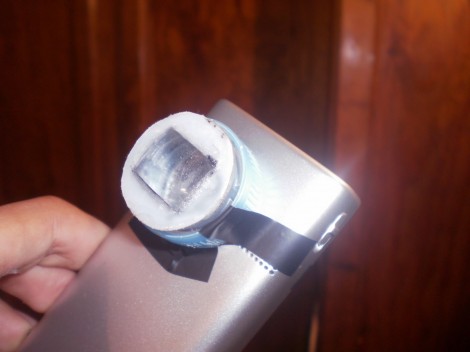
This lens adapter makes a lot of sense if you’re looking to interface with cameras that don’t have an in-built mounting option. It uses the cap and threaded neck from a soda bottle (translated) to make the lens adjustable and removable.

In the past we’ve seen this hack using a lens cap with a hole drilled in it as the mounting bracket. But that’s only useful if the lens you’ve chosen actually has a cap to use. This method lets you cut the top off of a the soda cap and mount it on the camera. Now each lens can be affixed to the threaded neck of the bottle, allowing for some adjustment of the focal point by screwing the add-on in or out.

Obviously this would work well for macro or fish-eye lenses. But there’s all kinds of other options out there like adding a microscope lens adapter, or actually attaching quality optics to your device.

Simple VGA Interface For Tiny FPGA Boards

fpga_vga_adapter

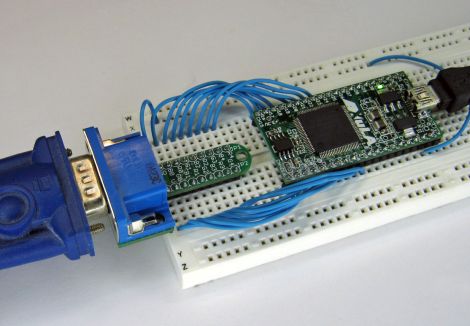
[devb] has been playing around with XESS FPGA boards for ages, and as long as he can remember, they have had built-in VGA interfaces. His newest acquisition, a XuLA FPGA board, doesn’t have any external parts or ports aside from a USB connector. He needed to get video output from the board, so he decided to build a VGA interface himself.

He prototyped a 512-color VGA interface board which worked just fine, but he thought it would be way too cumbersome to use for each and every project. To keep life simple, he designed a small PCB that integrates a VGA connector and all of the resistors he needed to get the signal from the FPGA. His boards plug directly into a breadboard, so only a handful of wires is needed to connect the FPGA to a monitor.

As you can see on his site, the adapter works quite well, allowing the FPGA to put out a crisp 800×600 image with little fuss. [devb] has also posted all of his design files on his site in Eagle format for anyone interested in replicating his work.

Power Adapter For Digital Cameras Without An External Jack

[Kusnick] is into using digital camera rigs for book scanning. The problem is that keeping the batteries charged is a pain, but there’s no external AC adapter jack which would allow him to use the mains. His solution was to build his own adapter to replace the batteries.

There are some fancy book scanning setups that allow you to just flip through the pages, but it’s much simpler to build a rig that uses two cameras. [Kusnick’s] setup is the latter, which means he’s found two inexpensive cameras that don’t need to be mobile. The first attempt at making an adapter featured a block of acrylic with the positive and negative contacts connected to a shielded cord which he then hooked to an external supply. The camera would come on and then turn off citing that the cameras were “for use with compatible battery only”. Turns out there’s some type of verification circuit built into the proprietary batteries. But the solution to that came quite easily; remove the circuit board from the battery and insert it in the adapter to trick the camera.

[Thanks Daniel]

Using Quality Optics With A Webcam

[Devon Croy] built a case to join a webcam sensor with a camera lens. The box is a PVC conduit box you’d find at a home center. He used JB Weld to attach four bolts to the back of the box. These are used to fine-tune the mounting plate for the webcam sensor to ensure it’s at the focal point of the lens. The lens connects through a couple of extension tubes to an adapter mounted in the center of the box’s cover plate. The setup above shows a macro lens that takes pretty good pictures.

If you need images of really tiny things you should look into a microscope adapter for your camera.