We shouldn’t say iCub — the humanoid robot from Italy — is creepy. After all, human-like robots are in their infancy and an early computer or automobile would hardly be indicative of where those industries would take us. You can see the little guy in the video below.
The effort is open source and was part of an EU project that has been adopted by 20 labs around the world. The video just shows a guy in VR gear operating the robot, but the website has a lot of technical information if you want to know more.
The CAN bus is a rich vein to mine for a hacker: allowing the electronic elements of most current vehicles to be re-purposed and controlled with ease. [MikrocontrollerProjekte] has reverse engineered a CAN bus media and navigation controller and connected it to an STM32F746G-Discovery board. The STM32 is in turn connected to an Android phone, and allows the media controller to trigger a large number of functions on the phone, including music playback, maps, and general Android navigation.
When reverse engineering the controller, [MikrocontrollerProjekte] employed a variety of approaches. A small amount of information was found online, some fuzzing was done with random CAN bus IDs and messages, as well as some data logging with the device inside the car to identify message data to the relevant IDs on the bus.
The STM32F746G-Discovery board acts as a Human Interface Device (HID), emulating a mouse and keyboard connected to the Android phone via USB OTG. The LCD screen shows the output of the keystrokes and touchpad area. We’re not sure how useful the mouse-emulation would be, given that the phone has a touchscreen, but the media functions work really well, and would also make a really snazzy music controller for a PC.
We’ve all been there: after assessing a problem and thinking about a solution, we immediately rush to pursue the first that comes to mind, only to later find that there was a vastly simpler alternative. Thankfully, developing an obscure solution, though sometimes frustrating at the time, does tend to make a good Hackaday post. This time it was [David Wehr] and AudioSerial: a simple way of outputting raw serial data over the audio port of an Android phone. Though [David] could have easily used USB OTG for this project, many microcontrollers don’t have the USB-to-TTL capabilities of his Arduino – so this wasn’t entirely in vain.
At first, it seemed like a simple task: any respectable phone’s DAC should have a sample rate of at least 44.1kHz. [David] used Oboe, a high performance C++ library for Android audio apps, to create the required waveform. The 8-bit data chunks he sent can only make up 256 unique messages, so he pre-generated them. However, the DAC tried to be clever and do some interpolation with the signal – great for audio, not so much for digital waveforms. You can see the warped signal in blue compared to what it should be in orange. To fix this, an op-amp comparator was used to clean up the signal, as well as boosting it to the required voltage.
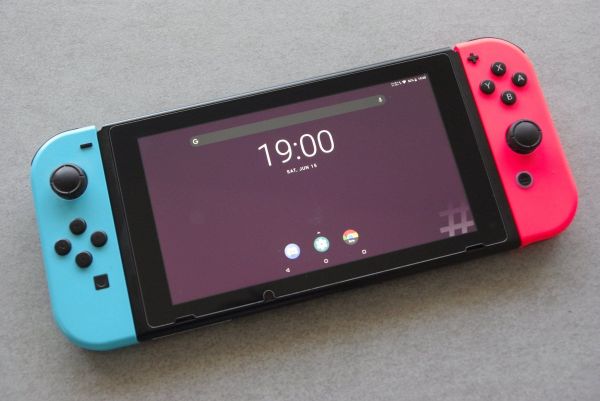
As a gamer, [Lexie Dostal] dreamed of a smartphone that was a viable gaming platform: something with enough power to run the games and emulators he was interested in, with the controls to make playing them feel natural. So when he got his hands on an early version of Kite, the modular open hardware platform designed to be hacked and customized, that’s exactly what he decided to build. The Kite kit would provide the touch screen and Android-equipped motherboard, he just needed to design a case and integrate controls to make it a real gaming device.
The case design [Lexie] came up with is inspired by the bottom half of the Nintendo 3DS, and ended up only a few centimeters wider than the stock case from the Kite kit. Unfortunately, his delta 3D printer wasn’t large enough to fit the device’s case, so he ended up having to break it into five separate pieces and glue them together. With the case in one piece he worked his way from 220 to 400 grit sand paper, filling any voids in the print with glue as he went. A few coats of primer, more sanding, and a final matte texture spray give the final case a very professional-looking finish.
Not only was the Nintendo 3DS an inspiration for the device, it was also a donor for some of the parts. The directional pad, analog “nub”, and buttons are replacement 3DS hardware, which is interfaced to the KiteBoard with an Arduino Nano. When he couldn’t find springs small enough to use for the shoulder buttons, he bought some thin music wire and wound them himself. Talk about attention to detail.
There’s quite a bit of gear packed into the case, but [Lexie] thinks there’s probably still room to make some improvements. He could free up some room by dropping the connectors and soldering everything directly, and says he’d like to come up with a custom PCB to better interface with the 3DS’s hardware to cut down on some of the wiring required. With the extra room he thinks the battery, currently a 3200 mAh pack designed for the LG V20 smartphone, could probably be replaced with something even bigger.
Readers may recall that the Kite is currently in the running for the 2018 Hackaday prize. Seeing Kite already delivering on the promise of making it easier to develop powerful Android devices is very exciting, and we can’t wait to see what else hackers will be able to do with it.
While we here at Hackaday never question why an individual took on a particular project, it surely doesn’t stop our beloved readers from grabbing their pitchforks and demanding such answers in the comments. Perhaps no posts generate more of this sort of furore than the ones which feature old audio gear infused with modern hardware. In almost every case the answer is the same: the person liked the look and feel of vintage hardware, but didn’t want to be limited to antiquated media.
That sentiment is perhaps perfectly personified by the TapeLess Deck Project, created by [Artur Młynarz]. His creations combine vintage cassette decks with an Android phone small enough to fit behind the tape door. An Android application which mimics the look of a playing tape, complete with “hand written” track info, completes the illusion.
The output from the phone is tied into the deck where the audio signal from the tape head would have been, so the volume controls and VU meters still work as expected. Watching the meters bounce around while the animated “tape” plays on the screen really does look incredibly slick, though the effect is somewhat hindered by the fact the physical playback controls don’t seem to be implemented. Incidentally, the whole experience works better if the plastic window on the tape door is removed; that way you can utilize the touch and swipe interface [Artur] has in the software.
Let’s get this out of the way first – this project isn’t meant to be a replacement for your regular smartphone. Although, at the very least, you can use it as one if you’d like to. But [Shree Kumar]’s Hackaday Prize 2018 entry, the Kite : Open Hardware Android Smartphone aims to be an Open platform for hackers and everyone else, enabling them to dig into the innards of a smartphone and use it as a base platform to build a variety of hardware.
When talking about modular smartphones, Google’s Project Ara and the Phonebloks project immediately spring to mind. Kite is similar in concept. It lets you interface hacker friendly modules and break out boards – for example, sensors or displays – to create your own customized solutions. And since the OS isn’t tied to any particular brand flavor, you can customize and tweak Android to suit specific requirements as well. There are no carrier locks or services to worry about and the bootloader is unlocked.
At the core of the project is the KiteBoard – populated with all the elements that are usually stuffed inside a smartphone package – Memory, LTE/3G/2G radios, micro SIM socket, GPS, WiFi, BT, FM, battery charging, accelerometer, compass, gyroscope and a micro SD slot. The first version of KiteBoard was based around the Snapdragon 410. After some subtle prodding at a gathering of hackers in Bangalore, [Shree] moved over to the light side, and decided to make the KiteBoard V2 Open Source. The new board will feature a Snapdragon 450 processor among many other upgrades. The second PCB in the Kite Project is a display board which interfaces the 5″ touchscreen LCD to the main KiteBoard. Of Hacker interest is the addition of a 1080p HDMI output on this board that lets you hook it up to external monitors easily and also allows access to the MIPI DSI display interface.
Finally, there’s the Expansion Board which provides all the exciting hacking possibilities. It has a Raspberry Pi compatible HAT connector with GPIO’s referenced to 3.3 V (the KiteBoard works at 1.8 V). But the GPIO’s can also be referenced to 5 V instead of 3.3 V if you need to make connections to an Arduino, for example. All of the other phone interfaces are accessible via the expansion board such as the speaker, mic, earpiece, power, volume up / down for hacking convenience. The Expansion board also provides access to all the usual bus interfaces such as SPI, UART, I²C and I²S.
To showcase the capabilities of the Kite project, [Shree] and his team have built a few phone and gadget variants. Build instructions and design files for 3D printing enclosures and other parts have been documented in several of his project logs. A large part of the BoM consists of off-the-shelf components, other than the three Kite board modules. If you have feature requests, the Kite team is looking to hear from you.
When it comes to smartphone design, Quantity is the name of the game. Whether you’re talking to Qualcomm for the Snapdragon’s, or other vendors for memory, radios, displays and other critical items, you need to be toeing their line on MOQ’s. Add to this the need to certify the Kite board for various standards around the world, and one realizes that building such a phone isn’t a technical challenge as much as a financial one. The only way the Kite team could manage to achieve their goal is to drum up support and pledges via a Kickstarter campaign to ensure they have the required numbers to bring this project to fruition. Check them out and show them some love. The Judges of the Hackaday Prize have already shown theirs by picking this project among the 20 from the first round that move to the final round.
Have an ESP8266 development board such as the NodeMCU or Wemos D1? You’re currently reading Hackaday, so probably. Got an Android device kicking around? Also seems fairly likely. In that case, you should check out ESP8266 Loader by [Bluino Electronics]. This recently released application lets you not only flash new binaries to any ESP8266 board using the FTDI, PL2303, CH34X and CP210X USB chipsets, but also offers a serial monitor for debugging on the go.
You’ll need a USB OTG cable to get your ESP board jacked in to your Android device, but you don’t need root or even to fiddle with the development settings. Here at the Hackaday R&D Dungeon we had somewhat mixed success getting a random selection of Android devices to work fully; all of the ones tried could at least open the serial monitor and read what a pre-programmed ESP was saying, but not all of them could successfully program a board.
Even on the devices where programming worked, it was slow. Just a basic LED blinking Sketch took long enough to write to our test Wemos D1 Mini that we contemplated getting a snack. But still, it shows a lot of promise for managing devices in the field, especially if you don’t have over the air update enabled in your code.
We especially liked that ESP8266 Loader helpfully downloaded a bunch of example binaries, many of which could be of practical use. There are programs for toggling the different GPIO pins on the board, creating Wi-Fi access points, and even a basic web server. With these in hand, you could actually do some testing and diagnostic work right from your mobile device.