Apollo DSKY Replica Looks The Part

It’s hard to say what exactly it is about the Apollo DSKY that captures so many hackers’ imaginations. Whatever it is, the “Display and Keyboard” unit from the Apollo Guidance Computer has inspired dozens of teardowns, simulations, and reproductions over the years, to varying degrees of success. But this mechanically faithful DSKY replica really knocks it out of the park in terms of attention to detail.

The product of [M. daSilva], this DSKY replica takes a somewhat different path than many of the others we’ve seen. By working from as many original documents as possible, he was able to reproduce the physical size and shape of the DSKY very accurately — no mean feat when working from copies of copies of the original paper prints. Still, the details that are captured, like the gussets and reinforcements that were added to strengthen the original die-cast parts, really make this DSKY look the part. It’s functional, too, thanks to a Raspberry Pi running VirtualAGC, with a Nextion 4.3″ LCD display standing in for the original electroluminescent display. We were surprised to learn the DSKY had a port for nitrogen purging the case; check out the video tour below for that and other tidbits.

Of course, just because [M. daSilva] chose to concentrate on dimensional accuracy for this go-around doesn’t preclude more faithful electronics in the future. Perhaps he can team up with [Ben Krasnow] or [Fran Blanche] and really make this a showpiece.

Continue reading “Apollo DSKY Replica Looks The Part”

Building A USB-C Charger For Canon NB-4L Batteries

One of the most appealing aspects of USB-C is that it promises to be a unified power delivery system. You’ll no longer need to have a separate power cords for for your phone, camera, and laptop; physically they’ll all use USB-C connectors, and the circuitry in the charger will know how much juice to send down the line for each gadget. But in reality, we’ve all got at least a few pieces of older equipment that we’re not about to toss in the trash just because it doesn’t support the latest USB spec.

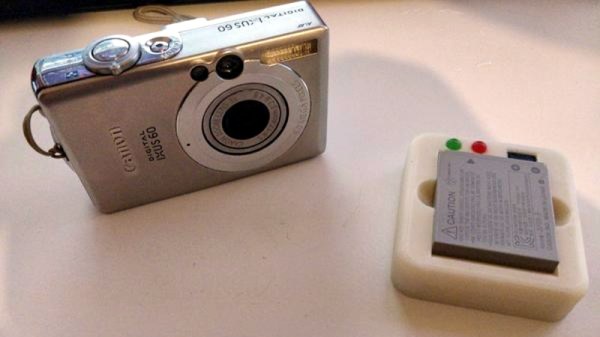
Note the relocated status LEDs.

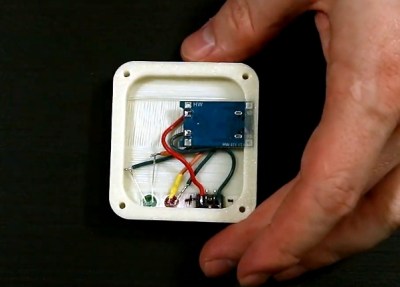
Case in point, the old Canon camera that [Purkkaviritys] modified to take infrared pictures. Instead of abandoning it, he decided to make a custom USB-C charger for its NB-4L batteries. Since they’re just single cell 3.7 V lithium-ions, all he had to do was wire them up to the ubiquitous TP4056 charger module and design a 3D printed case to hold everything together.

He did go the extra mile and replace the SMD charging indicator LEDs on the PCB with 5 mm LEDs embedded into the 3D printed enclosure, though you could certainly skip this step if you were in a hurry. We imagine if you print the enclosure in a light enough color, you should be able to see the original LEDs glowing through the plastic.

This project is yet another example of how incredibly useful the TP4056 module really is. If there’s even a chance you might want to build a rechargeable gadget in the near future, you should have a few of these cheap boards ready to go in the parts bin.

DIY Ergonomic Game Pad Lends A Hand

Does it seem like everyone you game against can do everything faster than you? Chances are good that they have some kind of dedicated game pad or macro pad with a bunch of custom shortcuts. If you can’t beat ’em, join ’em, but why buy one when you can build your own? [lordofthedum] did the smart thing when they built their own version of the Azeron game pad, which is an outrageously expensive but ergonomic and cool-looking macro pad that reminds us of the DataHand ergonomic keyboard.

Each finger hovers over a C-shaped group of three switches — one actuates by moving the finger forward, another by moving backward, and the third by pushing down like a regular button. The thumb gets a 4-way joystick. All of these inputs are wired up to an Arduino Pro Micro, which has sort of become the standard for DIY macro pads and keyboards. We think this looks fantastic, and really raises the bar for DIY macro pads.

Need a few more keys, but still want a thumb joystick? Check out the smooth and sweet Sherbet game pad.

Reforming 3D Prints With Salt And Heat

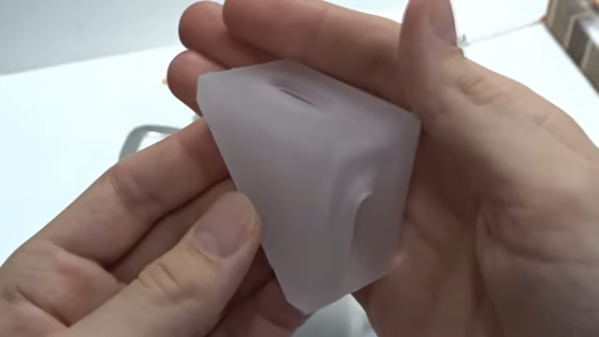
The biggest problem with fused deposition 3D prints is that while the layers should stick together, they aren’t the same as a solid piece of plastic you would get from, say, injection molding. You can anneal plastic using moderate heat, but it is likely to cause the part to deform or change size. [Free Spirit 1] has a solution for this. Using a powdered salt, the part is packed on the inside and out and put in an oven. The results in the video below look really impressive.

In addition to making the part look solid and — we assume — adding strength, the resulting prints are also water- and gas-tight which was the purpose of the effort. That alone would make the technique worthwhile.

The only thing we noticed is that the part has to have access to hold the salt. Anything not supported would be subject to deformation. However, the ground-up salt is so fine that it should be relatively easy to fill in most parts and, of course, print with 100% infill to avoid hollow internal areas.

[Free spirit 1] used a coffee grinder to get the salt powder, but apparently you can buy “flour salt.” We wondered if other powders might work well, too. Apparently, sand didn’t work out, perhaps because the salt dissolves out in water, so whatever you use, it should probably dissolve in something that won’t attack your plastic.

Annealing isn’t a new idea, and we’d love to see some objective tests on this new method.

Continue reading “Reforming 3D Prints With Salt And Heat”

In-vest-ing In Menopause

Most of us reach for an over-the-counter medicine if we have occasional pain, but menopause doesn’t act like that. Hot flashes don’t build like a headache, dizzy spells don’t wait for a good time, and panic attacks don’t announce themselves. Predicting and addressing sudden hormone shifts is the intent behind Menesto, a vest with sensors, cooling apparatus, and a companion app.

A thermometer and humidity detector monitor the skin for spikes in temperature and moisture to recognize when the wearer is having a hot flash. When an event is registered, a fan blows over a Peltier panel’s cool side and hopefully provides enough chilled air inside the vest. A Peltier panel is a thermoelectric heat engine that moves energy away from one ceramic plate to another, so one half gets cool while the other heats up. Power comes from rechargeable 18650 batteries and all the hardware talks to an ESP8266 on a NodeMCU running Arduino.

Continue reading “In-vest-ing In Menopause”

Community Testing Suggests Bias In Twitter’s Cropping Algorithm

With social media and online services are now huge parts of daily life to the point that our entire world is being shaped by algorithms. Arcane in their workings, they are responsible for the content we see and the adverts we’re shown. Just as importantly, they decide what is hidden from view as well.

Important: Much of this post discusses the performance of a live website algorithm. Some of the links in this post may not perform as reported if viewed at a later date. 

The initial Zoom problem that brought Twitter’s issues to light.

Recently, [Colin Madland] posted some screenshots of a Zoom meeting to Twitter, pointing out how Zoom’s background detection algorithm had improperly erased the head of a colleague with darker skin. In doing so, [Colin] noticed a strange effect — although the screenshot he submitted shows both of their faces, Twitter would always crop the image to show just his light-skinned face, no matter the image orientation. The Twitter community raced to explore the problem, and the fallout was swift.

Continue reading “Community Testing Suggests Bias In Twitter’s Cropping Algorithm”

How To Create Hermetically Sealed Electrical Connections

[Eric Strebel] is no stranger to pressure and vaccum tanks, regularly using them for all manner of resin casting jobs for his product design business. However, sometimes it becomes necessary to run equipment within a pressure tank, such as for rotomoulding or other similar jobs. In order to get power into a tank under pressure, [Eric] built a special plug with a hermetic seal to do the job. (Video, embedded below.)

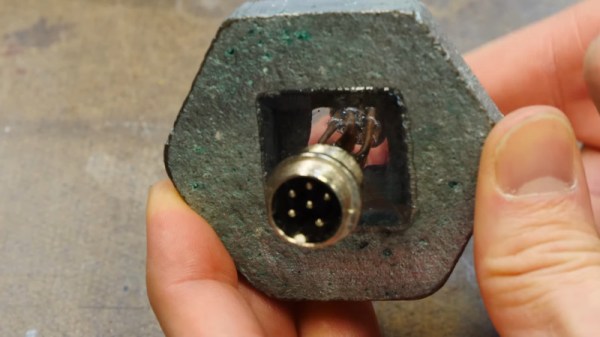
The build starts with a large metal plug which screws into the pressure vessel, into which a square recess is machined. For the electrical passthrough, [Eric] selected GX-16 aviation connectors, in this case packing six conductors. The connectors are hooked up back-to-back through the hole in the metal tank plug, using bare copper wire. This is to avoid insulation on wires acting as a channel for gases to pass through. With the connectors wired up and an acrylic disc in place to stop overflow, the metal plug is filled with resin to create the hermetic seal.

Results are good, with the connectors functioning electrically and the resin acting as a perfect seal. There’s a small risk of short circuit with the exposed copper conductors, but [Eric] is exploring some easy solutions to avoid issues. We’ve seen his work before, too – like this great discussion on cardboard as a design tool. Video after the break.

Continue reading “How To Create Hermetically Sealed Electrical Connections”