Environmental Sound Detectors 

We all know that sound. That sound of a noisy yapping dog, or the sound of a disruptive garbage truck loudly picking up the trash while making a ruckus along the way. It can be extremely distracting and frustrating to deal with. And more often than not, we have little control over the noise pollution in the area. Unless of course, you build a monitoring solution to raise awareness of the situation, like this one that [Edmund] made.

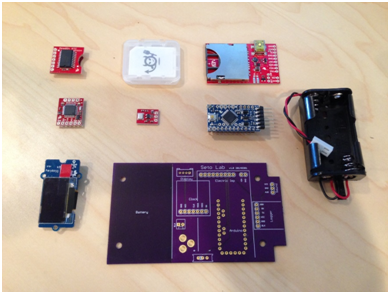
It was designed in conjunction with the Earth Journalism Network (EJN) in order to, as their website states, “facilitate story-telling of the sources and health impacts of noise from around the world“. An Arduino Pro Mini was the backbone of the project. Being open-source in nature meant that it could be customized easily with a wide array of sensors. [Edmund] chose to use an Electric Imp adding WiFi capability to the device. His step-by-step tutorial showed the design process, leading into the prototyping of the parts, and contains schematics for the circuit. As of the time that this article was published, the coding section of project hasn’t been released yet, but the first three parts give enough information to get the ball rolling.

This type of monitoring solution has the potential to record the noise levels of neighborhoods all across the world. With a large enough pool of data, API’s can be developed for uses like house hunting web searches that show which areas in town are the quietest, or which ones are the loudest. This will surely provide a wealth of knowledge about noise pollution, and it will be interesting to see how people utilize this (and projects similar) in the future.

Homemade Activity Monitor

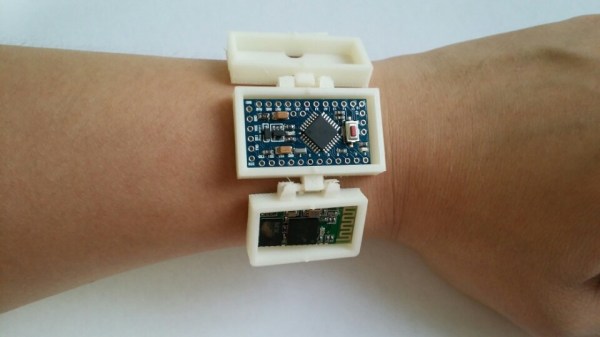
A group of developers have uploaded a tutorial on Instructables showing the steps needed to develop a homemade DIY fitness tracker. The design is the second iteration of an Arduino-based wearable smart watch project of theirs. This time around, they opted to focus more on the monitoring system rather than a visual display. It is called the ‘RetroBand’ and records steps taken and calories burned by the user.

The microcontroller used is an Arduino Pro mini 3.3v. Accelerometer and gyro sensors were integrated to capture the movement of the ‘RetroBand.’ A wireless bluetooth module connects to an Android phone which presents the data through a Play Store app complete with graphs included. An enclosure was 3D printed. Everything is powered by a one cell Lithum-Polymer battery. The code for the project can be found on Github, and additional information with a how-to manual is on their website (which is in Korean, but can easily be translated through the browser).

Rolly Bot Puts A New Spin On Independent Wheel Control

rolly bot

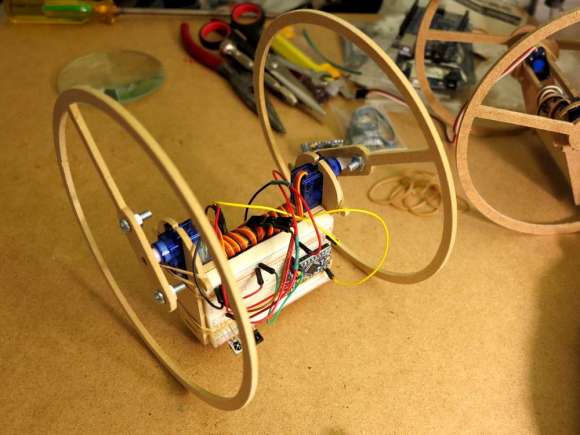
All of [Darcy]’s friends were making wheeled robots, so naturally, he had to make one too. His friends complicated theirs with h-bridges and casters for independent wheel maneuvering, but [Darcy] wanted something simpler. A couple of 9g servos later, the Rolly Bot was born.

Rolly Bot is self-balancing because of its low center of gravity. Should it hit a wall, the body will flip over, driving it back in the other direction. The BOM comes to a whopping $10, and that includes continuous rotation servos. It does not include the remote control capability he added later, or the cost of the CNC you would need to completely replicate this build. He even made a stand so he could test the wheels during programming.

[Darcy]’s code is on his site along with some pictures of another version someone else built. Watch Rolly Bot roll around after the jump.

How would you make this build even simpler? Tell us in the comments.

Continue reading “Rolly Bot Puts A New Spin On Independent Wheel Control”

POV Display Does It On The Cheap

lowBudgetPOV

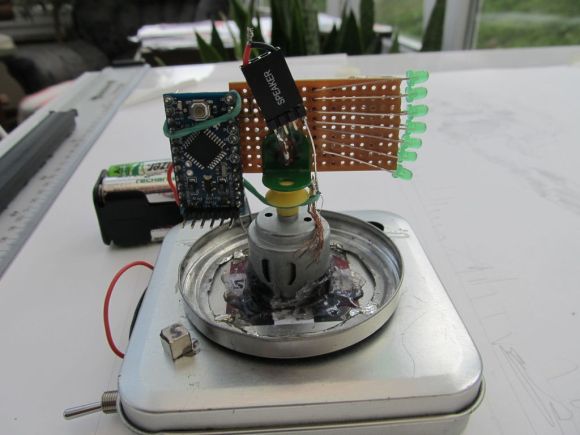
[Sholto] hacked together this ultra low-budget spinning display. He calls it a zoetrope, but we think it’s actually an LED based Persistence Of Vision (POV) affair. We’ve seen plenty of POV devices in the past, but this one proves that a hack doesn’t have to be expensive or pretty to work!

The major parts of the POV display were things that [Sholto] had lying around. A couple of candy tins, a simple brushed hobby motor, an Arduino Pro Mini, 7 green LEDs, and an old hall effect sensor were all that were required. Fancy displays might use commercial slip rings to transfer power, but [Sholto] made it work on the cheap!

The two tins provide a base for the display and the negative supply for the Arduino. The tins are soldered together and insulated from the motor, which is hot glued into the lower tin. A paper clip contacts the inside of the lid, making the entire assembly a slip ring for the negative side of the Arduino’s power supply. Some copper braid rubbing on the motor’s metal case forms the positive side.

[Sholto] chose his resistors to slightly overdrive his green LEDs. This makes the display appear brighter in POV use. During normal operation, the LEDs won’t be driven long enough to cause damage. If the software locks up with LEDs on though, all bets are off!

[Sholto] includes software for a pretty darn cool looking “saw wave” demo, and a simple numeric display. With a bit more work this could make a pretty cool POV clock, at least for as long as the motor brushes hold up!

Continue reading “POV Display Does It On The Cheap”

Visualize Vroom With This RGB LED Tachometer

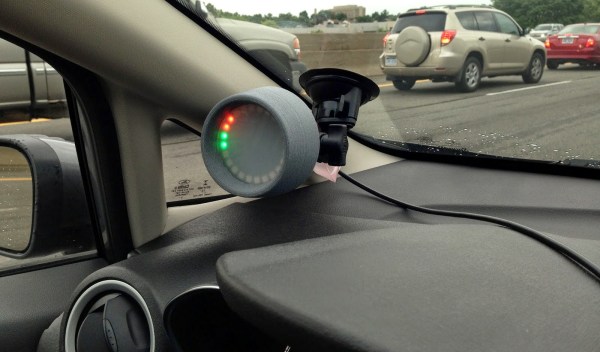
[Pete Mills] recently bought the all-new Ford Fiesta, which offers impressive fuel economy over that of his Jeep. He soon figured out that he has real time access to a wealth of engine and chassis data through Ford’s OpenXC platform and used it to build blueShift, a neopixel tachometer. The car already has a tach, but this one is more visual, can be seen in periphery, and is just plain fun.

In case you hadn’t heard, the OpenXC platform is Ford’s consumer key to the kingdom of OBD2 treasures. It unlocks the magic through its Vehicle Interface, which plugs into the OBD2 port and translates the CAN bus messages to OpenXC format. These messages are packaged into JSON format and can be sent over Bluetooth or Ethernet/Wi-Fi to an Android, Python, or iOS device.

[Pete] went with Bluetooth and used a BlueSMiRF with an Arduino Pro Mini. He derives power from the car’s on-board USB port, but has future plans to use the OpenXC VI port. blueShift reads the RPM data and displays a green trail as the engine revs up. At the peak revolution, it shows a red LED. This one is sticky and will persist for the lesser of three seconds or the time elapsed to a new positive RPM. [Pete] is also reading the headlight status of the car. As soon as they come on, the RGB LEDs dim to avoid blinding him at night.

[Pete] wanted to make an enclosure more finished-looking than a Tupperware box. He nearly detoured into 3D-printer design, but ended up putting together a Prusa i3v and came up with this RAM mount-compatible enclosure. His fantastic write-up and code are on his blog, but you can make the jump to see a short demo and a full explanation video. You can also make smart brake lights or even create art with OpenXC.

Continue reading “Visualize Vroom With This RGB LED Tachometer”

Throwback Handheld Built With Modern Hobby Hardware

magpi-gaming-handheld

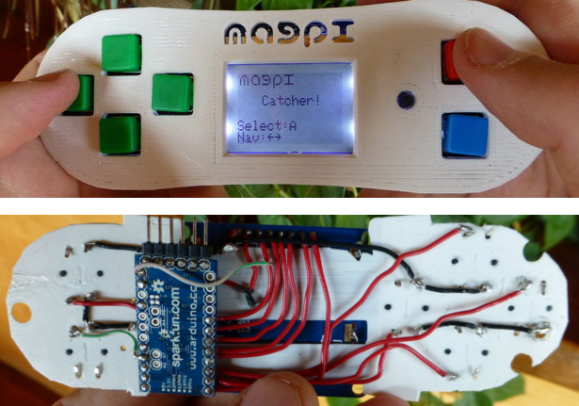
Remember all of those fantastically horrible handheld LCD games that hit the toy stores back in the ’90s. You know, the ones that had custom LCD screens to make for some fake animation. Here’s an example of what those should have been. It’s an LCD-based handheld with some soul.

The entire thing is roughly the size of a television remote, with a 3D printed case making it very presentable. But looking at the wiring which hides inside proves this is one-of-a-kind. The Arduino Pro Mini is probably the biggest difference in technology from back in the day compared to now. It has plenty of space for all of the different settings and games shown off in the clip below. The user interface itself is definitely a throw-back though. The Nokia 3310 screen boasts a whopping 84×48 pixel monochrome area. There are four buttons serving as a d-pad, and two as action buttons. Perhaps the greatest feature (besides the printed case we already mentioned) is the ability to recharge the internal battery via USB.

[Zippy314] built this with his son. What’s more fun: learning to program the games, or mastering them and discovering the bugs you missed along the way?


Continue reading “Throwback Handheld Built With Modern Hobby Hardware”

Make Your Own Smart Watch

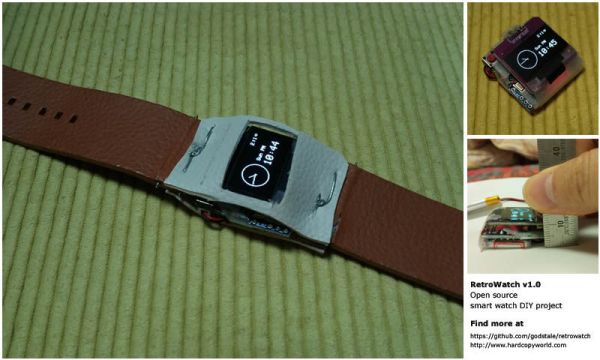
Wearables are all the rage lately. Have you been eyeing the Pebble or one of the new smart watches lately but are not sure if it’s for you? With [GodsTale’s] “Retro Watch” you can now build your own, allowing you to try out a smart watch without making a huge investment.

This smart watch uses very common and easy to obtain parts: Arduino Pro Mini, HC-06 Bluetooth module, Adafruit’s 0.96’’ OLED display, and a lithium battery. It is amazing how few parts can be used to make such a functional project. While the example packaging shown is a bit rugged around the edges, it gets the job done. Having such simple hardware allows [GodsTale] to focus on the software. One of the coolest aspects of this project is the Android app [GodsTale] provides. The app provides basic functionality, such as viewing RSS feeds and Android notifications. Check out the GitHub and a more detailed write-up for more information.

It would be great to see this project evolve in the future, it has so much potential. We would love to see a custom circuit board, or a model for a 3D printed case for this awesome smart watch. See a video of the Retro Watch in action after the break. If you thought this was cool, check out a few of these recent hacks.

Continue reading “Make Your Own Smart Watch”